
Introduction: Why Install an Attic Fan?
If you’re looking for an impactful, cost-effective way to boost your home’s energy efficiency and comfort, attic fan installation is a project worth considering. Attic fans serve a crucial role in maintaining proper ventilation, reducing heat buildup, and ultimately lowering cooling costs during the warmer months. By drawing hot air out of your attic, these fans help your HVAC system run more efficiently and extend the life of your roofing materials by preventing excessive heat and moisture accumulation. Many homeowners are surprised at how much of a difference an attic fan can make—not only in temperature regulation but also in overall energy savings.
While hiring a professional is always an option, a properly planned and executed DIY attic fan installation is accessible to most competent DIYers. However, it isn’t a casual weekend project; it involves working with electrical systems, navigating attic spaces, and ensuring proper ventilation. Safety, compliance, and careful planning are paramount. This comprehensive guide will walk you through the entire process—from selecting the right attic fan and budgeting, to safe installation, wiring, and post-installation best practices. Whether your goal is to reduce energy bills, protect your home’s structure, or simply make your living space more comfortable, this guide will equip you with the knowledge and confidence to get the job done right.
Understanding Attic Fans: Types, Benefits, and Limitations
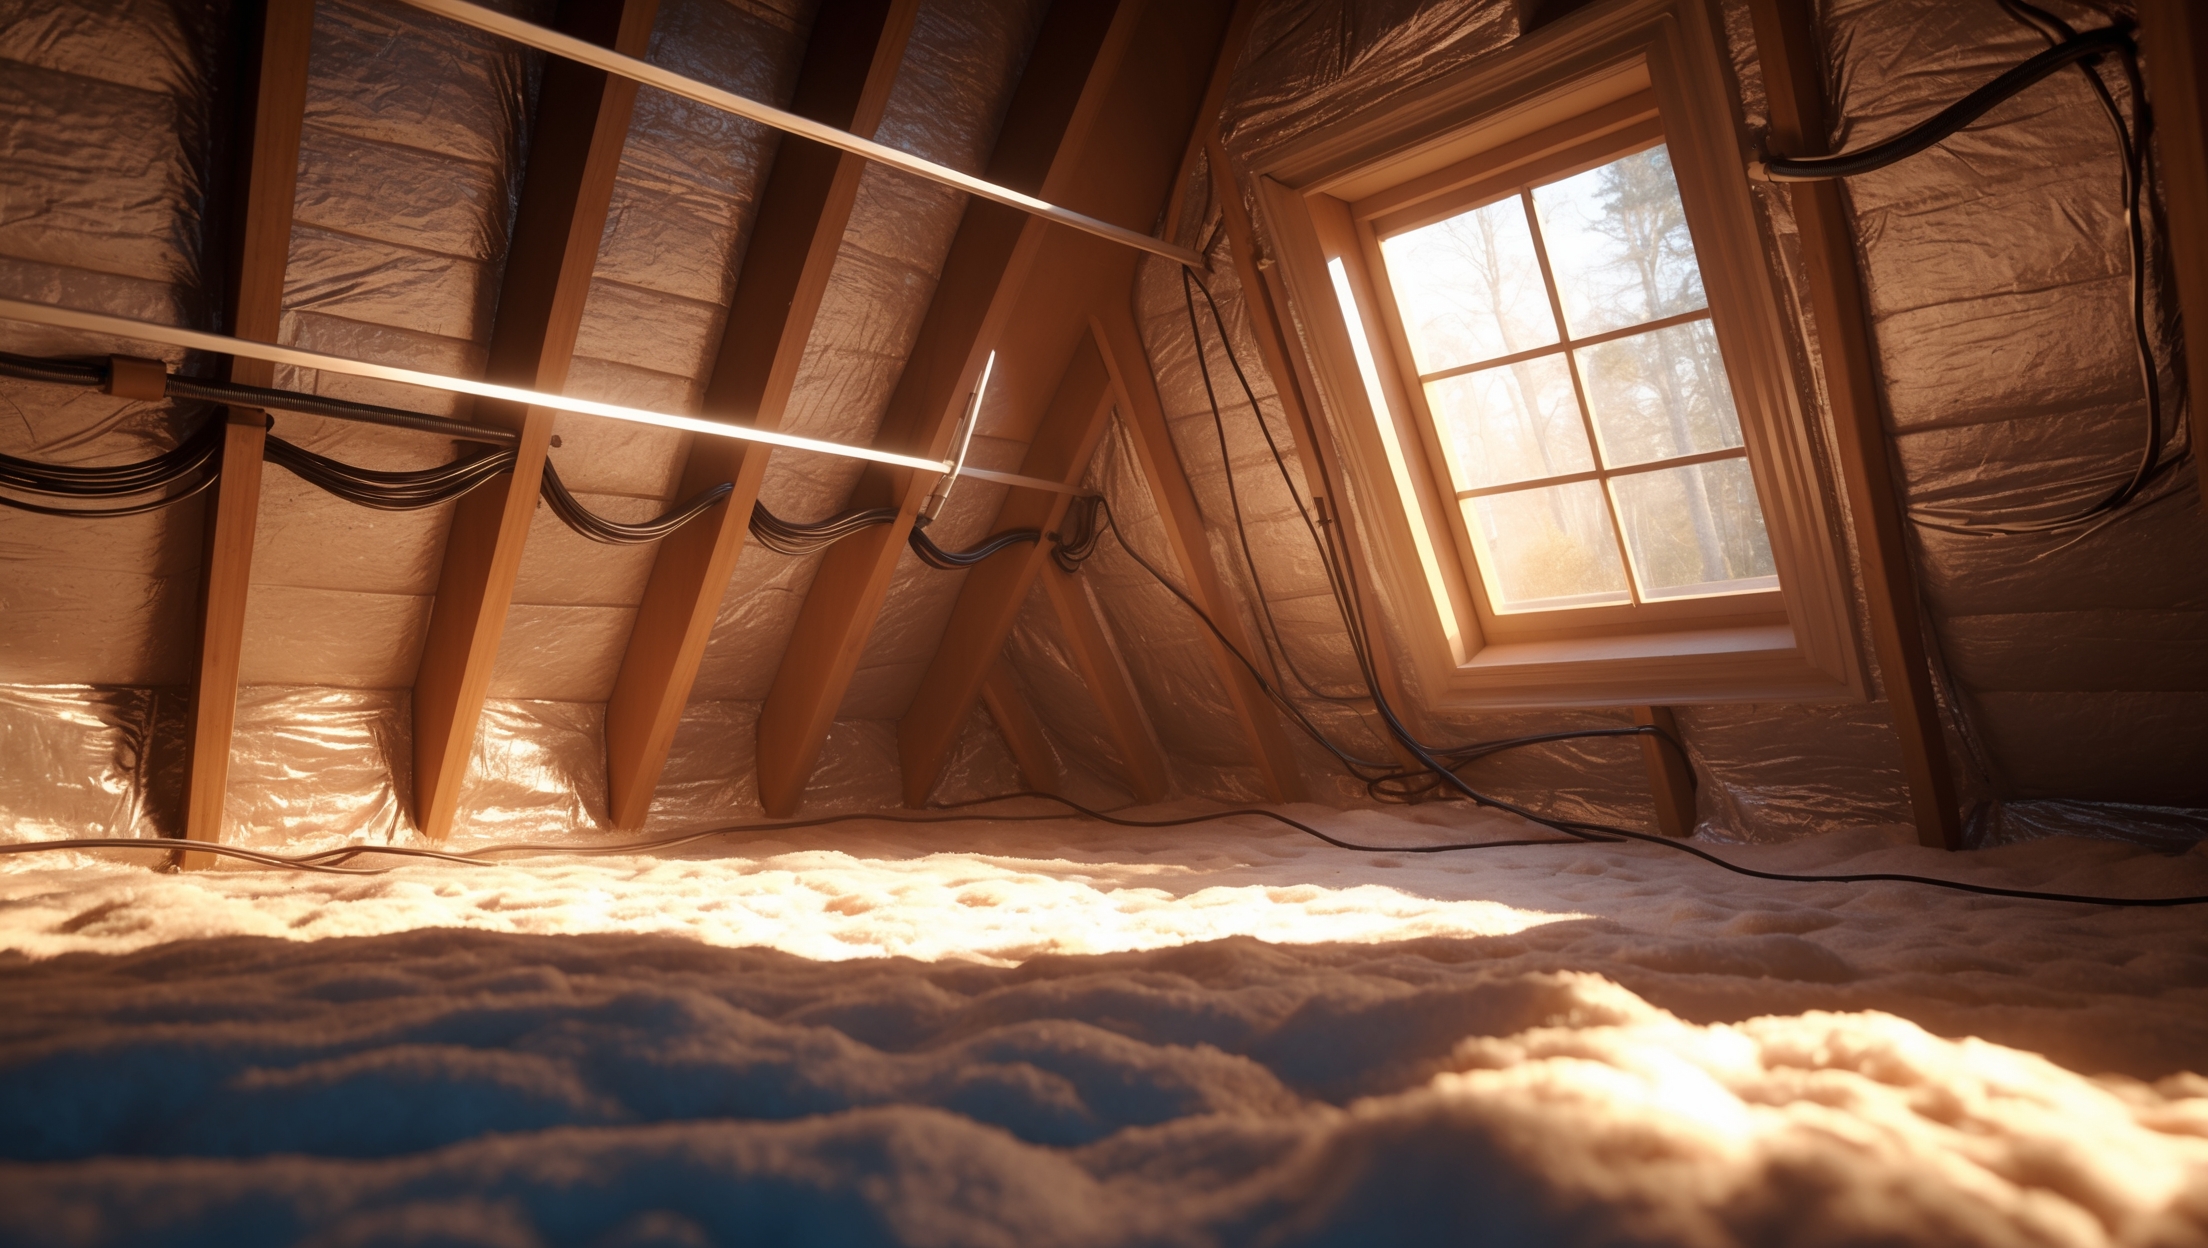
Types of Attic Fans
- Gable-Mounted Fans: Installed in the gable end of the attic. Ideal for homes with existing gable vents.
- Roof-Mounted Fans: Mounted directly on the roof. Great for homes with no gable vents or limited attic access.
- Solar-Powered Fans: Use solar panels to operate, reducing energy costs further and eliminating the need for electrical wiring.
- Whole-House Fans: Installed in the ceiling of a central hallway, these cool the entire home by drawing cooler outside air through living spaces and exhausting attic air.
Key Benefits
- Energy Efficiency: Reduces attic heat, lowering the burden on your HVAC system and reducing cooling costs by 10–30% in some climates.
- Improved Comfort: Keeps upper floors cooler, especially in multi-story homes.
- Roof Longevity: Minimizes moisture buildup and heat damage, preventing premature aging of shingles and roofing structures.
- Moisture Control: Helps prevent mold, mildew, and wood rot caused by trapped humidity.
Limitations and Considerations
- Attic fans require adequate intake ventilation (soffit or eave vents) to function effectively.
- Improper installation can lead to air leaks, back-drafting, or reduced HVAC efficiency.
- In cold climates, attic fans may not be necessary and could increase heating costs if not properly controlled.
Budgeting and Cost Breakdown
Major Cost Components
- Fan Unit: $80–$350 depending on size, power, and features (solar-powered models cost more).
- Wiring and Electrical Supplies: $30–$75 for wire, electrical boxes, connectors, and thermostat/humidistat controls.
- Ventilation Accessories: $20–$80 for additional soffit or gable vents if needed.
- Tools and Safety Gear: $50–$150 if you need to purchase items like a voltage tester, drill, hole saw, or safety harness.
- Miscellaneous Supplies: $15–$40 for caulk, weatherproofing, and mounting hardware.
Potential Hidden Costs
- Repairing or upgrading attic insulation or venting discovered during installation.
- Roof repairs if shingles or decking are damaged during roof-mounted fan installation.
- Permit fees if required by your local building department (typically $30–$100).
Sample DIY Budget
- Mid-range gable fan kit: $120
- Thermostat/humidistat control: $35
- Electrical wiring & supplies: $50
- Safety equipment rental: $40
- Miscellaneous: $30
- Total: $275
Compliance, Permits, and Safety Essentials
Do You Need a Permit?
Check with your local building department before starting. In many areas, installing a new electrical device or modifying attic ventilation requires a permit. This ensures your work is inspected for safety and code compliance. Failing to obtain a permit can lead to problems during home sales or insurance claims.
Electrical Code Considerations
- Use properly rated wire (generally 14 AWG for 15-amp circuits, 12 AWG for 20-amp).
- Install a dedicated circuit if required by code or if your attic fan draws significant amperage.
- All wire connections must be made in accessible, code-approved junction boxes.
- Install a disconnect switch or ensure the fan can be shut off from the main panel.
- Ground all metal fan housings and use weatherproof boxes for roof installations.
Safety Checklist
- Turn off power at the breaker before working on any electrical connections.
- Use a non-contact voltage tester to confirm circuits are de-energized.
- Wear dust mask, gloves, and safety goggles—attics are dusty and may contain insulation fibers or pests.
- Use sturdy planks or crawl boards to avoid stepping through the ceiling.
- Never work in the attic during extreme heat. Early morning is best.
- If working on the roof, use a properly anchored safety harness.
Choosing the Right Attic Fan
Key Sizing Factors
Select a fan with enough capacity to ventilate your attic volume. Most manufacturers recommend 1 CFM (cubic feet per minute) of airflow per square foot of attic floor space, plus an additional 20% if your roof is dark or the attic is heavily insulated.
- Calculate attic area (length x width in feet).
- Add 20% for dark roofs or heavy insulation.
- Example: 900 sq ft attic x 1.2 (20% boost) = 1,080 CFM fan needed.
Feature Considerations
- Thermostat/Humidistat Control: Automates fan operation based on attic temperature and/or humidity.
- Noise Level: Look for fans with sound ratings below 50 dB for quiet operation.
- Energy Efficiency: Choose ENERGY STAR® models where possible.
- Durability: Powder-coated steel or UV-resistant plastics last longer in attic environments.
Tools and Equipment Checklist
- Drill/driver with bits
- Hole saw or reciprocating saw (for vent opening)
- Wire stripper/cutter
- Non-contact voltage tester
- Screwdrivers (flathead and Phillips)
- Staple gun for securing wires
- Caulk gun and weatherproof caulk
- Measuring tape and pencil
- Ladder (for attic and/or roof access)
- Personal protective equipment: gloves, dust mask, goggles, hard hat
- Work lights or headlamp
Step-by-Step Installation Guide
1. Planning and Layout
- Locate existing vents and electrical wiring before choosing a fan location.
- Mark the fan mounting spot, ideally near the center of the gable or roof, away from obstacles and insulation.
- Check for adequate intake ventilation at soffits or eaves; add more if necessary.
2. Preparing the Opening
- Trace the fan housing on the wall or roof decking.
- Drill a starter hole, then use a reciprocating saw or hole saw to cut the opening.
- Test-fit the fan to ensure a snug fit.
- For roof-mounted fans, carefully remove shingles as needed and preserve them for replacement.
3. Mounting the Fan
- Install any included mounting brackets or flashing according to manufacturer instructions.
- Secure the fan housing with corrosion-resistant screws.
- Seal all edges with weatherproof caulk to prevent leaks and air infiltration.
- Replace shingles or siding as needed for a weather-tight finish.
4. Wiring and Controls
- Run electrical cable from a nearby junction box or outlet circuit, following local code for wire type and protection.
- Install a thermostat or humidistat control in the attic, away from direct sunlight and insulation.
- Connect wires inside a junction box: black (hot), white (neutral), green/bare (ground). Use wire nuts and secure all connections.
- Secure all wiring with staples or cable clamps at least every 4.5 feet.
- If required, install a dedicated circuit breaker in your main panel.
5. Testing and Adjustments
- Turn power back on at the breaker.
- Set the thermostat to a low temperature (e.g., 80°F) and confirm the fan activates.
- Check for smooth, quiet operation and adequate airflow at attic vents.
- Inspect for air leaks or unsealed gaps around the fan housing.
- Adjust thermostat/humidistat settings for optimal performance.
Maintenance Best Practices
- Seasonal Inspection: Check fan operation, clean dust/debris from blades and housing every spring and fall.
- Lubrication: If required by the manufacturer, oil bearings annually.
- Wiring Check: Inspect all visible wiring for signs of wear, rodent damage, or loose connections.
- Weatherproofing: Ensure caulk and flashing remain intact after heavy storms or winter freezes.
- Thermostat Calibration: Test and recalibrate controls for accurate activation temperatures.
Common Mistakes to Avoid
- Undersizing the fan or neglecting intake vents, reducing effectiveness.
- Failing to seal around the fan, leading to air leaks and moisture issues.
- Improper electrical connections or skipping the thermostat control—this can lead to constant fan operation or safety hazards.
- Ignoring safety gear or entering the attic during extreme heat.
- Not obtaining permits, risking code violations and insurance issues.
Troubleshooting: Post-Installation Issues
- Fan Won’t Start: Check breaker, verify thermostat setting, inspect wiring for loose connections.
- Excessive Noise: Ensure fan is securely mounted, check for debris, and confirm blades are balanced.
- Poor Airflow: Inspect intake vents for blockages and verify fan CFM matches attic size.
- Moisture or Mold: Confirm attic is air-sealed from the living space and that ventilation is working as designed.
Conclusion: Maximizing the Value of Your DIY Attic Fan Installation
Installing an attic fan is one of the most rewarding DIY electrical projects for homeowners seeking practical energy savings, improved home comfort, and long-term protection for their property. By following the detailed, step-by-step process outlined in this guide, you can confidently upgrade your attic’s ventilation while minimizing risks and avoiding costly mistakes. The direct benefits—lower cooling bills, reduced attic heat, and longer roof lifespan—are immediate and tangible. But the value extends even further: a well-ventilated attic helps prevent hidden moisture damage, mold, and air quality issues that could otherwise go unnoticed for years.
Remember, safety and code compliance are non-negotiable. Always double-check your local permitting requirements, follow electrical codes rigorously, and use the proper safety gear for attic or roof work. If you encounter uncertainty about wiring or ventilation calculations, don’t hesitate to consult an electrician or building inspector. The upfront investment in time and materials pays for itself through enhanced energy efficiency and home durability.
Whether you’re an experienced DIYer or tackling your first major electrical project, the right preparation, tools, and attention to detail will ensure your attic fan installation runs smoothly. Maintain your new system with regular inspections, and you’ll enjoy reliable, trouble-free operation for years to come. Your home, your wallet, and your roof will thank you for it.
I see there are several types of attic fans, like roof-mounted and gable-mounted. If my attic doesn’t have existing vents and access is tricky, is it usually more cost-effective to install a roof-mounted fan, or should I consider adding gable vents for a fan instead?
If your attic lacks existing vents and has tricky access, a roof-mounted fan is often more cost-effective. It can be installed directly through the roof without needing extra structural changes, whereas adding gable vents may require more extensive framing and siding work. Still, make sure your roof structure supports installation and consider hiring a professional if access is particularly challenging.
I’m curious about the potential energy savings you mentioned for a small business building compared to a typical home. Are there any different considerations or code requirements for attic fan installation in commercial properties versus residential?
For small business buildings, energy savings from attic fans can be significant, especially if the building has a large roof area or poor ventilation. Commercial properties may be subject to stricter building codes, including fire safety, electrical standards, and sometimes specific requirements for fan types or installation methods. It’s important to consult local codes and possibly work with a licensed contractor to ensure compliance when installing attic fans in commercial settings.
I noticed the guide says installation involves working with electrical systems and ensuring compliance. Are there particular permits or electrical codes I need to check in the US before starting a DIY attic fan project, or does that vary widely depending on my local area?
Permit and code requirements for attic fan installation can vary quite a bit depending on your city or state. Many areas require an electrical permit for DIY electrical work, and you’ll typically need to follow the National Electrical Code (NEC) as well as any local amendments. It’s a good idea to check with your local building department or permitting office before you start to find out the exact requirements for your location.
You mention energy savings and budgets, but I’m curious about the overall cost breakdown for a DIY attic fan project—what should I budget for tools and safety equipment on top of the fan itself, especially if I’ve never worked in an attic before?
For a DIY attic fan installation, besides the cost of the fan (usually $100–$300), you’ll want to budget roughly $50–$100 for tools if you don’t already own essentials like a drill, screwdriver, utility knife, measuring tape, and a ladder. For safety gear, plan on another $30–$60 for gloves, dust mask, safety glasses, and possibly a headlamp. If your attic lacks good lighting or flooring, consider temporary work lights or attic planks, which may add $20–$50. Factoring all this in, a realistic total budget is about $200–$500.
The article highlights energy savings as a key benefit. Do you have any estimates or examples of how much a typical homeowner in the US might actually save on cooling costs each year after installing an attic fan?
A typical homeowner in the US can expect to save around 10% to 30% on their cooling costs each year by installing an attic fan. For example, if your annual cooling bill is $600, you might save between $60 and $180 per year. Actual savings will vary depending on your climate, attic insulation, and how often you use air conditioning.
Does the article go into detail about budgeting for this project, especially for DIYers? I’m curious about the typical costs for each type of attic fan, including any unexpected expenses that might come up during installation.
The article does provide a general overview of attic fan costs, mentioning price ranges for both electric and solar models, as well as some common DIY expenses like wiring and mounting materials. However, it doesn’t include a detailed breakdown or itemized budget. Unexpected expenses such as extra wiring, vent repairs, or specialized tools are briefly noted, but not explored in depth. For a more precise budget, you may want to research current prices for specific fan models and factor in possible upgrades or repairs you might encounter during your installation.
You mentioned solar-powered attic fans as an option. Have you noticed a significant difference in upfront costs versus long-term savings compared to traditional wired fans? I’d like to get a sense of which route makes more sense on a tighter budget.
Solar-powered attic fans usually have a higher upfront cost than traditional wired fans, sometimes by a few hundred dollars, mainly due to the solar panel. However, they don’t add to your electricity bill, so over several years, the energy savings can offset that initial investment. If your main concern is budget right now, a wired fan is less expensive to install. But if you plan to stay in your home for a while, solar might save you more in the long run.
Is there a recommended square footage or CFM calculation to follow when deciding which size attic fan to buy for your home? I see that fan type and home layout matter, but are there rules of thumb to help avoid under or over-ventilating?
Yes, there’s a general rule of thumb for attic fan sizing. Most experts recommend about 1 CFM (cubic foot per minute) of fan capacity for every square foot of attic space. So, if your attic is 1,200 square feet, look for a fan rated at least 1,200 CFM. If your roof is dark or your climate is hotter, consider adding 15-20% more CFM. Proper intake venting is also important to match the fan’s airflow.
The article mentions that attic fans help lower cooling costs and make HVAC systems more efficient. How quickly can homeowners typically see a reduction in their energy bills after installing an attic fan, and are the savings significant in all climates?
Homeowners often notice a reduction in cooling costs within the first month of using their attic fan, especially during warmer seasons. However, the savings vary by climate. In hot or humid areas, the impact is more noticeable and can be significant. In cooler climates, the savings might be modest, since the attic fan won’t run as often. Overall, results depend on your attic’s insulation, ventilation, and your local weather.
Regarding attic fan installation, can you clarify what specific electrical safety precautions a DIYer should take, especially when working in tight attic spaces? I’m comfortable with basic wiring, but I’m concerned about code compliance and avoiding any fire hazards.
When installing an attic fan, always turn off power at the breaker before starting any wiring. Use a voltage tester to confirm wires are de-energized. In tight spaces, be extra careful to avoid contact with exposed wiring or insulation. Use wire nuts and approved electrical boxes for all connections, and secure all wiring away from fan blades and moving parts. To stay code-compliant, follow your local electrical codes regarding wire gauge, circuit amperage, and grounding. If in doubt, consider having your work inspected or consult a licensed electrician.
Could you provide more details on how to estimate the budget for a DIY attic fan installation, especially if we’re deciding between a standard electric model and a solar-powered one? Are there any hidden costs I should plan for?
To estimate your budget, start by comparing the costs of the fan units: standard electric models are usually less expensive upfront, while solar-powered ones cost more but save on energy bills. Remember to include wiring, mounting hardware, and possible ventilation upgrades. Hidden costs can include hiring an electrician if you’re not comfortable with electrical work, roof repairs from installation, and permit fees in some areas. Factoring in these can help you avoid surprises.
I noticed you mention that solar-powered attic fans cut energy costs and simplify wiring, but are there any hidden downsides like reduced airflow or higher upfront costs that small business owners should watch out for?
Solar-powered attic fans do tend to have higher upfront costs compared to traditional models, which can impact small business budgets. Additionally, their airflow can be lower, especially on cloudy days or if the solar panel isn’t optimally placed. It’s important to weigh the long-term savings against these factors and consider your building’s ventilation needs before deciding.
I see you mention that DIY attic fan installation involves electrical work and safety concerns. How long does the project usually take for someone with basic DIY skills, and are there common mistakes to watch out for?
For someone with basic DIY skills, installing an attic fan usually takes around 4 to 6 hours, depending on attic access and your familiarity with tools. Common mistakes include underestimating electrical safety (always turn off the power), improper vent sealing (which can cause leaks), and not following the manufacturer’s wiring instructions. Double-check your measurements and connections, and consider asking a licensed electrician for help if you’re unsure about any electrical steps.
For someone considering a solar-powered attic fan, how much sun exposure is really needed for it to work efficiently, especially in northern states? Would partial shade during the day noticeably reduce its effectiveness compared to an electrically wired attic fan?
A solar-powered attic fan needs several hours of direct sunlight each day to work efficiently—ideally, the panel should face south and remain unshaded during peak daylight. In northern states, or if your roof gets partial shade much of the day, the fan’s performance will drop, especially on cloudy days. Compared to an electrically wired fan, solar models are more sensitive to reduced sun exposure, so consistent efficiency depends on maximizing sunlight.
You mention working with electrical systems during the installation. For someone who’s not super familiar with home wiring, are there specific safety steps or codes I should be especially aware of before getting started on an attic fan project?
If you’re not experienced with home wiring, safety should be your top priority. Always turn off power at the breaker before starting, and use a voltage tester to double-check. Make sure connections are in approved electrical boxes and use proper wire nuts. Local building codes often require using specific wire gauges and GFCI protection for attic fans, so check your area’s rules first. If you’re unsure about any step, it’s wise to consult a licensed electrician.
When planning the installation, how do I determine whether my attic is better suited for a gable-mounted fan or a roof-mounted fan? Are there any specific attic layouts or roof types where one would be much more effective than the other?
To choose between a gable-mounted or roof-mounted attic fan, check if your attic has existing gable vents—if so, a gable-mounted fan is usually easier to install. For attics without gable ends or with a hip or flat roof, a roof-mounted fan is often more effective. Also, consider the direction of prevailing winds and the available space for installation. Steep-sloped roofs often work well with roof fans, while attics with accessible gable walls are ideal for gable fans.
For homes that already have existing gable vents, would it be simpler to install a gable-mounted attic fan versus a roof-mounted one, especially from a DIY perspective? Are there specific challenges to look out for with either type when considering energy efficiency?
If your home already has gable vents, installing a gable-mounted attic fan is generally simpler for DIYers since you can use the existing vent opening, avoiding the need to cut through your roof. Roof-mounted fans often require more skill and careful sealing against leaks. For both types, make sure your attic has enough intake vents to allow proper airflow; otherwise, you may not see the full energy efficiency benefits. Also, check insulation and wiring to avoid air leaks or electrical issues.
The article mentions working with electrical systems during installation. If I don’t have much experience with wiring, are there certain parts of the project that are safer for someone with basic DIY skills, or should I definitely hire a professional for those steps?
Wiring an attic fan involves handling electricity, which can be risky if you’re not familiar with proper safety procedures. While tasks like measuring, cutting the vent hole, and mounting the fan are suitable for most DIYers, the electrical hookup is best left to a licensed electrician if you’re inexperienced. This ensures your safety and that the installation meets code requirements.
The article mentions both gable-mounted and roof-mounted attic fans. If my attic has limited access but I already have gable vents, would it still be better to use a roof-mounted fan for ventilation, or should I stick with the gable option?
If you already have gable vents and limited attic access, a gable-mounted fan is usually the easier and less invasive option. It can often be installed directly into the existing vent opening, minimizing the need for roof work. Roof-mounted fans are best when gable vents aren’t available or don’t provide adequate ventilation. In your case, sticking with a gable-mounted fan should work well.
For a DIY attic fan installation, what kind of electrical knowledge should I have before attempting the wiring part, and are there situations where you’d definitely recommend getting a licensed electrician instead?
Before attempting the wiring for an attic fan, you should be comfortable with basic home electrical work, including safely turning off circuit breakers, identifying wires, making secure connections, and following local codes. However, if your project involves adding a new circuit, working near your main panel, or if you’re unsure about any part of the process, it’s definitely best to hire a licensed electrician to ensure safety and code compliance.
I noticed the article mentions solar-powered attic fans as an option. How do the installation steps or safety considerations differ when installing a solar-powered unit compared to a traditional electric attic fan?
When installing a solar-powered attic fan, you’ll need to mount the solar panel on your roof in a spot with maximum sunlight, which isn’t necessary for traditional fans. Wiring is generally simpler, since you won’t run electrical cables into your attic or connect to household power, reducing electrical safety risks. However, always secure the solar panel firmly and follow the manufacturer’s installation and weatherproofing guidelines.
When it comes to budgeting for a DIY attic fan installation, what are some hidden costs that homeowners might overlook, like additional wiring or structural modifications? Any tips for estimating the total project cost more accurately?
Some hidden costs to consider for a DIY attic fan installation include extra wiring or electrical upgrades, purchasing tools you may not already have, and possible structural modifications if your attic access or framing needs adjustment. You might also need new venting or weatherproofing materials. To estimate total costs accurately, list all required materials, check local permit fees, and add a buffer (about 10–20%) for unexpected expenses. If unsure, consult with a professional for a quick inspection before starting.
Since the guide talks about electrical work and safety, what steps do you recommend for someone with minimal wiring experience to make sure they stay safe and stay compliant with local codes during the installation?
If you have minimal wiring experience, it’s best to turn off the power at the breaker before starting any electrical work and use a voltage tester to double-check. Consult your local building codes since requirements can vary, and consider pulling any necessary permits. Reading the attic fan’s installation manual thoroughly will also help. If you’re unsure about any wiring steps, hiring a licensed electrician can ensure both safety and compliance.
Could you provide more information on how to determine whether a gable-mounted or roof-mounted attic fan would offer better ventilation for an attic with limited vent space? I’m also curious if one type is generally easier for a DIY installation.
For attics with limited vent space, gable-mounted fans are often preferred if you already have gable vents, as they use existing wall openings and require less roof alteration. Roof-mounted fans work well when gable vents aren’t available but usually need cutting into the roof, which can be more complex for DIYers. Generally, gable-mounted fans are easier to install yourself, especially if access to your gable ends is straightforward.
You mention post-installation best practices—could you expand on what ongoing maintenance or inspections are required to keep the attic fan running safely and efficiently over time?
To keep your attic fan running safely and efficiently, check it at least twice a year. Clean dust and debris from the fan blades, housing, and vent screens. Inspect the wiring, mounting, and fasteners for any signs of wear or looseness. Lubricate the motor if your fan’s instructions suggest it. Finally, test the thermostat and automatic controls to ensure the fan turns on and off at the correct temperatures.
You mention that attic fan installation involves electrical work and ventilation planning. For someone without a lot of electrical experience, are there particular safety risks or code requirements that would make hiring a professional a better idea?
Yes, attic fan installation often involves working with your home’s wiring and ensuring proper ventilation, both of which carry safety risks. Without electrical experience, there is a risk of shock, fire hazards, or improper installation that could violate local building codes. Hiring a professional ensures the wiring is safely completed, the fan is vented correctly, and all code requirements are met, reducing potential safety and legal issues.
If your attic has a mix of gable and roof vents already, is it okay to choose either a gable-mounted fan or a roof-mounted fan, or should you prioritize one over the other for best ventilation performance?
When your attic has both gable and roof vents, you can choose either a gable-mounted or a roof-mounted fan. However, for the best ventilation, it’s usually most effective to match the fan type with the dominant vent style. If your gable vents are larger or more centrally located, a gable-mounted fan works well. If roof vents are better placed for airflow, a roof-mounted fan may be preferable. Just avoid mixing powered fans with passive vents on opposite ends, as this can disrupt airflow.
You mention that whole-house fans are installed in a hallway ceiling and cool the entire home differently from attic fans. How do the installation process and long-term energy savings compare between a traditional attic fan and a whole-house fan?
Attic fans are usually simpler to install, placed directly in the attic roof, and mainly work to vent hot air out of the attic. Whole-house fans require more extensive installation since they’re mounted in a ceiling, often needing framing or electrical adjustments. In terms of energy savings, whole-house fans can potentially reduce cooling costs more if used correctly, as they cool the entire living space, while attic fans mostly help your air conditioner run more efficiently by lowering attic temperatures.
The guide mentions the importance of compliance and safety, particularly with the electrical aspects of installation. Are there common code requirements or inspections that DIYers should be aware of before starting work on an attic fan in most US cities?
Before starting a DIY attic fan installation, you should check your local building codes, as most US cities require electrical work to follow the National Electrical Code (NEC). Common requirements include proper wiring, grounding, and using a dedicated circuit. Some areas also require a permit and an inspection after installation. It’s important to verify with your local building department to ensure you meet all safety and code requirements before beginning the project.
When figuring out the right size attic fan, is there a recommended way to calculate CFM based on attic square footage, and does insulation type affect that calculation at all?
To size your attic fan, multiply your attic’s square footage by about 0.7 to determine the minimum CFM (cubic feet per minute) needed. For example, a 1,000 sq ft attic would need a fan rated at least 700 CFM. While insulation type doesn’t directly change the CFM calculation, homes with less insulation may benefit from a higher CFM to improve cooling. Still, stick with the square footage formula as your main guide.
The guide mentions budgeting for an attic fan, but I’m wondering about the hidden costs that might come up during installation—like unexpected electrical upgrades or extra ventilation materials. Can you elaborate on what to plan for financially?
You’re right to consider hidden costs. During attic fan installation, you might encounter expenses beyond the fan itself. These could include hiring an electrician if your wiring isn’t up to code, upgrading your circuit breaker, adding roof or soffit vents for proper airflow, sealing gaps for energy efficiency, or repairing any discovered roof damage. Setting aside an extra 20–30% of your initial budget can help cover these surprises.
Can you give a rough estimate of how much I should expect to spend if I decide on a solar-powered attic fan compared to a traditional electric one, including all the necessary materials? I’m trying to figure out if the extra upfront cost is justified by energy savings.
For a solar-powered attic fan, expect to spend around $300 to $600 for the fan itself and basic materials, while a traditional electric attic fan typically costs $100 to $250. You may also need to budget extra for installation if you aren’t doing it yourself. Solar fans have a higher upfront price, but they run for free and may save you $50 to $150 per year on energy, depending on your climate and usage.
I own an older building and the attic space is pretty cramped. The article mentions both gable-mounted and roof-mounted fans—do you have recommendations on which type is easier to install in tight attic spaces, and are there any extra safety steps I should consider?
In cramped attic spaces, gable-mounted fans are usually easier to install since you can often access the gable wall without needing to work on the roof itself. For added safety, ensure you have stable footing, proper lighting, and use protective gear like gloves and a dust mask. Be cautious of old wiring and insulation, and if space is very tight, consider having a second person nearby for assistance.
For homes that already have a gable vent, is it generally easier and more cost-effective to install a gable-mounted attic fan compared to a roof-mounted one? Are there any differences in energy efficiency or maintenance between the two types?
Installing a gable-mounted attic fan is usually easier and less expensive if your home already has a gable vent, since you can often use the existing opening and avoid cutting into the roof. In terms of energy efficiency, both types perform similarly if sized and installed correctly. Gable fans are easier to maintain because they’re more accessible, while roof-mounted fans might require climbing onto the roof for repairs or cleaning.
You mention that proper planning and safety are crucial when installing an attic fan. Are there any specific local building codes or electrical permit requirements I should be aware of before starting this as a DIY project in the US?
Before starting your attic fan installation, it’s important to check with your local city or county building department. Many areas in the US require an electrical permit for new wiring or connections, and there may be local codes about fan placement, wiring standards, and ventilation. Some locations might also require inspection after installation. It’s always best to verify local requirements to ensure your project is both safe and compliant.
For a college student living in an older rental house, is it usually allowed or practical to install something like a gable-mounted attic fan without making permanent changes to the property? Are there temporary or non-invasive options?
Installing a gable-mounted attic fan in a rental house is typically not allowed without your landlord’s approval, as it involves cutting and wiring, which are permanent changes. For rentals, consider portable options like window fans, floor fans, or even a portable attic fan that sits in the attic hatch but doesn’t require permanent installation. Always check with your landlord before making any modifications.
I’m planning to install a gable-mounted attic fan since my attic already has gable vents, but I’m worried about making sure there’s enough ventilation. How do I know if my attic has sufficient intake vents for the fan to work properly?
To ensure your attic has enough intake ventilation for a gable-mounted fan, check the total square footage of your existing intake vents (usually soffit vents). The general guideline is 1 square foot of net free vent area for every 300-400 square feet of attic space, split equally between intake and exhaust. If you don’t have enough intake vents, consider adding more to promote proper airflow and prevent negative pressure.
After installing an attic fan, what regular maintenance steps should I schedule to ensure it keeps operating efficiently and safely? Are there any signs of wear or potential issues I should watch for that could impact my energy savings?
To keep your attic fan running efficiently, check and clean the fan blades, motor, and vent openings every 6–12 months to remove dust and debris. Inspect electrical connections for signs of wear or corrosion and listen for unusual noises that could indicate a motor problem. Watch for rattling, reduced airflow, or unusual vibrations, as these may signal issues that impact both performance and energy savings. Regularly tighten mounting screws and replace any worn parts to maintain safety and efficiency.
I see that you mentioned both gable-mounted and roof-mounted attic fans. Is one generally easier for a DIYer to install, especially if attic access is tight? I’m trying to decide which style makes the most sense for an older house with a small attic entry.
If your attic access is tight, a gable-mounted attic fan is usually the easier option for DIY installation. These fans are installed on the vertical wall at the end of the attic, so you can often work from the outside or just inside the attic entry. Roof-mounted fans require working on the roof and cutting through shingles, which is much harder in small or awkward attic spaces.
You discuss the differences between gable-mounted, roof-mounted, and solar-powered attic fans. Do you have any insights on how much energy savings homeowners can realistically expect from each type, or situations where one is clearly preferable over the others?
Energy savings from attic fans can vary, but most homeowners see a 10–30% reduction in cooling costs, with solar-powered fans being the most efficient since they use no electricity. Gable-mounted fans are best for homes with existing gable vents and straightforward access, while roof-mounted fans suit homes without gable ends. Solar-powered fans are ideal in sunny climates and for those wanting the lowest operating costs. The best choice depends on your attic design and budget.
When it comes to budgeting for this project, are there any hidden costs I should expect beyond buying the fan itself, like electrical permits or extra tools? I want to avoid surprises before I start the installation.
Beyond the cost of the attic fan itself, you might need to budget for a few extras. If you’re wiring the fan into your home’s electrical system, an electrical permit may be required, which can come with a fee. You may also need to buy or rent tools like a hole saw, ladder, and safety equipment. Additionally, factor in wiring, mounting hardware, and possibly professional help if you’re not comfortable with electrical work.
I’m interested in the budgeting aspect for a DIY attic fan install. Besides the cost of the fan itself, what supplies or tools should be factored into the budget, and are there unexpected expenses that homeowners often overlook during this process?
When budgeting for a DIY attic fan install, besides the fan itself, consider supplies like electrical wiring, a mounting kit, fasteners, sealant or caulk, and possibly roof flashing. You’ll also need tools such as a drill, saw, ladder, and safety gear. Unexpected expenses often include needing extra wiring, replacing damaged shingles, or renting specialized tools. Always factor in these possible extras to avoid surprises.
You mention that attic fans can help extend the life of roofing materials. Are there any specific types of roofing that benefit more or less from having an attic fan installed?
Attic fans are especially beneficial for asphalt shingle roofs, which are sensitive to heat buildup and can deteriorate faster if attic temperatures stay high. Metal and tile roofs are generally less affected by attic heat, but proper ventilation still helps prevent moisture problems. Overall, while all roofing materials can benefit from attic fans, asphalt shingles see the most noticeable improvement in lifespan.
You mention both roof-mounted and gable-mounted attic fans. For homes in hot and humid climates, is one type generally more effective at reducing attic temperature and protecting roofing materials, or does it really depend on the layout of the attic?
For hot and humid climates, roof-mounted attic fans often perform better at venting hot air directly out of the attic since heat rises naturally. However, the effectiveness can still depend on your attic’s shape, existing venting, and how air flows through the space. If your attic has good soffit or eave vents, roof-mounted fans usually offer the best heat reduction and protection for roofing materials.
When budgeting for this project, what unexpected costs should I account for besides the basic price of the fan itself—like wiring, permits, or any tools that most homeowners might not already have?
Along with the fan’s price, include costs for electrical wiring, conduit, and possibly hiring an electrician if you’re not experienced with running new circuits. Check if your local area requires a permit, which can add to the expense. You may also need tools like a reciprocating saw, hole saw, or wire strippers, which aren’t always in a basic toolkit. Don’t forget weatherproofing materials and roof flashing for proper installation.
Could you clarify if local building codes or permits are typically required for a DIY attic fan installation, especially when it involves electrical work? I want to make sure I stay compliant, but I’m not sure where to start researching this.
Local building codes and permits often apply when installing an attic fan, particularly if electrical wiring is involved. Requirements vary by location, so it’s best to contact your city or county building department directly. They can tell you what permits are needed and if inspections are required. Checking with a licensed electrician can also help ensure your installation meets all safety and code standards.
I’m planning a DIY attic fan installation to help out my HVAC system during the summer, but I’m worried about roof leaks with roof-mounted fans. Do you have any tips on flashing or sealing around the unit to prevent water intrusion long-term?
To prevent leaks with a roof-mounted attic fan, use high-quality flashing that extends under the surrounding shingles above the fan and overlaps them below. Apply roofing sealant generously around the fan base and any fasteners. Make sure the flashing is securely nailed and sealed, and inspect the installation after heavy rains to catch any early issues. Regularly check the sealant over time, as UV and weather exposure can cause it to deteriorate.
I’m interested in the energy savings you describe, but could you share how to estimate the potential reduction in cooling costs for a 2,000-square-foot retail space versus a typical home? Are there online calculators or formulas you recommend?
To estimate cooling cost reduction, start by comparing your current energy bills to projected savings from improved attic ventilation—typically 10–30% for homes. For a 2,000-square-foot retail space, savings may be similar, but will depend on factors like insulation, business hours, and roof type. Online calculators from utility companies or HVAC manufacturers can help—just input your building size, location, and current cooling costs for an estimate. If possible, consult with a local HVAC expert for a more tailored calculation.
About budgeting for this DIY project, does the guide break down typical material and tool costs for each attic fan type, or give advice on where it might be worth paying a professional instead?
The guide does discuss general costs and typical materials needed for installing attic fans, but it doesn’t provide a detailed breakdown by fan type. It does offer some advice on when hiring a professional might be a better choice, especially for complex electrical work or if your attic has challenging access. This should help you decide how to budget and when to consider calling in an expert.
If my main goal is to reduce my summer cooling bills in my workspace, which type of attic fan installation should I prioritize, and how soon should I expect to see results on my energy bills after completing the project?
For lowering summer cooling bills in your workspace, prioritize installing a powered attic fan with a thermostat. These fans actively expel hot air, making your workspace cooler and reducing the strain on your air conditioning. Results on your energy bills can often be seen within the first one to two billing cycles, depending on your cooling habits and climate.
For a DIY attic fan installation, how do you determine if your existing attic has enough ventilation to safely operate the fan, especially when switching from passive to powered ventilation?
To ensure your attic has enough ventilation for a powered fan, calculate your attic’s square footage and check the manufacturer’s recommendations for intake and exhaust vent area, usually measured in square inches or feet. You’ll need adequate soffit or gable vents for air intake; otherwise, the fan can create negative pressure and pull conditioned air from your home. If needed, add more intake vents to balance airflow and prevent moisture or pressure issues.
For someone new to this type of project, what common safety mistakes should be avoided during installation, particularly when dealing with electrical wiring in the attic space?
When working with attic fan installation, a few common safety mistakes to avoid include: not turning off the power at the breaker before handling any wiring, using incorrect wire connections, and working on unstable surfaces. Always use proper insulation for wires, wear protective gear (like gloves and goggles), and make sure the attic is well-ventilated to avoid heat exhaustion. If you’re unsure about electrical work, it’s wise to consult a licensed electrician.
I noticed you mentioned working with electrical systems during installation. How difficult is the wiring part for someone who’s only done basic electrical work before, and are there specific safety steps I should take to avoid mistakes?
Wiring an attic fan does require more care than basic electrical tasks. If you’ve only done simple jobs like changing outlets, expect some challenges, especially with routing wires and connecting to a breaker. Always turn off power at the breaker before starting, use a voltage tester to confirm it’s off, and double-check wiring connections. If you’re unsure, consider having an electrician handle the wiring to ensure safety and code compliance.
After the installation is complete, are there any maintenance steps I should follow regularly to make sure the attic fan keeps running properly and doesn’t create any issues with moisture or airflow?
Yes, regular maintenance is important for your attic fan. At least once or twice a year, clean the fan blades and housing to remove dust and debris, check for any unusual noises or vibrations, and ensure the electrical connections are secure. Also inspect the vent openings to confirm they aren’t blocked and look for any signs of moisture buildup or mold. This will help keep the fan operating efficiently and prevent moisture or airflow problems.
For homes with limited attic access, you mention roof-mounted fans as a good option. Are there any additional precautions or installation tips for roof-mounted models, particularly when it comes to preventing roof leaks during and after installation?
When installing a roof-mounted attic fan, it’s crucial to use high-quality flashing and roofing sealant around the base of the fan to prevent leaks. Make sure the fan fits snugly, shingle overlaps are maintained, and all screws or fasteners are properly sealed. Installing the fan on a dry day and double-checking your work for gaps or loose shingles will also help ensure a watertight seal.
When choosing between a gable-mounted fan and a roof-mounted attic fan, are there specific climate or house design factors in the US that should make me lean toward one option versus the other? I want to be sure I’m picking the most effective type for long-term energy savings.
Yes, climate and house design do influence which attic fan works best. Gable-mounted fans are often ideal for homes with existing gable vents and work well in moderate climates. Roof-mounted fans are usually better suited for homes without gable ends or in areas with extreme heat, as they can vent hot air more efficiently. Also, consider your roof’s pitch and attic size—roof-mounted fans may be more effective for larger attics or complex rooflines. Both can save energy if installed properly, but matching the fan type to your home’s design and local climate will optimize results.
You mention that attic fans can help extend the life of roofing materials by reducing heat and moisture. Have you noticed if installing a fan can actually stop issues like mold or warped shingles, or is it more of a preventative measure?
Installing an attic fan is primarily a preventative measure. By reducing heat and moisture, the fan makes conditions less favorable for mold growth and helps prevent shingles from warping. If you already have mold or warped shingles, a fan alone likely won’t reverse the damage, but it can help stop those problems from getting worse and protect your roof in the future.
I noticed the article mentions working with electrical systems. How complicated is the wiring part for someone who has only done basic electrical projects before? Should I plan to bring in an electrician for any part of the attic fan installation?
The wiring for an attic fan usually involves connecting the fan to your home’s power supply and possibly installing a thermostat. If you’ve only done basic electrical projects, you may find the wiring slightly challenging, especially in tight attic spaces or when dealing with circuit breakers. If you’re not fully confident or your local codes require it, hiring an electrician for the wiring portion is a safe choice.
I see that safety and compliance are really important when installing an attic fan yourself. Are there specific electrical codes or permits I should be aware of before I start, especially if I’m replacing an old fan in an older home?
When replacing an attic fan, especially in an older home, it’s important to check your local building codes and electrical requirements. Many areas require a permit for electrical work, including fan installation. The National Electrical Code (NEC) sets general safety standards, like using the correct wiring gauges and having a dedicated circuit. Always turn off power at the breaker, and if you’re unsure about any part of the process, consult a licensed electrician or your local permitting office.
If I want to do this project mainly to lower my summer cooling bills, is there any way to estimate how much I could save per month before I buy the fan and start the installation?
Yes, you can estimate potential savings by considering factors like your current cooling costs, the size and insulation of your attic, and the typical energy use of an attic fan. On average, homeowners report saving 10–30% on summer cooling bills after installing a fan. You can also check the wattage of the fan you plan to buy, estimate how many hours it will run daily, and compare that cost to your current air conditioning usage for a more tailored estimate.
If I choose to do this as a DIY project, how much time should I expect to set aside for the installation from start to finish, assuming I have basic home improvement skills but not much attic experience?
For someone with basic home improvement skills but limited attic experience, you should plan to set aside about 4 to 6 hours for the full installation. This includes prepping the area, cutting the roof or gable (if needed), mounting the fan, wiring, sealing, and clean-up. Taking your time with safety steps and double-checking your work is important, so setting aside a half-day is a realistic expectation.
Could you clarify how I should choose between a gable-mounted fan and a roof-mounted fan if my attic already has some ventilation but tends to stay hot? I want to be sure I’m picking the most effective option before committing to install anything.
If your attic already has some ventilation, the choice depends on your attic layout and existing vent locations. Gable-mounted fans work well if you have accessible gable ends; they’re easier to install and use existing vents. Roof-mounted fans are better if your attic lacks gable ends or has uneven airflow, as they can be placed for optimal exhaust. Consider your attic’s shape and vent placement to maximize effectiveness.
You mention that roof-mounted fans are ideal for homes without gable vents, but I was wondering if there are any additional waterproofing or roofing concerns I should be aware of when installing one myself. Is this something most DIYers can safely handle?
When installing a roof-mounted attic fan, waterproofing is a key concern. You’ll need to properly flash and seal around the fan to prevent leaks. This involves cutting the right-sized hole, using roofing cement, and installing flashing under the shingles. While many DIYers can handle this with careful planning, if you’re uncomfortable working on your roof or handling roofing materials, hiring a professional might be safer to avoid potential water damage.
I noticed you mentioned that attic fan installation involves working with electrical systems and navigating attic spaces. For someone who’s never worked with home wiring before, how difficult is the wiring part of the installation, and are there any specific safety precautions beginners should know about?
The wiring part of attic fan installation can be challenging for beginners, especially if you’ve never worked with home electrical systems. It often involves connecting wires to a dedicated circuit, mounting a switch, and ensuring all connections are safe and secure. Key safety precautions include always turning off power at the breaker before starting, using insulated tools, double-checking wiring diagrams, and never working alone. If you feel unsure at any point, it’s best to consult a licensed electrician to avoid risks.
You mention that DIY attic fan installation requires working with electrical systems. For someone with minimal electrical experience, would you recommend hiring a professional just for the wiring part, or is it manageable with standard DIY skills?
If you have minimal electrical experience, it’s usually safer to hire a professional for the wiring portion. While much of the attic fan installation can be done with standard DIY skills, connecting to your home’s electrical system involves risks, including fire hazards and code compliance. Letting an electrician handle the wiring keeps the project safe and up to code, while you can still manage the other installation steps yourself.
You mentioned that attic fan installation involves working with electrical systems and ensuring safety and compliance. Are there particular building codes or electrical requirements I should be aware of before starting a DIY attic fan project in the US?
Yes, before installing an attic fan yourself, check your local building codes since requirements can vary by city or state. Generally, electrical work must comply with the National Electrical Code (NEC), including proper wiring, circuit breakers, and the use of approved junction boxes. Some areas may require permits or inspections for new electrical installations, so it’s wise to contact your local building department before starting the project.
Before starting, how can I estimate the total budget for a DIY attic fan project, including possible electrical upgrades or tools needed? I’d like to avoid unexpected costs, especially since you mentioned compliance and planning are so important.
To estimate your total budget, start by pricing the attic fan model you plan to buy. Add the cost of tools you may need like a drill, jigsaw, or safety gear if you don’t already own them. Check if your attic circuitry can handle the fan or if an electrician will be needed for upgrades—contact a local electrician for quotes. Also, factor in materials like wiring, mounting hardware, and weatherproofing supplies. Preparing a detailed list ahead helps avoid surprises and ensures you stay compliant and safe.
The article mentions that installing an attic fan involves working with electrical systems. For someone who has basic electrical knowledge but no professional experience, what specific safety precautions should I take during the wiring part of the installation?
When handling the wiring for your attic fan, always turn off the power to the circuit at the breaker box before starting. Use a voltage tester to double-check that no current is present. Wear rubber-soled shoes and avoid working in damp areas. Make sure to follow the manufacturer’s wiring diagram exactly and use wire nuts or connectors to secure all connections. If anything seems confusing or unsafe, consider consulting a licensed electrician.
The article mentions that solar-powered attic fans can reduce energy costs and don’t require electrical wiring. Are there any limitations or specific maintenance concerns with solar models compared to traditional gable- or roof-mounted fans?
Solar-powered attic fans have some unique considerations. Their performance depends on sunlight, so they may be less effective on cloudy days or if installed in shaded locations. Also, while they require little wiring, the solar panel should be kept clean and free of debris for optimal performance. Unlike wired fans, solar models may not run at night. Other maintenance is similar—check for debris, ensure vents are clear, and inspect the motor annually.
If I go with a solar-powered attic fan to avoid running electrical wiring, do I still need to take any special safety measures during installation, especially if I’m not very experienced with electrical work?
Even with a solar-powered attic fan, you’ll need to follow safety precautions. Wear gloves and safety glasses, use a sturdy ladder, and be cautious when working on the roof. While there’s no need to connect to your home’s electrical system, you should still handle tools carefully, secure all mounting hardware properly, and avoid installing the fan during wet or windy weather. If you’re unsure at any step, consider asking a handy friend for help or consulting a professional.
For those considering solar-powered attic fans to reduce energy costs, do you have advice on how to estimate the upfront investment versus long-term energy savings? I am trying to figure out how long it would typically take for the savings to offset installation costs.
To estimate payback time for a solar-powered attic fan, add up the total cost (fan, installation, and any permits). Next, calculate yearly energy savings—find out how much a traditional attic fan would have cost in electricity by checking its wattage and your local power rates. Divide the initial investment by annual savings to get the payback period. For most homeowners, the break-even time ranges from 4 to 8 years, depending on local climate and energy prices.
Could you explain a bit more about the differences in energy savings between solar-powered attic fans and traditional electrically-wired ones? I’m trying to figure out if the higher upfront cost of solar is worth it in the long run for a student budget.
Solar-powered attic fans use sunlight to operate, so they don’t add to your electricity bill, which can lead to noticeable savings over time—especially if you live in a sunny area. Traditional electric fans cost less upfront but use electricity, so you’ll see ongoing costs. For a student budget, think about how long you’ll stay in your current place; if you plan to be there for several years, solar may pay off, but for shorter stays, the electric version might make more financial sense.
You mentioned that solar-powered fans can help reduce energy costs, but do they provide the same cooling effectiveness as traditional electric fans, especially during the hottest parts of the summer?
Solar-powered attic fans can be quite effective, but their performance depends on sunlight availability. On very sunny days, they work well and can match the airflow of some electric models. However, during cloudy weather or at night, their effectiveness drops since they rely solely on solar energy. For peak summer heat, a high-quality solar fan can handle typical attic cooling needs, but an electric fan offers more consistent performance regardless of weather.
For a small business owner who uses part of their home for inventory storage, do you recommend a gable-mounted or roof-mounted attic fan for more consistent temperature control? I’m especially concerned about preserving materials sensitive to heat and humidity.
For your situation, a roof-mounted attic fan usually provides more consistent temperature control because it vents hot air directly from the highest point of the attic, helping to keep the space cooler and drier. This is especially useful for protecting sensitive inventory. Gable-mounted fans can also help, but may not be as effective if your attic has limited natural airflow or complex rooflines.
For DIY homeowners concerned about wiring, do you recommend hiring an electrician just for the electrical portion of the attic fan installation, or are there common safety steps a confident DIYer can take to ensure compliance during this part of the project?
If you’re comfortable with basic wiring and local codes, some DIYers do handle the electrical part themselves, but safety is critical. Always switch off power at the breaker, use proper tools, and check your local building codes for permit requirements. If you have any uncertainty or if new wiring is needed, bringing in a licensed electrician for just the electrical portion is the safest choice and ensures everything is up to code.
I noticed you mentioned both gable-mounted and roof-mounted attic fans. How should I decide between these two types for a typical suburban home, and are there benefits to one over the other in terms of energy savings or ease of installation?
Choosing between gable-mounted and roof-mounted attic fans depends on your attic’s layout and your home’s design. Gable-mounted fans are ideal if your attic already has gable vents, making installation easier and often less expensive. Roof-mounted fans are better if you don’t have gable vents or want to place the fan at the hottest point of the attic for optimal ventilation. Both types can offer similar energy savings if properly sized and installed, but gable-mounted fans are usually simpler for DIY projects.
The article mentions that attic fan installation isn’t a casual weekend project because of the electrical work involved. For someone with only basic electrical experience, what specific safety precautions or tools would you recommend before attempting the wiring step?
If you only have basic electrical experience, always switch off power at the breaker box before starting any wiring. Use a voltage tester to double-check that wires are not live. Wear insulated gloves and use insulated tools for extra protection. Make sure your ladder is stable if working near the attic ceiling. If you feel unsure at any step, consider having a licensed electrician handle the wiring to stay safe.
I’m trying to decide between a gable-mounted fan and a solar-powered fan, but not sure which one makes more sense for an older house with decent attic space but no existing vents. How should I figure out what’s best in terms of savings and installation effort?
Since your older house has no existing vents, a gable-mounted fan would require you to cut and frame an opening, which is more work but gives you control over fan size and airflow. A solar-powered fan is easier to install, especially on the roof, and saves on electricity, but may not be as powerful. Consider your attic size, insulation, and how much sun your roof gets. If energy savings and ease are priorities, solar is appealing, but for maximum airflow, a gable-mounted fan might perform better.
You mentioned that DIY attic fan installation isn’t really a casual weekend project and involves working with electrical systems. For someone who’s pretty new to electrical work, are there specific parts of the process that are most challenging or dangerous to be aware of?
Absolutely, for those new to electrical work, the trickiest and most hazardous steps are wiring the fan into your home’s electrical circuit and navigating the attic space itself. Connecting wires incorrectly can lead to shorts or even electrical fires. Also, attics can have low visibility, exposed insulation, and tight spaces, which raise the risk of falls or injury. If you’re uncomfortable with any part of the wiring or working in confined spaces, it’s safest to call in a licensed electrician for those steps.
The guide mentions several types of attic fans like gable-mounted and solar-powered models. How would you decide which type is most effective for an older house with limited attic space?
For an older house with limited attic space, the best choice often depends on your roof structure and access. Gable-mounted fans work well if you already have gable vents and they take up minimal space. Solar-powered fans are great for energy savings and also work in tight spots, but they require direct sunlight for full efficiency. Consider how much attic ventilation you need, your budget, and whether you prefer a wired or eco-friendly option before deciding.
When installing a roof-mounted attic fan, how do I ensure I’m sealing everything properly to prevent leaks after cutting into the roof? Are there specific materials or methods you recommend for waterproofing this part of the installation?
To prevent leaks after installing a roof-mounted attic fan, use a high-quality roofing sealant around the fan’s flange and any fasteners. Apply roofing cement under the flange before setting the fan, then secure it with roofing nails or screws. Overlap shingles above the flange for proper water runoff. For extra protection, consider using flashing tape around the opening and over any seams. Always follow the manufacturer’s specific instructions for waterproofing.
Can you provide more detail on the types of roof-mounted attic fans available, and whether there are specific models recommended for homes with limited attic access? Also, how should I determine if my attic is a good candidate for a roof-mounted versus a gable-mounted system?
Roof-mounted attic fans come in several varieties, including solar-powered, electric-powered, and wind-driven models. For homes with limited attic access, low-profile or solar units are often preferred since they can be installed from the roof without much interior work. To determine if your attic is suitable for a roof-mounted or gable-mounted fan, consider the size and shape of your attic, the availability of exterior gable walls, and ease of access. Roof-mounted fans are usually better for attics lacking suitable gable vents or when attic access is restricted.
For someone with limited experience working with electrical systems, how difficult is the wiring part of a DIY attic fan installation? Are there common mistakes homeowners make when wiring their attic fans themselves?
The wiring part of installing an attic fan can be challenging if you have limited electrical experience. Common mistakes include not turning off the power at the breaker, using the wrong wire gauge, or making loose wire connections. If you’re unsure, it’s safest to consult a licensed electrician or have someone more experienced help you with the wiring to avoid electrical hazards.
When planning a DIY attic fan installation, how critical is it to match the fan size or capacity to the square footage of your attic, and are there specific guidelines to prevent over- or under-ventilating the space?
Matching your attic fan size to your attic’s square footage is very important. An undersized fan won’t ventilate effectively, while an oversized one can create negative pressure and pull conditioned air from living spaces. A common guideline is to provide at least 1 CFM (cubic foot per minute) of airflow per square foot of attic space, and to add extra capacity for steep or dark roofs. Always consult the manufacturer’s sizing chart to make the best choice.
When budgeting for a DIY attic fan installation, what are the main hidden costs I should be aware of, like electrical upgrades or permits? I want to avoid surprises that could make the project more expensive than hiring a professional.
When budgeting for a DIY attic fan installation, consider hidden costs like electrical upgrades—older homes may need new wiring or a dedicated circuit. Local permits or inspection fees can also add up, depending on your area. Don’t forget costs for extra materials like ducting, brackets, or weatherproofing supplies. Renting or buying tools, plus possible repair costs if you run into unexpected issues, should also be factored in to avoid surprises.
I’m new to working with attic spaces, and I’m a little nervous about dealing with electrical wiring during installation. Can you share more details about how to safely wire a roof-mounted attic fan, and whether an electrician is really needed for the electrical part if I follow all the steps carefully?
Wiring a roof-mounted attic fan involves working with your home’s electrical system, which can be risky if you’re not experienced. You’ll need to shut off the power at the breaker, use proper tools, and ensure all connections are secure and up to code. Even with careful step-by-step guidance, hiring a licensed electrician is recommended unless you’re confident in your electrical skills. This helps prevent hazards and ensures your installation is safe and compliant.
The article talks about energy savings with attic fans, but I’m curious about realistic month-to-month savings on cooling bills, especially during a typical hot summer. Are there any average numbers or examples for a standard-size home?
Attic fans can help reduce your cooling bills, especially during hot summers. For a standard-size home (around 1,500–2,000 square feet), homeowners often see monthly savings of about 10–15% on cooling costs. This usually translates to $15–$40 per month, depending on your local climate and how much you use your air conditioning. Actual savings can vary based on insulation, attic size, and fan efficiency.
Since the guide mentions budgeting as a key step, can you provide some ballpark figures on the typical cost differences between a DIY installation versus hiring a professional, including any specialized tools or materials that might be unexpectedly expensive for first-timers?
For a DIY attic fan installation, you can expect to spend around $150 to $400 on the fan itself, plus $50 to $150 for basic materials and tools. If you need specialized tools, like a reciprocating saw or heavy-duty ladder, those could add $50 to $200 more if you don’t already own them. Hiring a professional typically costs $500 to $1,000 including labor and materials. Unexpected expenses for DIYers often include electrical supplies and permits, which can run another $50 to $100.
I see that the article mentions roof-mounted and gable-mounted attic fans, but how do I decide which type is most suitable for an older home that has limited attic access and no existing vents?
For an older home with limited attic access and no existing vents, a roof-mounted attic fan is usually more suitable. Roof-mounted fans can be installed directly from the roof, often without needing to enter the attic, which is helpful if access is tight. Gable-mounted fans require an existing gable vent and attic access for installation, so unless you plan to add a new vent, roof mounting is the more practical option.
You mentioned that solar-powered attic fans don’t require electrical wiring. Are there any limitations to their effectiveness compared to regular electric models, especially in buildings where the attic doesn’t get a lot of direct sunlight?
Solar-powered attic fans do rely heavily on direct sunlight to operate at full capacity. In attics that are shaded much of the day or where sunlight is limited, these fans may not move as much air as traditional electric models, especially during cloudy weather or early evening hours. If your attic doesn’t get a lot of sun, you might not see the same cooling or ventilation benefits as you would with a wired electric fan.
You mentioned that attic fans can reduce cooling costs and extend roof life, but I’m curious how to estimate the potential energy savings for a small business building versus a typical home. Are there any key differences in installation or expected results?
Estimating energy savings for a small business compared to a home depends on factors like building size, insulation quality, and existing ventilation. Small businesses often have larger attic spaces and higher heat loads, which can make attic fans more impactful in reducing cooling costs. Installation may require larger or multiple fans for commercial buildings, and professional assessment is advised. Overall, while both settings benefit, small businesses might see greater absolute savings but should expect higher upfront installation complexity.
As a small business owner, I’m interested in installing a solar-powered attic fan to help with energy costs, but I’m not sure if the energy savings justify the higher upfront price. Do you have any tips on calculating the potential payback period for solar attic fans versus electric ones?
To estimate the payback period for a solar attic fan, compare its upfront cost to that of an electric fan, then estimate your annual energy savings. For the solar fan, the main savings come from not using electricity. Find out how much an electric fan would cost to run yearly using your local energy rates and average fan wattage. Divide the price difference between the two fans by your estimated yearly savings to get the payback period. Also, factor in any local incentives or rebates for solar products.
When budgeting for an attic fan, what unexpected costs should I keep in mind besides the price of the fan itself, like permits, tools, or extra materials for safe DIY installation?
When budgeting for an attic fan installation, be sure to consider additional costs beyond the fan’s price. These may include electrical wiring or upgrades, permits if required by your local building codes, protective gear, and specialized tools like a reciprocating saw or drill. You might also need extra roof flashing, sealant, or lumber for safe mounting. Don’t forget possible costs for patching or reinforcing your roof and insulation around the fan to maintain your home’s energy efficiency.
The article says safety and compliance are important during a DIY attic fan installation, especially because of electrical work. Are there specific permits or inspections needed before starting this project, or is that mostly for larger electrical jobs?
For installing an attic fan, permit and inspection requirements can vary depending on your local building codes. Many areas require a permit for any new electrical work, even if it’s a relatively small project like an attic fan. It’s best to check with your city or county permitting office before starting. They can tell you if you need a permit or inspection to ensure your installation meets safety and code standards.
When deciding between a gable-mounted fan and a roof-mounted fan, what factors should I weigh most heavily? Is there a big difference in energy savings or maintenance needs between the two types based on your experience?
When choosing between a gable-mounted and a roof-mounted attic fan, consider your attic’s layout, existing vents, and your roof type. Gable-mounted fans work well if you already have gable vents, while roof-mounted fans are better for homes without them. Both types offer similar energy savings if sized correctly. In terms of maintenance, roof-mounted fans are a bit harder to access but otherwise require similar upkeep. Your choice mainly depends on ease of installation and your home’s structure.
You listed both gable-mounted and roof-mounted fans. How do I know which type is best for my home if it has both gable vents and decent roof access? Are there energy efficiency or installation cost differences between the two options?
If your attic has both gable vents and good roof access, your choice can depend on a few factors. Gable-mounted fans are usually easier and less expensive to install, especially if you’re using existing gable vents. Roof-mounted fans may be more effective at venting hot air from the highest point of the attic, but installation is costlier and may require cutting through the roof. Both types can offer similar energy savings if sized correctly, but roof-mounted fans sometimes perform better in larger attics or homes with limited gable vent area.
For budgeting purposes, what kind of installation costs or unexpected expenses should I plan for when choosing between a roof-mounted and a gable-mounted attic fan?
When budgeting, roof-mounted attic fans often have higher installation costs because they require cutting into the roof and properly sealing around the unit to prevent leaks. You may need professional roofing help, which adds to expenses. Gable-mounted fans are usually cheaper to install if you already have a suitable gable vent. For both types, plan for possible electrical work, attic ventilation upgrades, and unexpected repairs if damaged wood or wiring is found during installation.
I’m curious about the difference between gable-mounted and roof-mounted fans mentioned in the guide. How do I decide which type is more suitable for my home, especially if I have limited attic access and some existing ventilation?
Gable-mounted fans are installed in the vertical wall at the end of the attic (the gable), while roof-mounted fans sit directly on the roof. If you have limited attic access, gable-mounted fans are often easier to install because you can usually reach them from outside or inside the attic without climbing onto the roof. However, if your gable area isn’t suitable or you want to maximize airflow, a roof-mounted fan might be better, though installation is more complex. If you already have some attic ventilation, just be sure not to over-ventilate, as that can impact efficiency.
The article says attic fan installation isn’t a casual weekend project and involves working with electrical systems. What specific electrical skills or tools would someone need to safely do this themselves if they’ve never tackled electrical work before?
Installing an attic fan requires knowing how to safely turn off circuit breakers, identify and connect wiring (including grounding), and use a voltage tester to check for live wires. Essential tools include wire strippers, screwdrivers, a drill, and possibly a reciprocating saw to cut vent holes. If you’re unfamiliar with home wiring or electrical safety, hiring a licensed electrician is recommended to avoid serious hazards.
I see you mention both gable-mounted and roof-mounted attic fans in the guide. Is there a big difference in installation difficulty or required tools between those two types? I’m just trying to figure out which one would be more manageable for a DIY project.
Gable-mounted attic fans are generally easier for DIYers to install since you can usually access the gable wall from inside your attic, and the installation mainly involves cutting a vent hole and mounting the fan. Roof-mounted fans require cutting through the roof, working on a ladder or rooftop, and properly sealing the flashing to prevent leaks, which makes them more challenging and tool-intensive. If you’re looking for a more manageable project, a gable-mounted fan is typically the simpler option.
When budgeting for an attic fan installation, how should I estimate the upfront costs versus the expected energy savings for a moderate-sized office building? Any tips on calculating the break-even point would be really helpful.
To estimate upfront costs, consider the fan unit price, professional installation fees (if you don’t DIY), electrical work, and any permits. For energy savings, review your current cooling costs, then estimate how much less your AC will run with improved attic ventilation—many see 10–30% summer savings. To calculate the break-even point, divide the total installation cost by your projected annual energy savings. This tells you how many years it will take to recoup your investment.
You mentioned that roof-mounted fans are good for homes without gable vents, but are there any additional weatherproofing steps needed when installing these on older asphalt shingle roofs? I’m concerned about potential leak risks down the line.
You’re right to be cautious about leaks, especially with older asphalt shingles. When installing a roof-mounted attic fan, use high-quality flashing and roofing sealant around the base and fasteners. Make sure the flashing extends under the upper shingles as much as possible, and replace any brittle or damaged shingles around the installation area. Periodically check the sealant over time, as older roofs may require touch-ups to maintain a watertight seal.
I see that safety and compliance are really important during a DIY attic fan project, especially when working with electrical systems. Are there certain building codes or permits I should check before starting, and how do I make sure my installation will pass an inspection if needed?
Before starting your attic fan installation, it’s important to check your local building codes and permit requirements, as these can vary by area. Many regions require a permit for electrical work, and inspections may be needed after installation. To ensure your project passes inspection, follow the manufacturer’s instructions, use code-approved wiring and connectors, and, if unsure, consult a licensed electrician. This helps ensure both safety and compliance.
When installing a roof-mounted attic fan, how do you ensure the roof penetration is properly sealed to prevent leaks, and do you recommend any specific products or sealants for the job in areas with heavy rain or snow?
To properly seal the roof penetration when installing a roof-mounted attic fan, make sure to use flashing that fits snugly under the shingles above the installation point and over the shingles below. Apply a high-quality, exterior-grade roofing sealant around the edges of the flashing and any screws. For areas with heavy rain or snow, products like polyurethane roofing sealant or butyl rubber caulk are excellent choices because they remain flexible and highly water-resistant over time.
The article mentions both solar-powered and electric attic fans. How do the upfront costs and estimated energy savings compare between those two options for a business trying to minimize long-term utility bills?
Solar-powered attic fans generally have higher upfront costs than electric fans due to the price of the solar panel and components. However, solar fans use no electricity from the grid, so they deliver energy savings right away, especially during sunny hours. Electric fans cost less initially but may increase your utility bills since they run on your building’s electricity. Over time, the solar option usually offers greater long-term savings, making it a better choice if minimizing ongoing energy costs is a priority.
The guide talks about solar-powered attic fans as a way to reduce energy costs. Do you have any advice on how to determine if a solar-powered model will provide enough ventilation for a typical attic, especially in areas that don’t get a lot of direct sunlight?
To see if a solar-powered attic fan is right for your attic, start by checking the fan’s rated airflow (CFM) and compare it to the size of your attic—most manufacturers recommend at least 700 CFM per 1,000 square feet. For areas with less sunlight, look for high-efficiency panels or fans with battery backups to help maintain performance. You might also want to consult local installers about typical sunlight hours and average fan output in your region.
The article mentions safety and compliance are paramount—are there any specific electrical codes or permits homeowners should be aware of before starting a DIY attic fan installation?
Yes, before starting your DIY attic fan installation, you should check your local building codes, as many areas require an electrical permit for this type of work. The National Electrical Code (NEC) sets general safety standards, like ensuring proper wiring and using a dedicated circuit. Always turn off power at the breaker box before working, and if you’re unsure about local requirements, consult your city’s building department or a licensed electrician.
After finishing the installation, what are some telltale signs that the attic fan is properly ventilating and that the wiring is safe? Just want to be sure I did everything right before closing up the attic.
Once you’ve installed the attic fan, you should feel a steady airflow at the exhaust vent when the fan is running. The attic temperature should also drop compared to before. For wiring safety, check that the fan starts and stops as intended, there’s no buzzing, tripped breakers, or warm wires. If everything runs smoothly and there’s no unusual smell or sound, you’re likely in good shape.
For budgeting purposes, how much should I expect to spend on materials and tools if I try this project myself in a medium-sized commercial property? Are there any attic fan types that tend to be more affordable or easier to install for business owners?
For a medium-sized commercial property, expect to spend between $150 and $500 on materials if you choose a standard electric attic fan. Solar-powered fans can cost more, around $300 to $800, but may save on energy costs long term. Basic tools like a drill, saw, screwdriver, and safety gear will add $50 to $150 if you don’t already have them. Gable-mounted fans are usually more affordable and easier to install compared to roof-mounted models, making them a popular choice for business owners.
The article talks about energy savings, but could you give an idea of how much the average homeowner in a warmer climate might expect to save on cooling bills after installing an attic fan? I’m trying to determine if the investment would realistically pay off in a few years.
Homeowners in warmer climates can often see cooling bill reductions of around 10% to 20% after installing an attic fan, depending on factors like attic insulation and local electricity rates. If your current cooling costs are high, the savings can typically offset the cost of the fan and installation within 2 to 5 years. Actual results may vary based on your home’s size and attic conditions.
You talked about budgeting for an attic fan installation—about how much should I expect to spend on equipment and supplies if I want to do it myself, including any required safety gear or permits?
For a DIY attic fan installation, you can expect to spend between $100 and $400 for the attic fan itself, depending on size and features. Additional supplies like wiring, mounting hardware, and sealants can add another $30 to $70. Basic safety gear—such as gloves, eye protection, and a dust mask—typically costs $20 to $40. If your area requires a permit, this might range from $30 to $100. So, your total budget should be around $150 to $600.
You talk about how an attic fan can lower energy bills and make the HVAC system more efficient. Is there a general estimate for how much someone might save each year, and are there ways to calculate if the project will pay for itself over time?
Attic fans can typically reduce cooling costs by 10 to 30 percent, depending on your climate and how hot your attic gets. To estimate your savings, compare your current energy bills to projected bills after installation, factoring in the fan’s electricity use. Calculate the payback period by dividing the total installation cost by your estimated annual savings. This will show you how many years it takes for the fan to pay for itself.
The article says attic fan installation isn’t just a casual weekend project. For someone with only basic electrical experience, what are some of the main safety concerns I should be aware of before deciding whether to do this myself or call a professional?
Some important safety concerns include working with your home’s electrical wiring, which can pose shock or fire risks if not handled correctly. You’ll also need to access the attic, where heat, low clearance, and unstable footing can be hazardous. Cutting holes in your roof for venting carries the risk of damaging your roof structure or creating leaks. If you’re unsure about any step, especially with wiring or roof work, it’s safer to consult a licensed professional.
Once the attic fan is installed, are there recommended maintenance tasks or post-installation checks to ensure it continues to operate safely and effectively, especially when it comes to wiring and ventilation performance?
After installing your attic fan, it’s smart to check the wiring connections for any signs of wear or loose fittings every few months, especially after storms or heavy use. Also, keep the fan blades and vents clear of dust and debris for proper airflow. Test the fan periodically to confirm it switches on and off as intended, and check that attic vents are not blocked to maintain good ventilation.
I’m interested in the energy savings aspect you talked about. Do you have any rough estimates of how much I could actually save on my cooling bills each summer after installing an attic fan in a typical two-story house?
Attic fans can make a noticeable difference in cooling costs. For a typical two-story house, homeowners often report saving between 10% to 20% on their summer cooling bills after installing an attic fan. The exact savings depend on factors like your local climate, attic insulation, and how much you use air conditioning. In warmer regions or homes with poor attic ventilation, savings can be even higher.
In the section about types of attic fans, you mention both gable-mounted and roof-mounted options. How should I decide between these two styles for an older home that already has some ventilation, but not much attic access?
If your older home has limited attic access, a gable-mounted attic fan is usually easier to install since it can often be mounted from the outside, using existing gable vents. Roof-mounted fans may require working inside the attic and cutting into the roof, which is more complex if access is tight. Consider the current vent locations, ease of installation, and whether exterior or roof work is preferred for your situation.
You mentioned wiring and safety are important. For someone who’s never worked with attic electrical systems before, are there key safety tips or common mistakes to watch out for during installation?
Absolutely, safety is crucial when working with attic electrical systems. Be sure to turn off power at the breaker before starting any wiring. Use a voltage tester to double-check that wires aren’t live. It’s important to avoid running wires near insulation that could overheat them, and never connect new wires to old, damaged ones. If you’re ever unsure, it’s smart to consult a licensed electrician.
I’m a bit nervous about working with attic electrical systems as a first-timer. Does your guide cover how to safely handle the wiring for a new attic fan, or is it better to hire a professional just for that part?
Our guide does offer basic instructions and safety tips for wiring an attic fan, but if you’re new to electrical work or feel uncertain, it’s safest to hire a licensed electrician for the wiring part. Attic electrical systems can be tricky, and prioritizing safety is always best. You can handle the rest of the installation steps yourself if you feel comfortable.
My building is older and only has limited attic access. Since roof-mounted fans are recommended in those situations, are there any extra safety steps or installation challenges I should be aware of, especially if I’ll be working around older insulation?
When installing a roof-mounted fan in an older building with limited attic access, extra care is needed. Older insulation may contain asbestos or other hazardous materials, so wear proper protective gear and avoid disturbing it more than necessary. Make sure the roof structure can support the fan, and check for existing wiring or obstructions before cutting. If you’re unsure about the insulation type or structural integrity, it’s wise to consult a professional first.
I’m curious about the actual energy savings from installing a roof-mounted attic fan versus a gable-mounted one—does one offer significantly better cooling cost reductions, or is it more about the layout of the building?
The actual energy savings between roof-mounted and gable-mounted attic fans often depend more on your home’s layout and attic ventilation needs than the fan type itself. Roof-mounted fans tend to be more effective in attics with limited venting or complex shapes, potentially offering greater cooling cost reductions. However, if your attic is well-ventilated and has an ideal shape for airflow, a gable-mounted fan can perform just as well. Assessing your attic’s size, shape, and vent locations will help you choose the most efficient option for your situation.
Can you explain a bit more about what kind of budgeting is involved for a DIY attic fan install, especially for roof-mounted versus solar-powered fans? I’m trying to estimate both the upfront costs and potential energy savings before starting.
For a DIY attic fan install, a basic roof-mounted electric fan usually costs between $100 and $300, plus around $50–$150 for supplies like wiring, mounting brackets, and sealant. Solar-powered fans are pricier, typically $250 to $500, but they don’t increase your electricity bill. Energy savings vary, but you could save 10–30% on cooling costs in summer, with solar models offering better long-term savings despite higher upfront costs.
The guide talks about energy savings and reducing cooling costs. Do you have any ballpark figures or examples of how much homeowners can actually save on their bills after installing an attic fan?
Homeowners who install an attic fan typically see a reduction in cooling costs by about 10% to 30%, depending on the climate, attic insulation, and existing ventilation. For example, if your summer cooling bill averages $150 per month, you might save $15 to $45 monthly. Actual savings can vary, but many people notice their air conditioner runs less often after installation.
I’m considering a solar-powered attic fan to avoid dealing with electrical wiring, but I’m not sure if it moves as much air as an electric one. Has anyone noticed a drop in effectiveness with solar models during cloudy days or at night?
Solar-powered attic fans do depend on sunlight, so their output can decrease on cloudy days or at night when there’s no sun. This means they typically move less air compared to wired electric models during those times. If you live in an area with frequent cloud cover or need consistent ventilation, a wired fan may be more reliable, but solar fans are still a great low-maintenance option for many homes.
You mention that safety and compliance are crucial when working with attic wiring. Are there common mistakes DIYers should watch out for, especially in older homes with outdated electrical systems?
Absolutely, in older homes, DIYers often overlook things like brittle or frayed wiring, lack of proper grounding, and overloaded circuits. It’s also common to see mismatched wire sizes or outdated fuse boxes. Before starting, always shut off the main power, inspect all visible wiring, and consider consulting an electrician if anything seems questionable. Using the right connectors and respecting code requirements is key for both safety and compliance.
The guide mentions energy savings, but I couldn’t find much detail about typical cost breakdowns for a DIY attic fan install. What was your all-in budget when you took on this project, including materials and possible upgrade costs?
For a typical DIY attic fan installation, the budget usually ranges from $120 to $350. This includes the fan unit itself ($70–$200), wiring or extension cords ($20–$50), mounting hardware ($10–$30), and any sealant or weatherproofing materials ($10–$20). If you need to upgrade attic ventilation or add a thermostat, expect another $30–$80. Hiring an electrician for wiring, if needed, could add $100–$200. Costs can vary depending on your attic size and any pre-existing wiring.
You mentioned that attic fan installation isn’t just a casual weekend project. For someone who’s never worked in an attic before, what are the main safety risks I should watch out for, especially when it comes to wiring and ventilation?
When working in an attic, the biggest safety risks include accidentally stepping between joists and falling through the ceiling, encountering high temperatures or poor air quality, and dealing with electrical hazards. With wiring, always turn off power at the breaker before starting, and be cautious of exposed wires. For ventilation, watch out for dust and insulation—wear a mask and avoid blocking existing vents to ensure proper airflow.
I noticed the guide mentions both gable-mounted and roof-mounted attic fans. If my attic space is pretty tight and doesn’t have existing vents, would a roof-mounted fan be the better choice, or should I consider installing new gable vents?
If your attic is tight and lacks existing vents, a roof-mounted attic fan is often the more practical option since it doesn’t require adding gable vents. Roof-mounted fans can be installed directly through the roof, which saves space and improves airflow without needing sidewall access. Just make sure to follow proper sealing and flashing to prevent leaks.
When considering between gable-mounted and roof-mounted attic fans, are there specific situations or attic designs where one is clearly better than the other in terms of cooling efficiency or ease of DIY installation?
Gable-mounted attic fans work best if your attic already has gable vents, since installation is simpler and you avoid cutting through your roof. Roof-mounted fans are ideal when your attic lacks gable vents or has a complex shape, as they can be positioned for optimal airflow. For most DIYers, gable-mounted fans are easier to install if the structure allows.
The guide mentions that solar-powered attic fans eliminate the need for electrical wiring, but are there trade-offs in terms of airflow power or reliability compared to traditional electric fans, especially in areas with less sun? Would this impact energy savings in practice?
Solar-powered attic fans do have some trade-offs compared to traditional electric fans. They typically offer less airflow, especially on cloudy days or in shaded areas, since their performance depends on sunlight. This can mean reduced effectiveness in consistently ventilating your attic. While they offer energy savings by not using household electricity, lower airflow or reliability under less sun might limit those savings if your attic doesn’t stay as cool as with a wired electric fan.
For someone on a tight budget, do you have tips for sourcing quality attic fans and materials without compromising on safety or energy efficiency? Are there certain brands or features that offer the best value for DIY installations?
To save money without sacrificing quality or safety, consider shopping at home improvement stores during seasonal sales or checking local hardware outlets for open-box or clearance attic fans. Look for reputable brands like Broan, QuietCool, or Air Vent, which offer good energy efficiency at reasonable prices. Prioritize models with thermal protection, UL certification, and built-in thermostats. For materials, buying in bulk or multi-packs can lower per-item costs. Always double-check reviews to ensure reliability before purchasing.
I noticed you mentioned solar-powered attic fans as an option. For those, is there a significant difference in airflow or performance compared to traditional electric fans, particularly during peak summer months in hotter US climates?
Solar-powered attic fans can vary in performance depending on sunlight availability. In hot, sunny climates, they often work efficiently during peak daylight hours, but their airflow might be lower than similarly sized electric fans, especially if clouds reduce solar input. Traditional electric fans provide consistent airflow regardless of weather but use more energy. For maximum performance during the hottest months, electric models may move more air, but solar fans offer energy savings and easier installation.
I see there are gable-mounted, roof-mounted, and solar-powered fans. If my attic has both gable vents and decent roof access, how do I decide which type is most efficient and cost-effective for a two-story house in a humid climate?
For a humid climate and a two-story house, roof-mounted fans typically offer the best ventilation because they exhaust hot, moist air directly upward. However, if you already have gable vents, a gable-mounted fan can be easier and less costly to install. Solar-powered fans can help reduce energy bills but may be less powerful on cloudy days. Consider your budget, local sun exposure, and how much airflow each model provides before deciding.
If my attic already has some ventilation and insulation, is there a risk of reducing energy efficiency or causing moisture issues by adding a whole-house fan, or are there steps I should take to ensure everything works together properly?
Adding a whole-house fan can boost ventilation, but it’s important to balance airflow to avoid energy loss or moisture problems. Make sure your attic has enough vent space to handle the increased airflow, and check that insulation isn’t blocking vents. Sealing any gaps between your attic and living spaces will help prevent unwanted air exchange. If you’re unsure, consulting a professional can help you get the best efficiency and avoid moisture issues.
Can you clarify the differences in energy savings between solar-powered attic fans and traditional electrically wired fans? I’m interested in maximizing efficiency but want to know if the solar option is worth the initial investment for a small business building.
Solar-powered attic fans can provide energy savings by using free solar energy rather than drawing electricity from your grid, which can noticeably reduce your utility bills over time. While solar models have a higher upfront cost compared to traditional wired fans, they require little to no ongoing operating cost. For a small business, the investment can pay off if your building gets plenty of sunlight and you want to minimize monthly expenses. However, electric fans may perform more consistently regardless of sun exposure. Consider your local climate, roof orientation, and budget to decide which option delivers better long-term value for your situation.
Could you clarify how attic insulation is affected when installing a roof-mounted fan? I’m concerned about maintaining the effectiveness of my existing insulation and avoiding any moisture issues that might come up after the installation.
When installing a roof-mounted attic fan, it’s important to ensure the fan and any new ductwork don’t compress or disturb your existing insulation, as that can reduce its effectiveness. Take care to seal around the fan’s opening to prevent air leaks and moisture intrusion. Proper venting is key—make sure intake vents are adequate so the fan doesn’t create negative pressure, which could pull conditioned air from your living space or draw moisture into the attic. Regularly check for condensation or mold after installation to catch any issues early.
You mention that DIY attic fan installation isn’t just a casual weekend project. For someone with basic electrical skills but limited time, about how long should I realistically expect this project to take from start to finish, including planning and cleanup?
If you have basic electrical skills, you should budget around 6 to 8 hours for the entire attic fan installation project. This includes time for planning, gathering materials, installing the fan, wiring, testing, and thorough cleanup. If your attic is easily accessible and you run into no major surprises, you might finish a bit sooner, but setting aside a full day is a safe estimate.
You mentioned that installing an attic fan involves working with electrical systems. Are there specific safety precautions or local code requirements I should be aware of before starting the wiring part of the installation?
Before wiring your attic fan, always shut off power at the breaker to avoid shocks. Use a voltage tester to confirm power is off. Local codes may require using specific wire gauges, conduit types, or junction boxes, and some areas mandate permits or inspections for electrical work. Check your city or county building department for requirements, and if you’re unsure, consider hiring a licensed electrician to ensure everything is safe and up to code.
I noticed you discussed different types of attic fans, like gable-mounted and roof-mounted versions. Is one type noticeably more efficient or easier to maintain than the others for homes located in humid climates?
For homes in humid climates, gable-mounted fans are often easier to maintain since they’re typically installed on the attic wall and are more accessible for cleaning or repairs. In terms of efficiency, both gable-mounted and roof-mounted fans can work well, but it’s important to ensure good attic ventilation overall to prevent moisture buildup. Choosing the right size and ensuring proper installation matters more than the type for efficiency in humid areas.
You mention that this isn’t really a casual weekend project, especially because of the electrical work involved. For someone with zero experience in wiring, is it better to call in an electrician for just that part, or are there reliable step-by-step resources for safe DIY electrical hookups?
If you have no experience with electrical wiring, it’s much safer to hire an electrician for the wiring part of the attic fan installation. Electrical work can be risky without proper knowledge, and mistakes could lead to hazards or code violations. While there are step-by-step guides available, they often assume some basic familiarity with home wiring. For peace of mind and safety, professional help is recommended for the electrical portion.
When planning a DIY attic fan installation, what’s the most common electrical challenge homeowners encounter, and are there specific precautions I should take if my attic already has some older wiring?
One of the most common electrical challenges is dealing with outdated or insufficient wiring that might not safely support the new attic fan’s power needs. If your attic has older wiring, be extra cautious: check for frayed insulation, exposed wires, and confirm the circuit can handle the load. Always turn off the power at the breaker before working, and consider consulting an electrician if you’re unsure about your wiring’s safety.
You brought up safety and compliance when working with attic electrical systems. Are there any specific local codes or common mistakes that business owners should be aware of before attempting a DIY attic fan installation?
Business owners should always check their local building codes, as requirements for electrical work in attics can vary by area. A common mistake is not securing the needed permits or failing to use proper wiring rated for attic temperatures. Also, improper grounding and not following manufacturer instructions are frequent issues. Consulting with a licensed electrician is highly recommended to ensure compliance and safety.
I’m comfortable with most DIY projects, but I’m a bit concerned about handling the electrical work for an attic fan installation safely. Are there specific safety measures or checks you recommend before and after wiring the fan to make sure everything is compliant and hazard-free?
It’s wise to be cautious with electrical work. Before wiring, turn off the circuit breaker and use a voltage tester to confirm the power is off. Use properly rated wire and connectors, and ensure all connections are tight and protected in a junction box. After wiring, double-check that there are no exposed wires and that the grounding is secure. Once power is restored, test the fan for correct operation and listen for unusual noises. If local codes require, consider having a licensed electrician inspect your work to ensure compliance and safety.
I noticed you mentioned solar-powered attic fans as an option. For someone in a region with frequent cloudy days, do these still perform well enough to justify skipping the electrical wiring part?
Solar-powered attic fans can still operate on cloudy days, but their performance will depend on the amount of available sunlight. On consistently overcast days, the fan may run at reduced efficiency or intermittently. If you experience frequent or extended periods of cloud cover, you might not get the full ventilation benefits, so connecting an electric model to your home’s wiring—or choosing a hybrid fan—could provide more reliable attic ventilation.
When budgeting for a project like this, are there any hidden costs to look out for besides the obvious fan and basic wiring materials? I’m wondering if things like permitting fees or unexpected attic repairs might come up.
Absolutely, it’s smart to budget for more than just the fan and wiring. Permitting fees can definitely be required in some areas, so check with your local building office. Also, you might discover issues like damaged insulation, outdated wiring, or venting problems once you get into the attic. Setting aside a contingency fund for these surprises will help you avoid delays or extra stress.
If my attic already has gable vents but the space gets really hot in the summer, would adding a gable-mounted fan be enough, or should I consider a roof-mounted option for better ventilation?
If your attic stays hot despite existing gable vents, a gable-mounted fan can help boost airflow and improve cooling, especially if installed near an existing vent. However, if your attic is large or airflow remains poor, a roof-mounted fan may provide more effective ventilation by pulling hot air directly upwards and out. Consider the size of your attic, insulation, and current airflow when deciding. In some cases, combining both options yields the best results.
You mention solar-powered fans as an option. How do their upfront costs and reliability stack up against traditional electric attic fans in regions with frequent cloud cover? I’m trying to figure out if the long-term energy savings really offset the initial investment.
Solar-powered attic fans usually have higher upfront costs than traditional electric fans, mainly due to the solar panel and controller. In areas with frequent cloud cover, their effectiveness can drop, especially during less sunny periods, which may impact attic ventilation and energy savings. While they do cut energy costs over time, the payback period can be longer in cloudy regions. If your area doesn’t get consistent sunlight, the long-term savings might not fully offset the initial investment compared to a high-efficiency electric fan.
If my building already has a gable vent, would you recommend a gable-mounted fan over a roof-mounted one? Or are there situations where a roof-mounted fan still makes more sense despite existing vents?
If your building already has a gable vent, a gable-mounted fan is often simpler to install and uses the existing opening. However, a roof-mounted fan could be better if your attic has uneven airflow, is very large, or the gable vent location doesn’t effectively exhaust hot air. Roof-mounted fans can sometimes provide more even ventilation across the attic, especially in complex roof layouts.
You mentioned solar-powered attic fans as an option to save on energy costs. Do these typically cost a lot more up front compared to electric models, and is the energy savings significant enough to justify the extra investment for an average-sized attic?
Solar-powered attic fans do usually cost more upfront than traditional electric models—often $100 to $300 higher depending on size and quality. However, since they run on solar energy, you won’t see any additional increase in your utility bills, which can result in long-term savings. For an average-sized attic, the payback period depends on your climate and attic ventilation needs, but many homeowners find the energy savings and low maintenance make it worthwhile over several years.
The article mentions the importance of proper ventilation during attic fan installation. Could you clarify how to determine if my attic has sufficient existing vents, or if I might need to add extra ventilation when installing a roof-mounted fan?
To check if your attic has enough ventilation for a new roof-mounted fan, calculate your attic’s square footage and make sure you have at least one square foot of vent area (intake and exhaust combined) for every 300 square feet of attic space. Look for existing soffit, gable, or ridge vents. If the total vent area falls short of this guideline, you should add additional vents to ensure proper airflow and prevent negative pressure issues.
In the guide, you mention that solar-powered attic fans can eliminate the need for electrical wiring. For homes in climates with a lot of cloudy days or shade over the roof, how reliable are these solar fans compared to traditional gable- or roof-mounted models?
Solar-powered attic fans rely on direct sunlight, so in areas with frequent cloud cover or significant roof shade, their performance can drop, especially on overcast days. In those conditions, traditional electrically wired fans provide more consistent ventilation since they’re not dependent on weather. If your attic needs reliable airflow year-round and your roof doesn’t get much sun, a wired model or a hybrid solar/electric fan might be a better option.
Once the attic fan is installed, how do I know if it’s actually helping to lower my cooling costs or improving ventilation? Are there any specific signs or checks I should do after the installation to make sure everything is working correctly?
To check if your attic fan is effective, monitor your home’s indoor temperature and notice if your air conditioning runs less often. You can also check the attic temperature during hot days; it should be noticeably cooler than before. Good ventilation is indicated by reduced humidity and musty smells in the attic. Additionally, listen for the fan running during warm periods and visually inspect that the shutters or vents open when the fan is on.
About budgeting, do you have any tips on what unexpected costs I should plan for besides just the price of the fan itself? I want to avoid being caught off guard, especially if tools or permits are needed.
Absolutely, it’s smart to plan ahead. Beyond the fan cost, you might need to budget for electrical wiring, insulation repairs, or extra roofing materials if you run into issues cutting a vent. Specialized tools like a jigsaw or reciprocating saw can add to expenses if you don’t already have them. Also, check with your local building department—some areas require permits for attic fan installation, which can involve fees. Setting aside a little extra for these possibilities can help you avoid surprises.
What is a realistic budget range to expect for a DIY attic fan installation, taking into account possible wiring upgrades or hiring an electrician for certain steps? I want to make sure the total cost doesn’t end up higher than just hiring a professional from the start.
For a DIY attic fan installation, expect materials (fan, possible mounting hardware, and basic supplies) to run between $100 and $400. If you need to upgrade wiring or hire an electrician for electrical work, add $150 to $400 depending on complexity and local rates. Altogether, a realistic budget is $250 to $800. Professional installation often ranges from $400 to $1,200, so DIY can save money, but unexpected electrical needs can narrow the gap.
You mention both solar-powered and traditional electrically wired attic fans. Are there noticeable differences in cooling performance or long-term maintenance requirements between these two types, especially for homes in hotter climates?
Solar-powered attic fans generally have lower airflow ratings than traditional wired fans, so electrically wired models often provide stronger cooling, which can be advantageous in hotter climates. However, solar fans have fewer electrical components and no need for wiring, so they’re typically easier and cheaper to maintain over time. If your attic gets very hot, a wired fan may cool more effectively, but it will use more energy and require routine electrical checks.
I own a small retail shop and our attic space gets extremely hot in the summer, which drives up our cooling bills. For a commercial property like mine, is a gable-mounted or roof-mounted attic fan generally more effective, and are there noise considerations I should be aware of?
For a small retail shop, a roof-mounted attic fan usually provides better overall ventilation since it draws hot air directly up and out, which can be more effective for commercial spaces with larger or irregular attics. However, roof-mounted fans sometimes transmit more noise indoors, especially if installed close to occupied areas. Gable-mounted fans are generally quieter but depend on having suitable gable vents and may be less effective for large or complex attic spaces. Consider fan specifications and check for models labeled as ‘quiet’ or ‘commercial grade’ to minimize noise disturbance.
When considering a roof-mounted attic fan versus a gable-mounted one, what specific factors should influence my choice if my attic has both types of vents and I am mainly focused on maximizing summer energy savings?
If maximizing summer energy savings is your priority, consider your attic’s airflow. Roof-mounted fans generally vent hotter air directly out through the roof, making them more efficient at quickly removing heat. Gable-mounted fans use existing side vents and can be easier to install if wiring is accessible. Also, check your attic’s size, vent placement, and the condition of your roof versus gable walls. For best results, choose the location that enables the strongest airflow path without short-circuiting intake vents, ensuring effective ventilation throughout the attic space.
You mentioned roof-mounted and gable-mounted fans as two main types. If my home has both a gable vent and decent attic space, is one option generally more cost-effective or better for long-term energy savings, or does it depend on something else?
Choosing between a roof-mounted or gable-mounted attic fan often depends on your attic’s layout, roof pitch, and existing ventilation. Gable-mounted fans are usually easier and less expensive to install if you already have a gable vent. Roof-mounted fans may offer more direct airflow in some situations but can cost more to install. For most homes with a gable vent and adequate attic space, a gable-mounted fan is typically more cost-effective without sacrificing long-term energy savings.
Is there a recommended way to make sure I’m staying compliant with local electrical codes when wiring the attic fan myself, or should I have an electrician check my work before I finish the installation?
It’s always wise to check your local building codes before starting any electrical work, as requirements can vary widely. Many areas require permits or inspections for new wiring. If you’re not experienced with electrical installations, having a licensed electrician review your work or handle the wiring can provide peace of mind and ensure everything is up to code and safe.
I see you mention both gable-mounted and roof-mounted fans, but are there any notable differences in energy savings or overall performance between the two types if my house already has both vent options available?
Both gable-mounted and roof-mounted fans can offer similar energy savings if installed properly, since both effectively remove hot air from the attic. However, roof-mounted fans are usually positioned closer to the attic’s hottest point, which can make them slightly more efficient at exhausting heat. If your attic layout and vent placement allow for either type, the difference in performance is generally minor, so you can choose based on ease of installation and aesthetics.
Can you share some tips on accurately estimating the energy savings from a solar-powered attic fan versus a traditional electric model? I’m trying to justify the upfront investment for my shop and would like a realistic payback calculation.
To estimate energy savings, compare the wattage and daily run time of both fan types. For a traditional electric fan, multiply its wattage by average hours of use and your electricity rate to get monthly costs. A solar attic fan uses no electricity, so its cost is typically zero. The payback time is your upfront solar fan cost divided by your estimated annual savings from lower electricity bills. Factor in your local sun exposure and any seasonal differences for the most accurate estimate.
The article mentions that proper ventilation is essential for attic fan effectiveness. How can I determine if my attic currently has enough existing venting, or if I need to add additional vents before installing a fan?
To check if your attic has enough venting, calculate the total square footage of your attic floor, then make sure you have at least 1 square foot of vent area for every 150 to 300 square feet of attic space (the exact ratio may depend on whether a vapor barrier is present). Look for a good balance between intake vents (like soffit or eave vents) and exhaust vents (like ridge or gable vents). If your attic feels stuffy, overly hot, or you notice moisture buildup, you may need more vents before installing an attic fan.
When it comes to wiring the attic fan myself, how do I make sure everything is up to code and safe? Is this something a DIYer can handle with basic electrical skills, or is it safer to hire a professional electrician for that step?
Wiring an attic fan involves working with your home’s electrical system, which can be risky if you’re unsure about local codes or safe practices. If you have basic electrical skills and can confidently follow local regulations and safety protocols, you might handle the wiring yourself. However, if you’re at all uncertain or your area requires a permit, hiring a licensed electrician is the safest option to ensure everything is up to code and properly installed.
I’m feeling a little overwhelmed about working with electrical systems for my first attic fan installation. Does the guide explain what kind of permits or inspections might be needed if I decide to wire a roof-mounted fan myself, or should I definitely call in an electrician for that part?
The guide highlights important safety considerations for electrical work, but it doesn’t go into detail about permits or inspections. Electrical codes can vary a lot depending on your location—some areas require a permit and inspection for attic fan installation, especially if you’re wiring it yourself. If you’re unsure or not experienced with electrical systems, it’s usually safer to hire a licensed electrician for that part.
Regarding budgeting for a DIY attic fan project, what hidden costs should I keep in mind besides the price of the fan itself, like electrical permits or safety gear?
When budgeting for your attic fan project, consider costs like electrical permits, which can vary by location. You might also need safety gear such as gloves, goggles, and a dust mask. Factor in wiring, mounting hardware, sealant, and possibly hiring an electrician if your home’s wiring is complex. Unexpected expenses could include patching roof shingles or buying extra tools.
You mentioned that attic fan installation involves electrical work. How challenging is the wiring part for someone who has only basic experience with home electrical projects, and are there any specific safety precautions or codes I should pay attention to?
The wiring part of attic fan installation can be moderately challenging for someone with only basic electrical experience. You’ll need to safely connect the fan to your home’s electrical system, often at a junction box or dedicated circuit. Always turn off the power at the breaker before starting. Use a voltage tester to double-check wires are not live. Be sure to follow local building codes, which may require using specific wire gauges and conduit, and sometimes a permit. If you feel unsure, consider consulting a licensed electrician for safety.
When choosing between a gable-mounted fan and a roof-mounted fan, how do you determine which option is best for your particular attic configuration and ventilation needs?
To decide between a gable-mounted and a roof-mounted attic fan, first check your attic’s structure. Gable-mounted fans work well if your attic has existing gable vents and clear wall space. Roof-mounted fans are ideal for attics without gable ends or when roof space is more accessible. Also, consider your attic’s size, current ventilation, and local climate. Proper sizing and placement are key for effective ventilation.
When installing a roof-mounted attic fan as a DIY project, how do you recommend weatherproofing the installation area to prevent leaks, especially in regions with heavy rain or snow? Are there particular flashing or sealant materials that work best for this application?
To weatherproof a roof-mounted attic fan, use a high-quality metal flashing kit designed for attic fans, as it creates the most reliable seal around the base. Apply roofing-grade butyl or polyurethane sealant under the flashing and along all fasteners. Make sure the flashing tucks under the upper course of shingles. For regions with heavy rain or snow, double-check all edges and seams to ensure full coverage and prevent leaks.
If my attic has some moisture issues but also gets really hot in the summer, should I be looking at a roof-mounted fan or a gable-mounted one? Are there situations where one is clearly better for ventilation and protecting the roof structure?
If your attic has moisture issues and gets very hot, both roof-mounted and gable-mounted fans can help, but a roof-mounted fan is typically more effective at quickly exhausting hot, moist air because it is installed near the roof peak, where heat and moisture naturally rise. Gable fans work well if your attic already has good venting along the roof ridge and soffits. For persistent moisture or if your attic has limited venting, a roof-mounted fan may offer better protection for the roof structure and insulation.
For a homeowner who is new to electrical work, how challenging is it to safely wire a roof-mounted attic fan, and are there specific safety certifications or permits needed before starting this kind of project?
Wiring a roof-mounted attic fan can be quite challenging for someone new to electrical work, mainly because it involves working with household wiring and possibly your circuit breaker. For safety, it’s important to turn off the power at the breaker and follow all manufacturer instructions. Many areas require a permit for electrical work, and hiring a licensed electrician may be mandatory or highly recommended. Always check your local building codes and ensure your installation meets the National Electrical Code standards.
If I want to install a gable-mounted fan, do I need to modify the existing vent or completely replace it, and how do I make sure the setup still provides enough ventilation for my attic after installation?
For a gable-mounted fan, you’ll often need to enlarge or modify the existing vent opening to fit the fan properly, but you don’t always have to completely replace the vent. Make sure the vent area matches the fan size, and check that you have enough intake vents (like soffit vents) to allow fresh air in. Proper balance between intake and exhaust vents is key to maintaining effective attic ventilation.
If I want to use a solar-powered attic fan to avoid running new electrical lines, do I still need to do any wiring inside the attic, or is it mostly just mounting and positioning the solar panel on the roof?
With a solar-powered attic fan, most of the work involves mounting the fan and positioning the solar panel on the roof for optimal sunlight. Typically, no interior attic wiring is required, as the solar panel directly powers the fan. You’ll just connect the panel to the fan with the included cord, keeping the installation simple and avoiding new electrical lines.
The article says attic fan installation can help extend the life of roofing materials. Could you clarify how the fan’s ventilation process actually prevents excess heat and moisture, and what happens if the fan is sized too small for the space?
Attic fans work by pulling hot, humid air out of your attic and replacing it with cooler outside air. This process helps prevent heat buildup and moisture accumulation, both of which can damage roofing materials over time by causing warping or mold. If the fan is too small for your attic, it won’t ventilate effectively, allowing heat and moisture to linger and potentially reducing the lifespan of your roof.
You mention that attic fan installation involves working with electrical systems and ensuring safety. Could you elaborate on what specific safety precautions a DIYer should take during wiring to stay compliant with US building codes?
When wiring an attic fan, always turn off power at the breaker before starting any work. Use a voltage tester to confirm the wires are not live. Ensure all wiring connections are made inside approved electrical boxes and use wire nuts or approved connectors. Ground the fan properly and follow the manufacturer’s instructions closely. Use only UL-listed components and follow the local code for wire gauge and circuit capacity. If you’re unsure, it’s safest to consult a licensed electrician.
For DIY attic fan installation, how do you determine if your attic has enough existing ventilation, or do you sometimes need to add more vents before installing the fan? I’m trying to figure out what’s considered ‘proper ventilation’ to avoid negative pressure issues.
To ensure proper attic ventilation before installing a fan, check that you have enough intake (soffit) vents and exhaust vents to match the fan’s airflow rating. A common guideline is 1 square foot of vent area per 300 square feet of attic space, split between intake and exhaust. If you don’t have enough, you should add more vents to prevent negative pressure that could pull air from your living spaces or cause moisture problems.
When budgeting for this project, are there any surprising costs beyond the fan and basic supplies I should expect, like electrical permits or extra insulation? It would be helpful to know what often catches DIYers off guard.
Some costs that often surprise DIYers include the need for an electrical permit, which some localities require for installing a fan. You might also need extra wiring or a junction box if your attic isn’t already set up for it. Additional insulation or weatherproofing around the fan is sometimes needed to prevent air leaks. Also, factor in possible roof repairs if shingles or flashing are disturbed during installation.
I’m curious about budgeting for a DIY attic fan project. Could you give an idea of what typical costs are for each type of attic fan, including any extra materials or safety equipment I might not be thinking about?
For budgeting, basic electric attic fans usually cost $70–$150, while solar models are pricier at $200–$400. You’ll also need wiring or mounting hardware ($20–$50), vent covers or flashing ($15–$40), and possibly extra lumber for framing. Safety equipment like gloves, dust masks, and eye protection can add $15–$30. If your attic lacks an electrical outlet, factor in the cost of hiring an electrician. Always check if your roof or attic needs repairs before installation, as that can impact your total costs.
Could you elaborate on the safety concerns related to the electrical wiring part of a DIY attic fan installation? I’m comfortable with basic DIY projects, but I’m a little worried about code compliance and whether permits are usually required for this type of home upgrade in the US.
Working with electrical wiring for an attic fan does require caution. Always shut off power at the breaker before starting. In the US, most areas require that attic fan wiring complies with the National Electrical Code, which covers things like wire gauge and proper junction boxes. Permits are often required for new electrical circuits, and inspections may be needed. It’s a good idea to check with your local building department before starting to ensure you meet all code and permit requirements for your area.
For the attic fan installation process you describe, how do you recommend handling electrical connections if the attic has limited access and no nearby outlets? Is running a new circuit typical for this kind of project, or are there safer alternatives?
If your attic lacks nearby outlets and access is limited, running a new dedicated circuit is common for attic fan installation. This ensures both safety and sufficient power. However, wiring in tight spaces can be tricky and potentially hazardous. If you’re not experienced with electrical work, hiring a licensed electrician is the safest option. They can assess the best route for new wiring or suggest alternatives such as hardwiring to an existing circuit if it’s safe and up to code.
When installing a roof-mounted attic fan, are there any specific concerns or steps for ensuring that the roof remains watertight afterward? I want to avoid any future leaks but I haven’t handled roofing projects before.
Maintaining a watertight roof is crucial when installing a roof-mounted attic fan. Be sure to use high-quality flashing around the fan base, and apply roofing sealant under the flashing and over nail heads. Carefully lift shingles as needed, install the flashing so water flows over it (not under), and press the shingles back in place. Take your time to reseal any disrupted shingles or seams. If you’re unsure, hiring a roofer for this step helps prevent leaks.
You mentioned energy savings and extending the roof’s lifespan as benefits. Do you have any guidelines for budgeting the entire project, including possible unexpected costs like electrical upgrades or new vents, so I can avoid surprises?
To budget your attic fan installation, start with the fan’s purchase and basic materials, then add costs for vents if your attic needs more airflow. Plan for professional electrical work if new wiring or circuit upgrades are needed, which can add to the total. Set aside an extra 15–20% as a buffer for surprises like structural repairs or unexpected code requirements. Getting a few quotes from contractors can also help clarify your budget.
I’ve got a pretty old house with limited attic access, so I’m leaning toward a roof-mounted fan, as you mention. Do you have any tips for sealing around the roof cutout to prevent future leaks, especially in regions with heavy rain or snow?
For a roof-mounted attic fan, it’s important to use high-quality roofing sealant or flashing designed for your roof type. Apply flashing under the shingles, ensuring it overlaps at the top and sides, and generously seal all edges, screw holes, and seams. Consider using a waterproof membrane for added protection. Double-check everything before reinstalling shingles, and inspect the area annually to catch any wear, especially after harsh weather.
When considering a solar-powered attic fan, are there specific roof orientations or sun exposure requirements that homeowners should keep in mind to maximize efficiency, especially in regions that experience cloudy weather or varying seasons?
Yes, solar-powered attic fans work best when installed on a south-facing roof with minimal shade, as this maximizes sun exposure throughout the day. In regions with frequent clouds or changing seasons, ensuring the fan is placed where it gets the most direct sunlight is especially important. You might also consider models with larger solar panels or those that support hybrid power options for better performance during cloudy periods.
When planning for DIY attic fan installation, what would you recommend as a realistic budget range, factoring in tools, materials, and potential surprises like needing extra ventilation or electrical updates?
For a DIY attic fan installation, it’s wise to budget between $200 and $600. This estimate includes the fan itself (usually $75–$300), basic materials, and any new wiring or venting. If you need extra tools or encounter electrical or ventilation updates, allow for an extra $100–$200. Planning for these surprises helps prevent costly delays.
For a first-time DIYer, what are some specific safety precautions I should take when wiring an attic fan, especially if my attic is tightly insulated? The article mentions safety and electrical work, so I want to be certain I’m not overlooking something crucial.
If you’re new to wiring, be sure to turn off power at the circuit breaker before starting any work. Wear insulated gloves and use tools with insulated handles. In a tightly insulated attic, ensure there’s good ventilation to prevent overheating and never work alone—let someone know you’re up there. Avoid standing on joists alone to prevent falls, and keep insulation clear from electrical connections to prevent fire risks. If you’re ever unsure, it’s safest to consult a licensed electrician.
I have a pretty small attic with limited access, so I’m trying to decide between a roof-mounted and a gable-mounted fan. The article mentions both, but is one type generally easier for a first-timer to install, especially when it comes to the wiring part?
For smaller attics with limited access, a gable-mounted fan is usually easier for a first-timer to install. Gable fans are typically installed from inside the attic, so you don’t need to work on the roof. Wiring is often simpler as well, since you can run wires along interior walls rather than dealing with exterior roof penetrations. This can make the installation process safer and less complicated overall.
If my house already has a whole-house fan, would it still make sense to add a roof-mounted attic fan for extra ventilation, or could that end up causing airflow issues or working against the existing system?
If you already have a whole-house fan, adding a roof-mounted attic fan can sometimes interfere with airflow, as the two systems may compete for air. This could reduce the efficiency of both fans. It’s usually best to use one system tailored to your needs, unless a professional determines that your attic still lacks sufficient ventilation. Consulting an HVAC expert can help you decide if both systems would work well together in your situation.
I’m debating between installing a gable-mounted fan versus a roof-mounted one since my house has both vent types available. Are there big differences in energy savings or installation complexity between the two options that I should consider?
Both gable-mounted and roof-mounted attic fans can be effective, but there are some differences to keep in mind. Gable-mounted fans are often easier to install if you already have a suitable gable vent, as they typically require less roof work and fewer weatherproofing steps. Roof-mounted fans usually involve cutting into the roof and sealing the area against leaks, making installation a bit more complex. In terms of energy savings, both types are similar as long as they’re properly sized and installed for your attic space. Ultimately, your choice may come down to which installation process you’re more comfortable with.
When installing a roof-mounted attic fan, what should I watch out for to make sure I do not accidentally damage my shingles or roof structure during the process? Are there specific safety steps you recommend?
When installing a roof-mounted attic fan, take care when cutting through shingles—use a sharp utility knife and cut only what’s necessary to minimize shingle damage. Avoid prying or pulling shingles up forcefully. Ensure you don’t cut into rafters or other structural elements by locating and marking them beforehand. For safety, always use fall protection like a harness, work on dry days, and wear non-slip shoes. It’s also a good idea to have someone else nearby in case you need assistance.
For homes in areas with very humid summers, do you recommend attic fans with built-in humidistats or is a basic model enough? Also, how do I ensure that I’m not accidentally drawing conditioned air out of the living space instead of just venting attic heat?
In regions with very humid summers, an attic fan with a built-in humidistat is a good choice. It helps prevent excess moisture buildup, which protects against mold and wood damage. To avoid pulling conditioned air from your living areas, make sure your attic is well-sealed from the rest of the house and that attic vents (like soffit or ridge vents) supply enough outside air when the fan runs.
The article mentions that attic fan installation involves working with electrical systems. For someone with limited electrical experience, what precautions or preparatory steps would you recommend to ensure safety and compliance with local codes?
If you’re new to electrical work, start by turning off power at the breaker before handling any wiring. Use a voltage tester to double-check that wires are not live. Wear insulated gloves and use tools with rubber grips. It’s also important to read your local electrical codes or consult your municipality, as permits may be required. If any part feels unclear or unsafe, hiring a licensed electrician is the best way to ensure the installation meets safety and code requirements.
When it comes to installing a roof-mounted attic fan, is there a recommended way to ensure you’re not accidentally compromising the roof’s water barrier or risking leaks? I’m comfortable with standard DIY tasks but haven’t tackled anything on the roof before.
To avoid compromising your roof’s water barrier, always use flashing specifically designed for attic fans and carefully follow the manufacturer’s instructions. Cut the roof opening precisely, remove only as many shingles as needed, and apply roofing sealant under the flashing and around screws. Take your time to properly seat the flashing under the top row of shingles, which helps direct water away from the opening and minimizes leak risks.
If my attic already has decent insulation but stays hot in the summer, would adding a gable-mounted fan make a noticeable difference in temperature, or should I consider other ventilation upgrades as well?
A gable-mounted fan can help reduce attic temperatures by actively pulling hot air out, especially if your current insulation isn’t enough to keep things cool. However, for best results, ensure your attic also has proper intake vents, like soffit vents, to let cooler air in. Combining a fan with balanced intake and exhaust ventilation often provides the most noticeable improvement.
When it comes to budgeting for this DIY project, what are the major costs to think about besides the fan itself? Should I plan for any unexpected expenses, like additional wiring or ventilation adjustments, that might catch a first-timer off guard?
Besides the cost of the attic fan itself, you’ll want to budget for electrical supplies such as wiring, a circuit breaker, and possibly a junction box. You might also need tools like a saw or drill if you don’t have them already. Unexpected expenses can include hiring an electrician if your wiring isn’t up to code, or buying extra materials if you discover your attic needs better ventilation or sealing. It’s smart to set aside a little extra in your budget just in case.
I’m interested in the energy savings part—about how much can I realistically expect to save on my cooling bills during the summer if I install a solar-powered attic fan?
With a solar-powered attic fan, you can generally expect to save between 10% and 15% on your summer cooling bills, though the exact amount depends on your home’s insulation, attic size, and local climate. The fan helps remove hot air, making your AC work less and keeping living spaces cooler. Since it’s solar-powered, the fan runs without adding to your electricity costs.
After installing an attic fan, are there any recommended maintenance routines or checks that should be done to make sure it keeps working efficiently and safely? For instance, how often should fans be inspected or cleaned, and what are common signs of trouble to watch out for?
It’s important to inspect and clean your attic fan at least once or twice a year, ideally before and after the hottest months. Check for dust buildup, loose wiring, and any unusual noises or vibrations. Make sure the fan blades spin freely and the vent is clear of debris. Common signs of trouble include reduced airflow, squeaking or grinding sounds, and the motor overheating. Regular maintenance will help your fan stay efficient and safe.
How much should I budget for a typical DIY attic fan project, including all the materials and any special tools I might need? I want to avoid unexpected costs or trips to the hardware store halfway through.
For a typical DIY attic fan project, you should budget around $150 to $350. This covers the attic fan itself ($70-$200), wiring and electrical supplies ($30-$60), a roof or gable vent ($20-$50), and weatherproof sealant ($10-$20). You may also need special tools like a hole saw or reciprocating saw, which can be rented for about $10-$20 if you don’t already own them. Don’t forget basic safety gear like gloves and goggles. Planning ahead with a complete supply list helps minimize those last-minute hardware store runs.
For a busy household, how much time should I realistically expect this attic fan installation project to take from start to finish, especially factoring in planning and any unexpected issues?
For a busy household, you should set aside a full day for the attic fan installation, typically 6 to 8 hours. This includes time for planning, gathering materials, and possible surprises like electrical adjustments or tricky roof access. If you run into unexpected issues, it could extend into a second day, so it’s wise to plan for some flexibility.
You mention budgeting as part of the planning process for attic fan installation. Could you give an estimated range for the total cost of parts and materials for a typical gable-mounted vs. roof-mounted attic fan, especially for a smaller property?
For a smaller property, you can expect the total cost of parts and materials for a gable-mounted attic fan to range from about $100 to $250. Roof-mounted attic fans typically cost a bit more, usually between $150 and $350. These estimates include the fan unit itself, mounting hardware, wiring, and any needed venting materials. Prices may vary depending on brand and specific features.
The article mentioned that attic fan installation isn’t just a casual weekend project and involves working with electrical systems. For someone who’s never done any wiring before, how much electrical knowledge do I need to safely handle the installation, or should I definitely hire an electrician for that part?
Attic fan installation does require working with your home’s electrical wiring, which can be risky without experience. If you’ve never done any wiring before, it’s safest to hire a licensed electrician for that part. This helps prevent mistakes that could lead to electrical hazards or void warranties, while still letting you handle other aspects like mounting and venting if you’re comfortable.
I noticed the guide mentions both gable-mounted and roof-mounted attic fans. Is there any significant difference in installation difficulty or long-term maintenance between the two types that a DIYer should consider before starting the project?
Gable-mounted attic fans are usually easier for DIYers to install because they fit into existing gable vents, so you often won’t need to cut new holes in your roof. Roof-mounted fans require cutting into the roof, sealing properly, and working at a steeper angle, which can be more challenging. For long-term maintenance, roof-mounted fans may need more frequent checks for leaks or weather damage, while gable-mounted fans are generally easier to access and service.
When planning a DIY attic fan installation, could you clarify what basic electrical knowledge or certifications are necessary for safety and code compliance? I want to make sure I don’t overlook any important steps or legal requirements before getting started.
For DIY attic fan installation, you should be comfortable working with household wiring, including identifying circuit breakers, wiring connections, and grounding. While a specific certification isn’t usually required for basic installations in most areas, it’s crucial to follow local electrical codes, which may require permits or inspections. If you’re unfamiliar with wiring or your area has strict regulations, consulting or hiring a licensed electrician is the safest approach.
Since attic fan installation involves electrical work and attic navigation, what are some specific safety tips you recommend for small business owners trying to do this themselves, especially to prevent accidental damage or injury?
When installing an attic fan yourself, always turn off power at the breaker before starting any electrical work. Wear sturdy shoes and use a stable ladder for attic access. Be cautious of exposed nails, insulation, and low rafters to avoid injuries. Use protective gear like gloves, eye protection, and a dust mask. Double-check wiring connections and never work alone—have someone nearby in case of emergency. If anything feels unsafe, consider consulting a licensed electrician.
You mentioned that attic fans can help lower cooling costs and make HVAC systems more efficient, but is there a recommended CFM (cubic feet per minute) rating I should look for to optimize these savings without over-ventilating my attic?
To optimize energy savings without over-ventilating, it’s generally recommended to choose an attic fan with a CFM rating of about 700–900 CFM per 1,000 square feet of attic space. This provides effective ventilation while maintaining the right balance. Be sure to match the fan size to your attic’s square footage and check that your attic has adequate intake vents to support the airflow.
The article mentions the importance of compliance and safety, especially working with electrical systems. For someone in the US, are there any specific code requirements or permits I need to be aware of before starting a DIY attic fan installation?
Before installing an attic fan yourself in the US, check your local building department for permit requirements—some areas require an electrical permit for new wiring or connections. The National Electrical Code (NEC) sets standards for safe wiring, grounding, and circuit protection, which you must follow. Always use proper wire gauge, install a dedicated circuit if needed, and turn off power before starting any work. If you’re unsure about local codes or electrical tasks, it’s best to consult a licensed electrician.
I noticed you mentioned that attic fan installation involves working with electrical systems. Are there particular safety codes or permits I need to be aware of when installing an attic fan in a commercial space rather than a home?
Yes, installing an attic fan in a commercial space generally involves stricter codes than residential projects. You’ll need to comply with your local building and electrical codes, which often require permits and may mandate that a licensed electrician does the wiring. It’s also important to check ventilation requirements specific to commercial buildings. Contact your local building department for the exact codes and permit process before starting.
For homes in hotter climates, do you think a solar-powered attic fan provides enough airflow compared to traditional electric models? I’m interested in the energy savings but want to be sure it actually cools the attic effectively.
Solar-powered attic fans can be effective in hotter climates, especially for moderate attic sizes and when installed in well-ventilated spaces. However, traditional electric models generally provide higher and more consistent airflow, particularly during very hot days or for larger attics. If maximizing energy savings is your priority and your attic isn’t oversized, a solar fan is a good choice, but for the strongest cooling, an electric model may perform better.
You mention both roof-mounted and solar-powered attic fans as options. For a home with limited attic access and no existing vents, do you recommend solar-powered models over traditional roof-mounted ones, and what are the potential trade-offs in terms of performance or installation complexity?
Solar-powered attic fans can be a good choice when attic access is limited and there are no existing vents, as they often require less wiring and can be easier to install on roofs without attic entry. However, traditional roof-mounted fans might offer stronger airflow and more consistent performance, especially in cloudy climates. Solar models are typically quieter and cost nothing to run, but their efficiency depends on sunlight and proper placement. Installation for both types will require cutting a new opening in your roof, so professional help may still be needed.
When installing a roof-mounted attic fan, how do you ensure the flashing is sealed properly to prevent leaks, especially in areas that get heavy rain? Do you recommend a specific type of sealant or method for DIYers tackling this for the first time?
To properly seal the flashing and prevent leaks, start by sliding the upper part of the flashing under your shingles and making sure it sits flat against the roof. Use a high-quality exterior-grade roofing sealant, such as one labeled for asphalt shingles or polyurethane-based, to seal all edges of the flashing, especially the top and sides. Apply an extra bead of sealant over any exposed fasteners. For heavy rainfall areas, be generous with the sealant and check for any gaps. Always follow the sealant manufacturer’s instructions for best results.
The article mentions that attic fan installation isn’t a casual weekend project due to electrical work and attic navigation. For someone with intermediate DIY skills, what are some warning signs that indicate it’s time to call a professional instead of finishing the install alone?
If you encounter old or confusing wiring, unclear circuit diagrams, or damaged insulation during the attic fan installation, it’s best to stop and consult a professional. Other warning signs include unexpected electrical smells, tripped breakers that won’t reset, or discovering mold, pests, or structural issues in the attic. Safety always comes first, so if you ever feel unsure or out of your depth, a licensed pro can help ensure the job is done safely and correctly.
When installing a solar-powered attic fan, how do I make sure it operates efficiently throughout the summer, especially on partly cloudy days? Are there backup options if it doesn’t get enough sunlight?
To keep your solar-powered attic fan running efficiently during the summer, install it in a spot with maximum sunlight exposure—usually the south-facing part of your roof. Keep the solar panel clean and free of debris. If your area gets frequent cloudy days, you can look for hybrid models that allow the fan to switch to electric power as a backup, or consider installing a battery backup to store excess solar power for use when sunlight is limited.
The guide talks about working with electrical systems during installation. Are there particular safety gear or precautions recommended for someone who isn’t an electrician but wants to attempt a DIY attic fan setup?
If you’re not an electrician, it’s especially important to use safety gear like insulated gloves, rubber-soled shoes, and safety goggles when working with electrical systems. Always turn off power at the breaker before starting any electrical work. Use a voltage tester to confirm wires are not live. If anything feels uncertain, consider consulting a professional to prevent accidents.
I’m trying to decide between a gable-mounted and a roof-mounted attic fan for my home, which has limited attic access. Are there significant differences in energy savings or installation difficulty between the two options?
With limited attic access, gable-mounted fans are usually easier to install since they can be set up from the exterior wall, often avoiding the need to enter the attic. Roof-mounted fans typically require working inside the attic and creating a hole in the roof, making installation trickier. In terms of energy savings, both types can be effective if sized and installed correctly, so the main difference comes down to installation difficulty rather than efficiency.
Can you elaborate on how solar-powered attic fans compare to electric ones in terms of both upfront cost and long-term energy savings? As a business owner, I’m trying to figure out which type offers the best return on investment.
Solar-powered attic fans usually have a higher upfront cost than electric ones, often costing two to three times more. However, solar fans have no ongoing energy costs since they run on sunlight, leading to significant long-term savings, especially in sunny regions. For a business, the return on investment improves over time because you avoid monthly electricity expenses, and there may be tax credits or incentives for solar installations. Electric fans cost less to install but add to your utility bills. The best option depends on your budget, local sunlight, and energy rates.
I read that attic fans can help lower cooling costs, but are there specific guidelines for calculating the right fan size based on attic square footage or roof slope? I want to make sure I pick a model that fits my space and budget.
To choose the right attic fan size, start by calculating your attic’s square footage (length x width). Most experts recommend a fan that provides at least 1 CFM (cubic foot per minute) of airflow per square foot of attic space, then add 15-20% more if your roof is steep or your attic has a lot of obstructions. Check product specs for CFM ratings to match your needs and avoid under- or oversizing.
When choosing between a roof-mounted attic fan and a gable-mounted option, are there significant differences in terms of installation difficulty or long-term maintenance that a DIYer should be aware of?
Roof-mounted attic fans typically require cutting a hole in the roof and working at heights, which can make installation a bit more challenging and may demand extra attention to waterproofing. Gable-mounted fans are generally easier to install since they fit into an existing gable vent. For maintenance, roof fans may be harder to access later, especially for cleaning or repairs, while gable fans are often more accessible from inside the attic.
For DIYers with minimal experience working with electrical systems, are there specific safety tips or common mistakes to watch out for when installing a roof-mounted attic fan compared to a gable-mounted one?
When installing a roof-mounted attic fan, safety is especially important because you’ll be working at heights and potentially creating a new roof opening, which brings added risks of falls and leaks. Common mistakes include improper sealing around the fan, which can cause water damage, and not shutting off the power at the breaker before wiring. With gable-mounted fans, the process is often safer since you usually work from inside the attic, but always double-check electrical connections and secure ladders. If you’re unsure, consulting an electrician is wise.
You mention that proper ventilation and safety are important during installation. What are the key compliance checks or building codes I should be aware of before starting a DIY attic fan project, particularly regarding electrical work?
When installing an attic fan, check your local building codes for requirements on electrical wiring, circuit protection (like GFCI), and appropriate junction boxes. Electrical connections often need to be up to National Electrical Code (NEC) standards, such as using the correct gauge wire and ensuring all connections are safely enclosed. You may also need a permit for electrical modifications. It’s always a good idea to consult your local permit office or a licensed electrician before starting.
If my attic does not have any existing gable vents, would you recommend roof-mounted fans over gable-mounted ones, or is it possible to add gable vents first? Curious what factors to consider before choosing between these two types.
If your attic doesn’t have gable vents, you can either add gable vents and install a gable-mounted fan, or go with a roof-mounted fan. Roof-mounted fans are often easier if you want to avoid cutting in new vents. Consider your attic’s layout, ease of installation, existing ventilation, and how visible you want the fan to be from outside. Roof fans work well for most roof types, but adding gable vents can also improve passive airflow.
When choosing between gable-mounted and roof-mounted attic fans, are there specific considerations regarding the age or material of my roof that I should keep in mind to avoid damaging the structure during installation?
Yes, the age and material of your roof are important factors. Roof-mounted fans require cutting into the roof, which can be risky for older roofs or those with brittle materials like slate or clay. Gable-mounted fans are usually less invasive and a better choice if your roof is aged or delicate. Always check for signs of wear or damage before installation, and if unsure, consult a professional to prevent structural issues.
For a DIY attic fan install, are there any important electrical code requirements or permits I should know about before getting started, especially if my area has strict building regulations?
Yes, before installing an attic fan yourself, check your local building codes and permit requirements. Many areas require a permit for electrical work, especially if you’re adding new wiring or altering circuits. The National Electrical Code (NEC) usually applies, which covers proper wire sizing, grounding, and circuit protection. If your area has strict regulations, an inspection may also be required after installation. Always turn off power at the breaker before working and consider consulting a licensed electrician if you’re unsure.
Once the attic fan is installed, are there specific maintenance steps I should keep up with to make sure it keeps running efficiently and safely over the years?
Yes, regular maintenance is important for attic fans. Check and clean the fan blades and motor area at least once a year to remove dust and debris. Inspect the wiring for any signs of wear or damage. Lubricate moving parts if your fan model requires it. Also, ensure that the thermostat or humidistat sensors are working properly. Keeping vents clear from obstructions will also help maintain efficiency and safety.
I see you mention that installing an attic fan isn’t a simple weekend project due to the electrical work involved. How difficult is the wiring for someone with only basic electrical experience, and are there common mistakes I should watch out for during installation?
The wiring for an attic fan typically involves connecting to your home’s electrical circuit, which can be tricky if you only have basic experience. Common mistakes include improper wire sizing, loose connections, and not properly shutting off power at the breaker. Miswiring can be a safety hazard, so if you’re unsure, consider having a licensed electrician handle the electrical part to ensure it’s done safely and up to code.
As a small business owner trying to lower summer cooling costs in my shop, could you clarify if a gable-mounted or roof-mounted attic fan would be more effective in a single-story commercial building? Are there considerations unique to commercial spaces I should watch for during installation?
For a single-story commercial building, roof-mounted attic fans are usually more effective since they pull hot air directly up and out, which can be ideal for larger spaces. In commercial settings, check for fire-rated barriers, wiring, or HVAC components in the attic before installing, and ensure your fan choice is rated for continuous use. Also, verify compliance with local building codes that might differ from residential installations.
If I already have a gable vent, is it better to go with a gable-mounted fan for simplicity and cost reasons, or are there advantages to roof-mounted options that I might be overlooking?
If you already have a gable vent, a gable-mounted attic fan is usually simpler and more cost-effective to install since you can use the existing opening. However, roof-mounted fans can sometimes provide better airflow if your attic layout restricts air movement or if your gable vents are small. Also, roof-mounted options may be better in homes where gable vents are not optimally placed for ventilation. Consider your attic’s size, shape, and airflow needs when choosing.
If my home already has gable vents but struggles with humidity and heat, how do I decide between adding a gable-mounted fan versus upgrading to a roof-mounted or whole-house fan? What factors should weigh most in making that call?
When choosing between a gable-mounted fan, a roof-mounted fan, or a whole-house fan, consider your home’s layout, attic size, and local climate. Gable fans work best if your attic already has good venting but struggles with airflow. Roof-mounted fans can be more effective for larger attics or if your gable vents are small. Whole-house fans help cool the whole home but require open windows, which might not suit every climate. Also factor in installation complexity, noise, and energy efficiency for each option.
I want to tackle this as a DIY project but I’m a little nervous about working with the electrical parts. Does the guide recommend any specific safety gear or steps for someone with minimal wiring experience?
The guide does recommend some important safety steps for DIYers with limited wiring experience. It suggests turning off power at the breaker before starting any electrical work, using a voltage tester to confirm the power is off, and wearing insulated gloves and safety goggles. If you’re ever unsure, it’s always wise to consult an electrician for the wiring part to ensure your safety.
I’m curious about budgeting for this project. Can you share an estimated range for total DIY attic fan installation costs, including recommended safety equipment and any extra materials that might not be included with the fan kit?
For a typical DIY attic fan installation, expect to spend around $100 to $400 for the fan kit itself. Additional materials like wiring, fasteners, sealant, and possibly extra ducting might add $20 to $50. Essential safety equipment, such as gloves, safety goggles, and a dust mask, usually costs $20 to $40. In total, plan for a budget range of $140 to $490, depending on your attic size and specific needs.
I’m curious about the typical budget range for a full DIY attic fan project, including necessary tools and materials. Could you give an estimate or tips on keeping costs manageable without cutting corners on safety?
A typical DIY attic fan installation project can cost between $150 and $400. This includes the fan itself (usually $100–$250), plus materials like wiring, mounting hardware, and a thermostat ($30–$70). If you need to buy tools such as a drill, saw, or safety gear, budget an extra $50–$100. To save money, check if you can borrow tools or buy materials in bundles, but always prioritize quality electrical components and safety equipment.
I’m interested in installing a solar-powered attic fan as you mentioned, but I’m not sure if my attic gets enough sunlight for it to work efficiently. Are there ways to determine if a solar option will be effective in my specific situation?
To check if a solar-powered attic fan will be effective, observe how much direct sunlight your roof receives throughout the day, especially where you plan to install the fan. South-facing roof sections usually get the most sun. Also, look for any trees or structures that might cast shade during peak sunlight hours. For a more precise assessment, you can use a sunlight calculator app or consult a local solar installer who can evaluate your attic’s solar exposure.
You mentioned that solar-powered attic fans don’t require electrical wiring. Does that make them significantly easier and cheaper to install for someone on a tight student budget, or are there hidden costs I should be aware of?
Solar-powered attic fans are often easier to install because you don’t need to run electrical wiring or hire an electrician, which definitely helps keep costs down. However, you might still need basic tools, roof flashing, and sealant, and you’ll need to be comfortable working on your roof. The main hidden cost is that quality solar fans can be pricier upfront compared to standard models, so consider comparing prices before deciding.
Before I start budgeting for this project, can you give a ballpark estimate for the total cost of a DIY attic fan installation, including any unexpected expenses that homeowners sometimes overlook?
For a DIY attic fan installation, total costs usually range from $150 to $350. This includes the fan unit itself (typically $75–$250), wiring and mounting materials ($30–$60), and basic tools if you don’t already have them. Don’t forget to budget for safety gear and possible unforeseen expenses like extra insulation, patching roof shingles, or hiring an electrician if you hit wiring issues—these can add $50–$150.
Does the installation guide cover any specific safety precautions for working with electrical wiring in the attic, especially for homes with older electrical systems? I want to make sure I avoid any common mistakes that could lead to fire hazards.
Yes, the installation guide includes detailed safety precautions for working with electrical wiring, particularly in older homes. It highlights the importance of shutting off power at the breaker, using proper tools, and checking for outdated or damaged wiring before starting. The guide also recommends consulting a licensed electrician if you’re unsure about the condition of your home’s wiring to help prevent fire hazards.
In terms of safety, what should I look out for when working with electrical wiring in the attic, especially if my attic has limited space or isn’t well lit? Any tips for ensuring I stay compliant with local building codes during installation?
When working with electrical wiring in a cramped or dimly lit attic, use a headlamp or portable work light for visibility and always shut off power at the breaker before starting. Wear insulated gloves and avoid working alone in case of an accident. To stay compliant with local codes, use proper wire types and connectors, secure all wiring, and check if a permit or inspection is needed. If unsure, consult your local building authority or hire a licensed electrician.
When installing a roof-mounted attic fan, how do you make sure the wiring is both safe and up to code, especially if you’re not super experienced with electrical work? Are there specific local regulations I should look out for before starting?
If you’re not experienced with electrical work, it’s a good idea to consult or hire a licensed electrician for wiring a roof-mounted attic fan. This ensures safety and compliance with code. Check your local building department for specific regulations or permit requirements, as electrical codes can vary by location. Always turn off power at the breaker before starting, use proper connectors, and never bypass grounding. Following these steps will help you stay safe and within legal requirements.
If my attic already has some ventilation and doesn’t get super hot, is installing a gable-mounted fan still recommended, or would it be overkill? Are there cases where adding a fan could cause problems instead of solving them?
If your attic already stays at a reasonable temperature and is well-ventilated, installing a gable-mounted fan might not be necessary. In fact, adding a fan to a well-ventilated attic can sometimes disrupt airflow or create negative pressure, potentially drawing conditioned air from your living space and raising energy costs. It’s best to assess whether your current ventilation is adequate before adding more.
I’m a little nervous about working with electrical wiring in the attic. Are there extra safety steps or precautions in your step-by-step instructions for someone who’s never done electrical work before, or would a solar-powered fan be safer for a beginner?
If you’re new to electrical work, extra caution is important since attic wiring can be tricky and potentially dangerous. While our guide includes basic safety steps like shutting off power and using insulated tools, a solar-powered fan can be a safer choice for beginners because it often requires less or no electrical wiring inside the house. If you feel unsure at any step, consider consulting a licensed electrician for added safety.
You talked about navigating attic spaces and the need for safety and compliance during installation. Do you have specific advice for first-timers on what kind of protective equipment and tools are essential before even starting this kind of project?
Before starting an attic fan installation, make sure you have sturdy work gloves, safety goggles, a dust mask or respirator, and a hard hat to protect yourself from insulation and nails. Wear long sleeves and pants to avoid skin irritation. For tools, you’ll need a flashlight or headlamp, stable ladder, tape measure, drill, screwdriver, utility knife, and a stud finder. Also, keep a first aid kit nearby and check your attic for hazards like exposed wiring before you begin.
You mention that solar-powered fans can eliminate the need for electrical wiring. If I go with a solar option, are there any maintenance or performance differences I should be aware of compared to traditional electrically-powered attic fans?
Solar-powered attic fans generally require less maintenance since they don’t have electrical wiring that could degrade over time. However, you should periodically clean the solar panel to keep it free from dust and debris, as buildup can reduce performance. Also, keep in mind that their efficiency depends on sunlight—on cloudy days or in shaded areas, the fan might not operate at full capacity compared to a wired model.
The guide talks about solar-powered attic fans reducing energy costs, but I’m wondering about their performance in areas with frequent cloudy days. Have you noticed a big drop in effectiveness, or is backup wiring recommended?
Solar-powered attic fans do rely on sunlight, so in regions with frequent cloudy days, their performance can decrease since they won’t operate at full efficiency. Many homeowners in such climates opt for hybrid models or have backup electrical wiring installed to ensure consistent ventilation. This way, the fan can still function on overcast days, maintaining attic airflow and energy savings.
The article mentions that attic fans can help extend the life of roofing materials by preventing heat and moisture buildup. Can you clarify what signs homeowners should watch for to know if their roof has already been affected, and if installing a fan can still help at that stage?
Homeowners should look for signs like curling or warped shingles, unexplained leaks, mold growth on the underside of the roof, or a musty odor in the attic. These can indicate heat and moisture damage. If the roof is still structurally sound and the damage isn’t severe, installing an attic fan can help prevent further deterioration by improving ventilation. However, if you see significant damage, it’s wise to consult a roofing professional first.
You mentioned that solar-powered fans can eliminate the need for electrical wiring, but are there any trade-offs in terms of performance or installation costs compared to regular electric attic fans?
Solar-powered attic fans usually have higher upfront costs than standard electric fans, mainly because of the solar panel. However, they cost less to operate since they use free solar energy and don’t require electrical wiring. In terms of performance, solar fans depend on sunlight, so their output can fluctuate on cloudy days, while electric fans provide consistent airflow as long as there’s power. Both types can be effective, but your climate and attic size may influence which is best.
When you mention that attic fan installation involves working with electrical systems, how difficult is the wiring part for someone who has mostly done basic DIY projects around the house? Are there extra safety steps I should keep in mind if my attic has limited space?
The wiring for an attic fan can be moderately challenging if your experience is limited to basic DIY projects. It usually involves connecting the fan to an existing circuit or installing a new one, which means dealing with electrical panels and ensuring proper grounding. In a cramped attic, be careful to watch for exposed wires, avoid stepping on joists, and always turn off the circuit breaker before starting. If you’re uncomfortable or unsure, it’s safest to consult a licensed electrician.
You mention both gable-mounted and roof-mounted fans as options. For an older home with limited attic access, what are the main trade-offs between choosing a solar-powered roof-mounted fan versus modifying the structure for a gable-mounted install?
A solar-powered roof-mounted fan is easier to install if attic access is limited, since it can often be added from outside without much interior work. It won’t need electrical wiring, which is great for older homes. However, modifying walls for a gable-mounted fan may require structural changes and better attic access, but gable fans can sometimes be quieter and easier to service. The main trade-off is ease and speed of installation versus long-term accessibility and potential noise differences.
The article mentions that proper ventilation is critical for both energy savings and roof longevity. Are there specific safety tips for working in an older attic with questionable wiring, or should I really bring in an electrician before doing any DIY electrical work?
If your attic has old or questionable wiring, it’s best to consult a licensed electrician before doing any electrical work. Older wiring can pose serious safety risks, including fire hazards and electrical shocks. Even if you’re experienced with DIY projects, an electrician can assess the condition and make necessary upgrades, ensuring your attic fan installation is safe and up to code.
I’m trying to estimate a realistic budget for installing a roof-mounted attic fan in an older building with limited attic access. Are there hidden costs I should be aware of, like needing extra ventilation or special electrical work?
When installing a roof-mounted attic fan in an older building, you might face extra costs beyond the fan and basic installation. Limited attic access can require more labor or special tools. You may also need to add intake vents to ensure proper airflow, and older wiring may not meet current codes, possibly requiring an electrician to upgrade circuits. It’s smart to budget extra for these potential issues.
I’m trying to decide between a gable-mounted and a roof-mounted attic fan. Are there significant differences in installation difficulty or long-term maintenance between those two types, especially for someone new to home improvement projects?
Gable-mounted attic fans are generally easier to install if your attic already has a gable vent, since you can use the existing opening. Roof-mounted fans require cutting a new hole in the roof, which can be more challenging and may involve extra waterproofing steps. For beginners, gable-mounted fans tend to be simpler and need less long-term maintenance, since roof-mounted units are more exposed to weather and may need more frequent checks for leaks or flashing issues.
After installing the attic fan and wiring it yourself, what are the recommended ways to check that it’s operating safely and efficiently, especially in terms of electrical connections and ventilation performance?
After installation, first turn on the attic fan and listen for any unusual noises or vibrations. Check that the fan turns on and off properly using its switch or thermostat. Inspect all wiring connections to ensure they’re tight and there’s no exposed wire. Use a voltage tester to confirm safe electrical operation. For ventilation, feel for airflow at the exhaust point and verify that hot air is being expelled from the attic. It’s also a good idea to occasionally monitor attic temperature and check for moisture buildup to make sure the fan is working efficiently.
You mention that proper planning and compliance are important for a DIY attic fan install. Are there specific building codes or permits commonly required for this kind of project, or does that depend mostly on local regulations?
Building codes and permit requirements for attic fan installation do vary depending on your local regulations. Some areas require an electrical permit or inspection, especially if you’re adding new wiring. Others may have specific rules about roof penetrations or ventilation changes. It’s best to check with your city or county building department before starting the project to ensure you’re meeting all necessary codes and requirements.
How can I tell if my attic space is a good candidate for a gable-mounted fan versus a roof-mounted one, especially if I am not sure what types of vents are already installed?
To figure out if your attic is better suited for a gable-mounted or roof-mounted fan, first check if your attic has vertical gable walls at the ends—these are ideal spots for gable fans. If you don’t have gable walls, or they’re small, a roof-mounted fan is usually best. Look for existing vents: gable vents are rectangular and set high on the end walls, while roof vents are on the roof surface. If you’re unsure, a quick inspection with a flashlight should help you spot which vents you have.
You mentioned that roof-mounted fans are ideal for homes without gable vents, but I’m concerned about potential roof leaks down the line. Are there tips in the guide for making sure the installation stays weather-tight and doesn’t affect my roof warranty?
Your concern about roof leaks is definitely valid. The guide highlights the importance of using high-quality flashing and roofing sealant to create a weather-tight seal around the attic fan. It also suggests carefully following both the fan manufacturer’s instructions and your roofing warranty requirements. Taking these steps helps protect your roof from leaks and avoids potential warranty issues.
I noticed you mentioned both gable-mounted and roof-mounted attic fans. For a house in the Midwest with both gable vents and a fairly steep roof, is one option more efficient or easier to install for a DIYer?
For a Midwest home with both gable vents and a steep roof, a gable-mounted attic fan is typically easier to install for most DIYers. You can usually use the existing vent opening, which avoids roof cutting and working on a steep surface. While both fan types can be efficient, gable-mounted fans are safer and simpler for DIY installation in your situation.
I noticed you mention that attic fan installation involves working with electrical systems. For someone who has only basic electrical experience, are there specific safety precautions or tasks that should definitely be left to a professional electrician?
If you have only basic electrical experience, it’s wise to leave any wiring directly connected to your home’s main power supply to a licensed electrician. Tasks such as installing or modifying circuit breakers, running new electrical lines, or connecting to the main electrical panel can be risky without proper training. However, simpler steps like mounting the fan or following manufacturer instructions for plug-in models are generally safe if you turn off the power and double-check your work. Always prioritize safety and consult a pro if you’re unsure.
I’m interested in a solar-powered attic fan to avoid running new electrical wires. Are there any drawbacks or common issues with solar-powered models that I should consider before choosing that route?
Solar-powered attic fans are convenient since they don’t require additional wiring, but there are a few things to consider. Their performance depends on sunlight, so on cloudy days or at night, ventilation may be limited. Some users also report that less powerful models may not move as much air as wired fans. It’s important to check the fan’s capacity and ensure it’s suited for your attic size before buying.
I’m interested in installing a solar-powered attic fan to help with my energy bills, but I’m not sure how to determine if my roof gets enough sun exposure for it to work efficiently year-round. Are there guidelines or tips for assessing whether solar will be effective in my situation?
To assess if a solar-powered attic fan will work effectively, check that your roof receives full sunlight for most of the day, especially between 10 a.m. and 4 p.m. Avoid shaded areas created by trees, chimneys, or neighboring houses. Southern exposure is typically best in the Northern Hemisphere. Also, consider how sun angles change throughout the year—if your roof is sunny in winter and summer, solar should be effective.
For someone who isn’t super experienced with electrical work, how complex is the wiring part of a DIY attic fan install, and are there extra safety steps for older homes?
The wiring part of a DIY attic fan install can be moderately complex, especially if you’re not familiar with home electrical systems. For older homes, you should always turn off power at the breaker, check for outdated or brittle wiring, and use a voltage tester before touching anything. If the wiring looks worn or you find knob-and-tube components, it’s safest to consult an electrician rather than proceed on your own.
You touched on solar-powered attic fans helping to cut down on energy costs. Have you noticed any significant differences in actual utility bill savings after switching from an electric to a solar-powered fan, or does the payback period really depend on regional sunlight conditions?
Switching from an electric to a solar-powered attic fan can definitely help reduce electricity use, but the actual utility bill savings often depend on how much sunlight your region receives. In sunnier areas, people usually see a faster payback period, sometimes within a few years. In cloudier climates, the savings are still real, but it takes longer to recover the upfront cost. Local utility rates and attic insulation quality also play a part.
I’m particularly interested in solar-powered attic fans that you mentioned. Are there any specific considerations when it comes to sizing or placement of a solar panel to ensure the fan operates efficiently throughout the day?
When sizing a solar panel for your attic fan, ensure the panel’s wattage matches or slightly exceeds the fan’s requirements for optimal performance. Placement is also important—mount the panel on a south-facing roof section with minimal shading to maximize sunlight exposure throughout the day. Tilt the panel at an angle close to your local latitude for the best year-round efficiency.
When it comes to choosing between gable-mounted and roof-mounted attic fans, are there significant differences in installation difficulty or long-term maintenance that a DIYer should watch out for?
Gable-mounted attic fans are often easier for DIYers to install since they usually fit into an existing gable vent, requiring less roof modification. Roof-mounted fans often need cutting a hole in your roof, which can be more challenging and may risk leaks if not sealed correctly. In terms of long-term maintenance, both types need occasional cleaning and motor checks, but roof-mounted fans may be harder to access for repairs.
The article mentions DIY installation involving electrical work and safety concerns. As a small business owner who is pretty handy but not an electrician, what safety steps or inspections should I prioritize to ensure I’m staying within local codes during attic fan installation?
Since you’re comfortable with DIY projects but not a licensed electrician, prioritize shutting off power at the breaker before any wiring work, use a voltage tester to confirm no current is flowing, and follow the manufacturer’s wiring diagrams exactly. To stay within local codes, check if your area requires a permit or inspection for electrical work—most do. Consider having a licensed electrician review your work or make final connections to ensure everything meets code and is safe.
How complex is the electrical work involved in installing a standard attic fan yourself? I’ve done some basic wiring but am a little concerned about working in tight attic spaces. Are there common mistakes beginners should watch out for during installation?
The electrical work for a standard attic fan usually involves connecting the fan to your home’s power supply, installing a thermostat or switch, and making sure all connections are secure and up to code. If you’re comfortable with basic wiring, you’ll likely find the process manageable, but tight attic spaces can make access tricky. Common mistakes include not turning off the power, using undersized wire, or failing to properly secure connections. Always double-check wiring diagrams and consider getting a helper for safety, especially when moving or positioning the fan.
I’m interested in installing a solar-powered attic fan to avoid running electrical wiring, but my attic doesn’t get much sunlight due to tree cover. Would a gable-mounted or roof-mounted electric fan be more effective in this case, or do you have recommendations for low-light installations?
In an attic with limited sunlight, a solar-powered fan may not run efficiently since it relies on direct sun exposure. In your situation, a roof- or gable-mounted electric fan would be more dependable. Roof-mounted fans generally provide better overall air movement, but gable-mounted fans are easier to install if you already have gable vents. For low-light areas, an electric model with a thermostat and humidistat offers the most consistent performance.
I noticed there are several types of attic fans discussed, including gable-mounted, roof-mounted, and solar-powered options. How do you determine which type is best for homes in humid versus dry climates, and are there energy efficiency differences between them?
In humid climates, solar-powered or roof-mounted attic fans are often preferred since they provide consistent ventilation and help reduce moisture buildup. In dry climates, any of the types can work, but gable-mounted fans are popular due to easier installation. For energy efficiency, solar-powered fans use no electricity from your home, making them the most efficient option, while roof-mounted electric fans are effective but use more energy.
I’m trying to figure out if a gable-mounted or roof-mounted attic fan makes more sense for my home. Are there big differences in installation difficulty or long-term maintenance between these two types?
Gable-mounted attic fans are generally easier to install, especially if you already have a gable vent, since they don’t require cutting into your roof. Roof-mounted fans typically involve more work and care to prevent leaks but can be a better choice if your attic doesn’t have suitable gable vents. Maintenance-wise, both types are similar—mainly keeping the fan clean and checking for wear—but the roof-mounted ones can be harder to access for repairs.
When budgeting for this project, how much should I expect to spend on materials and do you think the energy savings realistically offset those costs within a few years? I’d love to hear from others who have tracked their own savings after installing a fan.
For most DIY attic fan installations, material costs usually range from $100 to $400, depending on the type and size of the fan and any extra supplies needed. Many homeowners report seeing lower cooling bills, with potential yearly savings between $50 and $150. This means you could recoup your investment in two to five years, but actual payback will depend on your local climate and how much you use your AC. We’d love to hear from readers who have tracked their energy savings!
The guide mentions that safety and compliance are important for DIY installation. Are there any common mistakes people make with attic fan wiring or ventilation that could cause problems with home insurance or local building codes?
Yes, there are a few common mistakes that can cause issues with insurance or building codes. Improper wiring, such as not using a dedicated circuit or failing to install a shut-off switch, can be hazardous and may not meet electrical codes. For ventilation, blocking exhaust vents or not providing enough intake vents can lead to moisture problems. Always follow local codes, use appropriate wiring, and ensure proper airflow to avoid these pitfalls.
Can you give more detail about the ventilation requirements? I have a smaller attic and I’m not sure if a whole-house fan or a gable-mounted fan would be a better fit in terms of making sure I have enough airflow without causing other issues.
For a smaller attic, proper ventilation is essential to prevent moisture buildup and maintain efficiency. Gable-mounted fans are often better for small attics since they can provide targeted airflow without overwhelming the space. Whole-house fans move much more air and work best in larger areas with plenty of intake and exhaust vents. Whichever option you choose, make sure your attic has enough vent openings—at least 1 square foot of vent area for every 300-400 square feet of attic—to avoid negative pressure and backdraft issues.
I see you mentioned solar-powered attic fans as an option to cut energy costs. How difficult is it to install a solar-powered fan for someone without electrical experience, and do these typically require professional inspection after installation?
Installing a solar-powered attic fan is generally more beginner-friendly than wiring a traditional electric fan, since it usually involves mounting the fan and attaching a small solar panel—no household wiring needed. Many homeowners can handle it with basic tools. However, if you’re unsure about roof work or sealing, you may want help. Professional inspection isn’t always required, but some local codes or HOA rules might need approval, so it’s best to check before starting.
When deciding between a gable-mounted attic fan and a roof-mounted fan, are there any specific factors I should consider besides whether my home has gable vents? For example, does one type offer better energy savings or tend to last longer than the other?
Beyond the presence of gable vents, consider things like ease of installation, weather exposure, and maintenance. Roof-mounted fans can be more exposed to the elements, sometimes leading to faster wear. Gable-mounted fans are generally easier to service and may last longer since they’re better protected. In terms of energy savings, both types are similar if sized and installed correctly, but roof-mounted fans can sometimes be more effective at venting heat directly upward.
Could you clarify what kinds of safety gear or precautions are absolutely necessary for someone working in an attic with limited space? I’m concerned about both the electrical aspect and moving around safely in a cramped attic area.
When working in a cramped attic, always wear a hard hat to protect your head, gloves for handling materials, and a dust mask or respirator for insulation fibers. For electrical work, use insulated tools and turn off power at the breaker before starting. Knee pads and sturdy shoes help with moving around safely, and a portable work light ensures good visibility. Be sure to step only on joists or boards to avoid falling through the ceiling.
Can you give some advice on estimating the total budget for a DIY attic fan installation, including any unexpected expenses that might come up? I want to avoid getting stuck halfway if I find I need extra parts or tools I didn’t plan for.
When budgeting for a DIY attic fan installation, start by listing the fan’s price, mounting hardware, electrical wiring, and any needed switches or thermostats. Add safety gear like gloves and goggles if you don’t have them. Set aside extra funds for tools you might be missing, such as a drill, wire stripper, or saw. Unexpected costs might include additional wiring, attic insulation repairs, or patching roof shingles. Adding a 15–20% cushion to your estimate can help cover surprises and keep your project on track.
For someone with moderate DIY skills, how long should I realistically expect the installation process to take, including wiring and any necessary adjustments to ventilation?
With moderate DIY skills, you can typically expect the full attic fan installation—including wiring and adjustments to ventilation—to take about 4 to 6 hours. This time frame assumes you have standard tools and no major complications. Be sure to allow extra time if your attic access is challenging or if you encounter unexpected issues during the process.
You mentioned that a DIY attic fan installation isn’t just a casual weekend project and involves electrical work and safety considerations. For someone with basic DIY skills but limited electrical experience, what specific safety steps should I take or when should I consider hiring a licensed electrician?
If you have limited electrical experience, always turn off power at the breaker before working with wiring. Use a voltage tester to confirm no power is present. Wear insulated gloves and avoid working alone, in case of emergencies. If you need to run new wiring, install a dedicated circuit, or connect to the main electrical panel, it’s best to hire a licensed electrician. Safety should come first, so whenever you feel unsure about any step, getting professional help is the safest route.
I see you listed several types of attic fans like gable-mounted, roof-mounted, and solar-powered options. How do I determine which type would be most effective for an older home with limited attic access? Are there pros or cons related to energy savings in this situation?
For an older home with limited attic access, a gable-mounted fan is often easiest to install since it can go on an existing vent without needing to cut into the roof. If attic access is very tight, a solar-powered gable fan is a good pick; it doesn’t require new wiring and can help lower energy bills. Roof-mounted fans are more efficient but often require professional installation, which can be tricky in older homes. Each type can improve energy savings, but gable-mounted fans offer a balance of ease and effectiveness for your situation.
I’m trying to choose between a gable-mounted and a roof-mounted attic fan, but my attic has some vents and limited access. How do I know which type would be easier to install myself and whether one is more effective for ventilation in this situation?
Given your attic has some vents and limited access, a gable-mounted fan might be easier to install if you already have a gable vent—this lets you avoid cutting into your roof, which is more complex and riskier. Roof-mounted fans can be more effective if your attic’s shape or vent placement limits airflow, but they typically require more tools and roofing skills. For most DIYers with limited attic access, a gable-mounted fan is the simpler and safer choice, as long as it’s compatible with your existing vents.
The article talks about energy savings and budgeting for the project. Could you share a ballpark estimate on what a typical DIY attic fan installation might cost, including necessary tools and materials, for someone starting from scratch?
For a DIY attic fan installation, you can expect to spend around $150 to $400 in total. This estimate includes the cost of a decent attic fan ($80–$250), wiring and mounting hardware ($30–$70), plus basic tools like a drill, saw, and safety gear if you don’t already have them ($40–$80). Prices will vary based on fan size and tool quality, but this range covers most first-time projects.
When deciding between a gable-mounted fan and a roof-mounted fan, are there any differences in installation difficulty or effectiveness in reducing attic heat, especially for older houses with limited attic access?
Gable-mounted fans are generally easier to install, especially in older homes with limited attic access, since they can often be mounted from the attic side or even outside. Roof-mounted fans usually require cutting through the roof, which can be more challenging and potentially riskier for older roofs. Both types are effective at reducing attic heat, but installation difficulty and potential roof disruption make gable-mounted fans a better choice when access is tight.
I noticed you mentioned both gable-mounted and roof-mounted attic fans. How do you decide which type is best for your house, especially if your attic already has some ventilation? Are there trade-offs in terms of effectiveness or ease of installation?
Choosing between gable-mounted and roof-mounted attic fans depends on your attic’s layout and existing ventilation. Gable-mounted fans are ideal if you already have gable vents, making installation simpler. Roof-mounted fans are better for homes without gable ends or when you need more direct airflow. Roof-mounted fans can be more effective for larger attics but usually require cutting into the roof, which is more involved than installing on a gable wall. Consider your attic size, roof style, and current airflow when deciding.
I noticed the article mentions both gable-mounted and roof-mounted attic fans. Is there a significant difference in energy efficiency or installation complexity between the two types, especially for older homes with limited attic access?
Gable-mounted attic fans are generally easier to install, especially in older homes with tight attic spaces, since they use existing gable vents and often don’t require cutting into the roof. Roof-mounted fans may be a bit more challenging to install and could require professional help, but both types offer similar energy efficiency when sized and installed correctly. If attic access is limited, gable-mounted fans are usually the simpler choice.
If I decide to install a solar-powered attic fan to cut down on wiring work, are there any specific safety precautions I need to keep in mind compared to a traditional electric fan?
When installing a solar-powered attic fan, you still need to follow basic safety steps like securing a stable ladder and using protective gear. One unique precaution is handling the solar panel safely—avoid working on it in direct sunlight to prevent accidental electrical output. Also, ensure all wiring connections are weatherproof and properly insulated, as solar systems are often more exposed to the elements than traditional wiring.
If I want to install a solar-powered attic fan, are there specific considerations or extra steps I should keep in mind compared to installing a standard electric model? Does the wiring process differ a lot for DIYers?
When installing a solar-powered attic fan, you’ll need to focus on positioning the solar panel where it gets maximum sunlight, which is different from electric models. There’s generally less interior wiring, since solar fans are often self-contained and may not require connecting to your home’s electrical system. You’ll mainly run a cable from the solar panel to the fan. Always follow the manufacturer’s instructions, check for roof leaks, and ensure proper weatherproofing around the solar panel mount.
I’m curious about the upfront costs versus energy savings. Could you provide a ballpark estimate of the typical cost range for DIY attic fan installation, including materials, and about how long it usually takes to see a return on that investment with lowered cooling bills?
For a DIY attic fan installation, materials like the fan itself, mounting hardware, and basic wiring typically cost between $100 and $400. If you already have tools, that’s usually the main expense. Most homeowners see a reduction in cooling costs of 10–20% per year, so the payback period is often 2 to 4 summers, depending on your climate and usage. Savings can add up faster in hotter regions with high cooling bills.
Your guide talks about lower cooling costs and energy efficiency, but I’m wondering how I can estimate the actual monthly savings after installing an attic fan. Is there a formula or rough guideline to help budget for potential payback time?
To estimate your monthly savings, you can compare your typical summer electricity bills before and after installation. On average, attic fans can reduce cooling costs by 10-15%. For example, if your summer electric bill is $150, you might save $15–$22.50 per month. Divide the total installation cost by your estimated monthly savings to gauge your payback period. Keep in mind that factors like local climate and attic insulation also influence savings.
If my attic already has some ventilation but still gets really hot in summer, would adding a gable-mounted fan make a noticeable difference in cooling costs, or would I be better off considering a whole-house fan?
If your attic stays hot even with existing ventilation, a gable-mounted fan can help lower attic temperatures, which may slightly reduce your cooling costs by easing the load on your AC. However, a whole-house fan is more effective for cooling your entire home quickly and can lead to greater energy savings. If your main goal is cooling the house itself, a whole-house fan is usually the better option.
If my attic already has gable vents, does that mean a gable-mounted fan is always the best choice, or are there situations where a roof-mounted or even a whole-house fan would be better?
Having gable vents does make installing a gable-mounted fan easier, but it’s not always the best option for every home. Roof-mounted fans can be more effective if your attic has poor airflow or if the gable vents are small or blocked. A whole-house fan is different; it cools the entire house by pulling air through open windows into the attic and out. The right choice depends on your attic layout, your cooling needs, and your home’s design.
Could you provide more detail on how solar-powered attic fans compare to electric ones in terms of actual energy savings and cooling efficiency? We get a lot of sun but want to be sure the solar option is sufficient during peak summer heat.
Solar-powered attic fans are highly effective in sunny regions and can greatly reduce electricity costs because they operate without using grid power. They provide good ventilation and help keep attic temperatures down, but their cooling efficiency depends on sunlight availability. During peak summer heat with lots of sun, a solar fan should run at full capacity and offer significant energy savings. Electric attic fans, however, provide consistent airflow regardless of weather, which can be helpful on cloudy days but increases your energy bill. For your sunny climate, a solar-powered fan should be sufficient for most of the summer.
I’m interested in trying a solar-powered attic fan, but I’m not sure if it would provide enough ventilation compared to an electric roof-mounted option. Are there situations where a solar-powered fan isn’t powerful enough for certain attic sizes?
Solar-powered attic fans are energy efficient, but their performance depends on sunlight and the specific model’s capacity. For larger attics or climates with high heat, a solar fan may not move as much air as an electric roof-mounted fan, especially on cloudy days. It’s important to check the fan’s rated airflow (CFM) and match it to your attic’s square footage. For very large attics, multiple solar fans or an electric model might be necessary for optimal ventilation.
Can you give an idea of how long a typical DIY attic fan installation takes for someone with basic electrical know-how? I want to budget my weekend and make sure I’m not biting off more than I can chew with this project.
For someone with basic electrical knowledge, a typical DIY attic fan installation usually takes about 4 to 6 hours. This covers prepping the attic, mounting the fan, wiring, and testing the system. If your attic is easy to access and you have all the needed tools on hand, you might finish quicker. It’s a manageable weekend project, but set aside extra time in case you run into unexpected issues.
I noticed that the article covers both gable-mounted and roof-mounted fans. If my house has both a gable vent and easy attic access, is there a significant advantage in performance or energy savings between installing a gable-mounted fan versus a roof-mounted one?
If you have both a gable vent and easy attic access, either fan type can improve ventilation, but roof-mounted fans usually offer slightly better overall airflow and cooling because they vent hot air from the highest point. Gable-mounted fans are easier to install and maintain. In terms of energy savings, the difference is typically minor unless your attic has unusual airflow restrictions. Choose the option that best fits your attic layout and installation preferences.
As a small business owner with some basic DIY experience, I’m curious about the electrical aspect of installing an attic fan. Are there specific safety codes or permits I need to be aware of before starting the wiring process in a commercial or home office setting?
When installing an attic fan in a commercial or home office setting, electrical work often requires adherence to local building codes and may require permits, especially in commercial spaces. It’s important to check with your local building department about specific requirements. Also, make sure to follow the National Electrical Code (NEC) standards for wiring, grounding, and circuit protection. If you’re unsure about any step, consulting a licensed electrician is the safest approach.
You mention that working with electrical systems is part of the installation. For a DIYer with some basic electrical experience, are there particular safety tips or common mistakes to watch out for during the wiring phase?
Absolutely, safety is key when working with any wiring. Always shut off power at the breaker before starting, and double-check with a voltage tester. Use the correct wire gauge, and make sure all connections are secure with proper wire nuts. Avoid over-tightening screws on terminals, and never work with wet hands or in damp conditions. If anything feels unclear, don’t hesitate to consult a licensed electrician.
The article mentions budgeting for the installation, but I didn’t see a ballpark estimate for overall costs or potential hidden expenses, like upgrading wiring or fixing ventilation issues. Can you give more detail on what to expect financially before starting this project?
For a typical DIY attic fan installation, you can expect to spend about $100–$400 for the fan itself. If you need a professional to upgrade wiring, that could add $150–$500 depending on complexity. Fixing ventilation issues or adding vents might cost another $50–$200. Unexpected expenses could come from repairing old or damaged attic structures or addressing insulation concerns. It’s wise to budget an extra 10–20% for surprises.
The guide talks about both gable-mounted and roof-mounted attic fans. My attic has limited access and no existing gable vents, so would adding a roof-mounted fan be possible without making major structural changes?
Yes, you can usually install a roof-mounted attic fan even if you don’t have gable vents or easy attic access. The installation typically involves cutting an opening in the roof between rafters and mounting the fan from above, so major structural changes are not required. However, you may need a roofer’s help to ensure the flashing is watertight and to minimize disruption to your roof.
For budgeting this project, do you have any ballpark estimates on the total cost of parts and materials for a standard roof-mounted fan installation, excluding labor? I want to make sure I’m planning realistically before I start.
For a standard roof-mounted attic fan, you can typically expect to spend between $100 and $350 on the fan itself, depending on the brand and features. Other materials like wiring, mounting hardware, a roof vent or flashing, and sealant might add another $30 to $80. So, budgeting around $130 to $430 for parts and materials (excluding labor) should give you a realistic starting point.
The article mentions different types of attic fans, like roof-mounted and gable-mounted. Are there particular climate or roof considerations that would make one type better than another for an older house in a humid area?
For an older home in a humid area, gable-mounted fans can be easier to install if your attic already has gable vents, which is common in older houses. Roof-mounted fans typically require cutting through the roof, which could complicate installation or create leak risks on aging roofing. Both types help with moisture control, but be sure your attic has sufficient intake vents for best results in humid climates.
When planning a DIY attic fan installation, what are the most common safety mistakes that first-timers overlook, especially when dealing with electrical wiring in tight attic spaces?
First-timers often forget to turn off the power at the breaker before handling any wiring, which poses a serious risk of electric shock. Another common mistake is not wearing proper safety gear, like gloves and a mask, especially in dusty, confined attic spaces. Improper use of ladders and tools in cramped areas can also lead to falls or injuries. Always double-check wiring connections and make sure to follow local electrical codes.
Could you explain the main differences in installation complexity and ongoing maintenance between solar-powered attic fans and traditional electric ones? I’m interested in which would make more sense for a business building with limited roof access.
Solar-powered attic fans are generally simpler to install because they don’t require running electrical wiring—just mounting the unit and its solar panel. Traditional electric fans need hardwiring, which can be challenging with limited roof access. For maintenance, solar fans are easier since there’s no electrical system to inspect, just occasional cleaning. In a business building with restricted access, solar fans usually make more sense due to easier installation and lower long-term upkeep.
If I plan to install the attic fan myself, how should I budget for unexpected expenses like extra wiring or vent modifications? I’m handy but have little experience with attic electrical work and want to avoid surprises mid-project.
Since you’re new to attic electrical work, it’s wise to build a buffer into your budget. Add at least 20% to the estimated cost of materials to cover surprises like extra wiring, connectors, or vent changes. Before starting, inspect your attic for existing wiring and vent placement to anticipate needs. Also, have basic electrical tools and safety gear on hand. If you encounter anything beyond your comfort zone, consider a small fund for professional assistance just in case.
I run a small business from home and am considering solar-powered attic fans to keep energy bills in check. Do you have any insights into how much extra installation complexity comes with the solar option compared to traditional electric fans?
Solar-powered attic fans are generally a bit simpler to install than traditional electric fans since they don’t require wiring into your home’s electrical system. You’ll just need to mount the fan and its solar panel, usually on the roof, and connect the included cables. This avoids hiring an electrician and reduces the risk of electrical hazards. However, you should plan for proper placement of the solar panel to maximize sun exposure, which might require additional roof work.
If my attic already has some ventilation through ridge and soffit vents, will adding a gable-mounted or roof-mounted attic fan create any issues with airflow or moisture, or could it actually make things less efficient?
If your attic already has ridge and soffit vents, adding a powered attic fan can disrupt the natural airflow and may even pull conditioned air from your home into the attic, making your cooling less efficient. It could also create negative pressure and contribute to moisture issues. Unless your attic has proven ventilation problems, it’s usually best to rely on passive venting alone.
The article mentions different types of attic fans like gable-mounted, roof-mounted, and solar-powered. Is there a specific type you would recommend for an older home with limited attic access and already high summer cooling bills?
For an older home with limited attic access, a solar-powered gable-mounted fan can be a solid choice. Gable-mounted fans are usually easier to install if you already have a gable vent, and the solar-powered option helps reduce cooling costs without increasing your energy bills. Just ensure your roof or wall has enough sunlight exposure for the solar panel to work efficiently.
In the section about solar-powered attic fans, you mention that they eliminate the need for electrical wiring. Do these models have any limitations in terms of airflow compared to traditional electric fans, especially on cloudy days or in regions with less sunlight?
Solar-powered attic fans can have some limitations compared to traditional electric models. Their airflow performance depends on the amount of sunlight they receive, so output may decrease on cloudy days or in areas with less sun. Some solar fans may not move as much air as high-powered electric fans, but they still provide good ventilation for most homes in sunny regions. If you live in a cloudy or shaded area, you might want to check the fan’s rated airflow (CFM) and consider a hybrid model or supplemental ventilation.
Can you explain more about the electrical requirements for installing a traditional attic fan versus a solar-powered one? I’m considering DIY but want to make sure I don’t run into any code issues or safety hazards.
For a traditional attic fan, you’ll typically need to connect it to your home’s electrical system, which involves running wiring and installing a dedicated circuit with a switch or thermostat. This work should comply with local electrical codes, and you may need a permit—if you’re not experienced, it’s safest to consult or hire a licensed electrician. Solar-powered attic fans, on the other hand, are usually self-contained with their own panels and wiring, so they don’t tie into your home’s electrical system and generally have fewer code concerns. Always follow the manufacturer’s instructions for either type.
For a parent on a tight budget, are there any big differences in upfront and long-term costs between installing a traditional electric attic fan and a solar-powered one?
A traditional electric attic fan usually has a lower upfront cost compared to a solar-powered fan. However, electric fans add to your monthly energy bill, while solar fans run for free using sunlight. Over time, the energy savings with solar can offset its higher initial price, especially if you plan to stay in your home for several years.
For a two-story home with limited attic space, would a roof-mounted attic fan be more effective than a gable-mounted one, or should I consider a whole-house fan instead? I want to make sure I pick the right type before I start planning.
For a two-story home with limited attic space, a roof-mounted attic fan is usually more effective than a gable-mounted one, since it can be installed wherever ventilation is needed most. If your goal is to cool the entire house, a whole-house fan is a different option—it draws cooler outside air in through windows and pushes hot air out via the attic, but it requires sufficient attic ventilation and space. Consider your cooling needs, attic size, and existing ventilation before deciding.
When considering a DIY attic fan installation for better energy efficiency, what kind of budget should I realistically expect, including the fan, wiring, and any permits or safety equipment? Does choosing a solar-powered fan change the overall cost much?
For a typical DIY attic fan installation, you can expect to spend between $150 and $400 for a standard electric fan, wiring, basic tools, and safety gear. If local regulations require permits, set aside an extra $20 to $100 for those. Choosing a solar-powered fan does raise costs, with most quality models ranging from $300 to $600, but this option can save on long-term energy bills. Overall, solar fans have a higher upfront cost but may pay off over time.
The article says attic fan installation isn’t a casual project and emphasizes safety and compliance. What are the most common mistakes DIYers make during installation that could lead to costly repairs or code violations?
Common mistakes during attic fan installation include improper wiring, which can create fire risks or violate electrical codes, and insufficient sealing around the fan, leading to air leaks and moisture problems. Many DIYers also neglect to use proper supports, making the fan unstable, or fail to check local permit requirements and regulations. Always turn off power before wiring and consult local building codes to avoid costly repairs or code violations.
The article mentions the importance of proper wiring and compliance for DIY attic fan installation. Are there specific safety certifications or permits needed before starting this kind of project in most US states?
Yes, many US states require you to follow the National Electrical Code (NEC) when wiring an attic fan. Often, a local permit is needed if you are adding new electrical wiring, and inspection may be required once work is complete. While there isn’t a universal certification, using UL-listed (Underwriters Laboratories) components is strongly recommended for safety. It’s a good idea to check with your city or county building department for the exact requirements before starting your project.
You mention both gable-mounted and roof-mounted attic fans. How do you determine which type is best for an older house with limited attic access and only a couple of small vents? Is one generally easier to install for a DIY project?
For an older house with limited attic access and just a few small vents, a gable-mounted attic fan is usually easier for a DIY project, especially if you already have a gable vent that can be used for installation. Roof-mounted fans often require cutting a new hole in the roof, which can be more complex and riskier for DIYers. A gable-mounted fan typically involves less structural work and can often be installed from the inside.
My house already has gable vents, but I’m interested in solar-powered attic fans to save on energy costs. Is it possible to combine these types, or is one better than the other for a moderately sized attic?
You can definitely combine gable vents with solar-powered attic fans. The fan will actively pull hot air out, while the gable vents allow fresh air to flow in, improving ventilation and efficiency. Just make sure the vents aren’t blocked, and that the total vent area meets the fan’s requirements. This combination often provides better performance than using either alone, especially for moderate-sized attics.
Is it really necessary to hire an electrician for the wiring part of a DIY attic fan installation, or are there safe ways for a homeowner with basic electrical skills to do it themselves and still meet code requirements?
If you have solid experience with basic home wiring and understand local electrical codes, you may be able to handle attic fan wiring yourself, especially if it’s a straightforward replacement. However, running new circuits or making any changes to your home’s electrical panel should be left to a licensed electrician for both safety and code compliance. Always turn off power at the breaker before starting, and consider getting your work inspected to ensure it meets local requirements.
If my attic has limited access and no existing vents, would a roof-mounted fan be my only realistic DIY option? Are there any special ventilation considerations I need to account for to make sure I don’t accidentally create moisture problems up there?
With limited attic access and no existing vents, a roof-mounted fan is often the most practical DIY solution. However, it’s important to add balanced intake vents, like soffit or gable vents, to ensure proper airflow. If there’s no intake, the fan could create negative pressure and pull conditioned air from your living space, or worse, draw in moisture. Make sure your ventilation plan allows air to flow in and out to prevent moisture buildup and related problems.
I’m curious how difficult the electrical work is for DIY attic fan installation if I’ve never worked with wiring before. Are there steps in your guide that you’d recommend leaving to a professional, or is it manageable for a beginner with basic tools?
Installing an attic fan involves connecting wiring to your home’s electrical system, which can be challenging for someone without experience. Steps like turning off circuit breakers, safely splicing wires, and ensuring proper grounding are critical for safety. If you haven’t worked with wiring before, it’s safer to have a licensed electrician handle the electrical connections, while you complete the mounting and ventilation steps yourself.