
Introduction: The Crucial Role of Electrical Grounding in Homes
Electrical grounding is the silent guardian of every modern home, quietly protecting occupants and property from electrical hazards. It’s a fundamental safety feature that often goes unnoticed—until something goes wrong. Proper grounding ensures that stray electrical current safely returns to the earth rather than causing shocks, appliance damage, or even fires. Whether you’re renovating, troubleshooting, or simply aiming to make your electrical system as safe as possible, understanding how to set up and maintain proper grounding is essential.
Many homeowners mistakenly assume grounding is a one-time installation task. In reality, grounding systems can degrade, connections may loosen, and local codes evolve. Staying proactive with setup and regular maintenance can mean the difference between a safe, code-compliant home and costly, hazardous electrical problems. In this comprehensive guide, we’ll walk you through the practical steps for setting up electrical grounding in your home, how to inspect and maintain it, and what to watch for to ensure lasting safety. Our goal is to empower you with actionable knowledge—whether you’re a DIY enthusiast or a homeowner overseeing a professional electrician’s work.
Understanding Electrical Grounding: What It Is and Why It Matters
What Is Electrical Grounding?
Electrical grounding creates a direct physical connection between your home’s electrical system and the earth. This connection provides a safe path for excess or stray electrical current to dissipate into the ground, minimizing the risk of electrical shock, fire, or equipment damage.
How Grounding Protects Your Home
- Shock Prevention: Redirects fault current away from people.
- Fire Protection: Reduces chances of arc faults and overheating.
- Appliance Safety: Prevents damage from voltage surges.
- Lightning Safety: Provides a path for lightning-induced surges to dissipate safely.
Key Components of a Home Grounding System
- Grounding Electrode: Usually a copper-clad rod or a metal water pipe buried in the earth.
- Grounding Electrode Conductor (GEC): The wire that connects your main service panel to the grounding electrode.
- Ground Bus Bar: Inside your electrical panel, this is where all ground wires converge.
- Bonding: The process of connecting all metallic parts (water pipes, gas lines, etc.) to ground, ensuring there are no stray voltages.
Step-by-Step: Setting Up a Reliable Home Grounding System
1. Assessing Existing Grounding Conditions
Before starting any installation, evaluate your current grounding system. Look for:
- Visible ground rods or wires exiting near the meter base or panel.
- Condition of ground connections—check for corrosion, loose clamps, or broken wires.
- Bonding of metal water pipes and other conductive systems.
If you’re uncertain, consult your local electrical code or a licensed electrician for an inspection.
2. Choosing the Right Grounding Electrode
- Ground Rods: 8-foot copper-clad steel rods are standard. In rocky soil, multiple rods or plate electrodes may be required.
- Metal Water Pipe: If your home uses metal water service lines, they can serve as a grounding electrode, but must meet code requirements (usually 10 feet in contact with earth).
- Ground Plates: Used where rods are impractical; must have adequate surface area in contact with soil.
Always check local code requirements, as some areas have specific rules on electrode type and quantity.
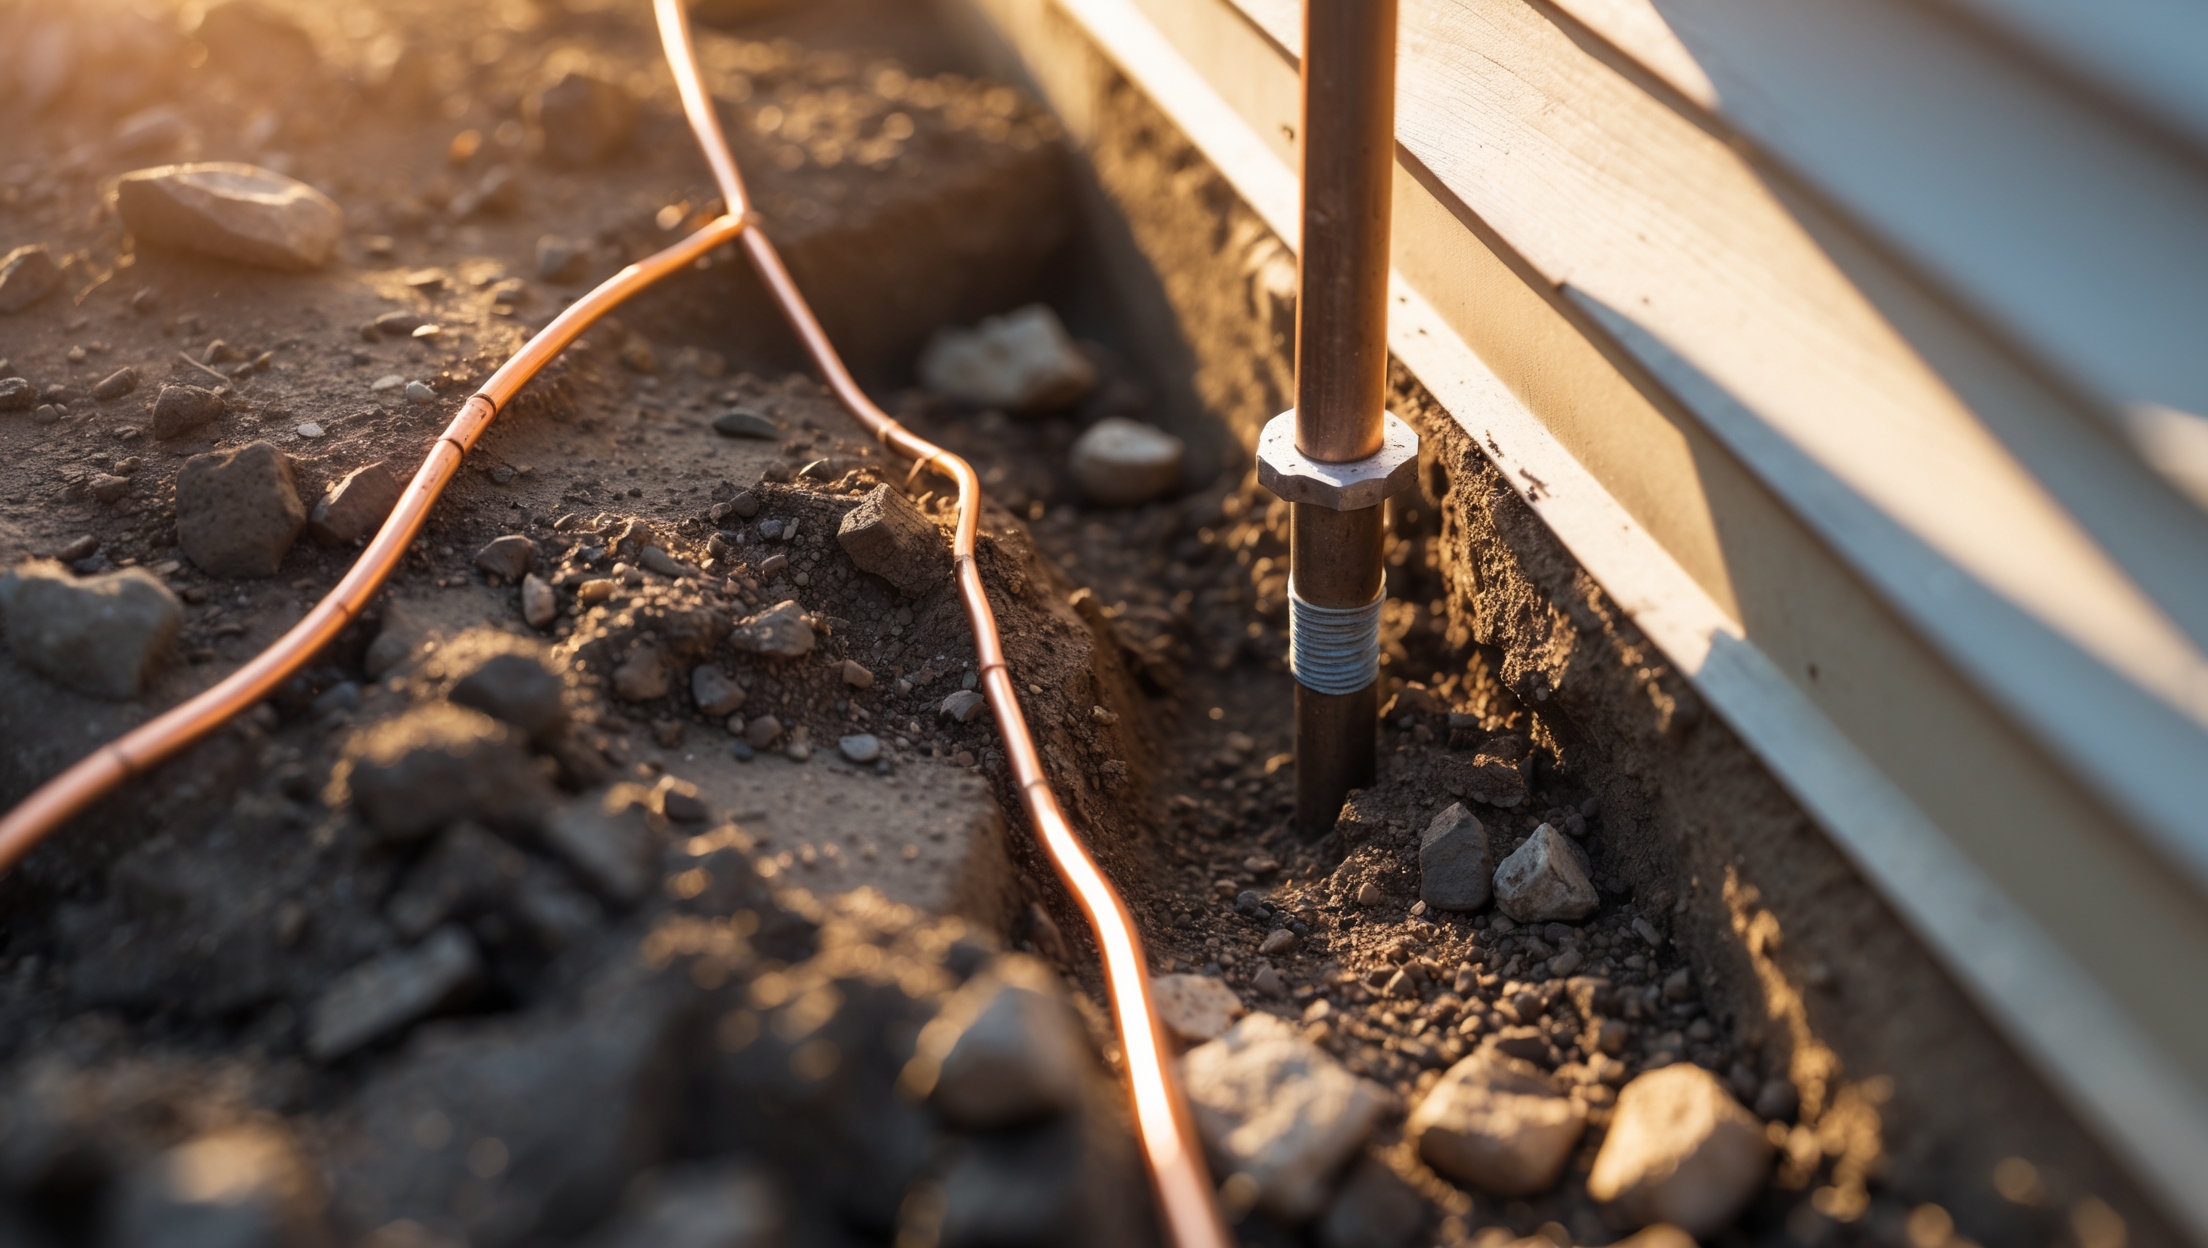
3. Installing a Ground Rod: Step-by-Step
- Locate the Installation Area: Choose a spot at least 2 feet from the foundation, away from paved surfaces.
- Drive the Ground Rod: Use a sledgehammer or rotary hammer to drive the rod 8 feet deep, with only a few inches exposed above grade.
- Attach the Grounding Electrode Conductor: Use a listed ground clamp to connect a continuous bare copper wire (usually #6 AWG for a single-family home) to the rod.
- Route the GEC to the Panel: Secure the wire along the foundation to the main service panel, avoiding sharp bends or kinks.
- Terminate at the Ground Bus Bar: Attach the GEC to the ground bus bar in your main panel using an approved connector.
4. Bonding Metal Water Pipes and Gas Lines
All accessible metal water pipes and gas lines (if present) should be bonded to the grounding system:
- Use approved clamps and #6 or #8 AWG copper wire.
- Bond within 5 feet of the point where the water pipe enters the home.
- Do not use gas pipes as the sole grounding means—bond only for safety.
5. Double-Checking Local Codes and Permits
Grounding requirements vary by jurisdiction and can change with code updates. Before beginning installation:
- Check with your local building department for specific rules and required permits.
- Document your work with photos and diagrams for future reference and inspection.
Maintenance Best Practices: Ensuring Your Grounding Stays Effective
Why Maintenance Matters
Even the best-installed grounding systems can degrade over time due to corrosion, physical damage, landscaping changes, or rod movement from soil shifts. Regular maintenance is essential for ongoing safety.
Homeowner Grounding Maintenance Checklist
- Visual Inspection: Annually check all visible ground rods, clamps, and wires for corrosion, looseness, or breakage.
- Test Ground Rod Resistance: Every few years, have a qualified electrician perform a ground resistance test (ideally below 25 ohms per NEC guidelines).
- Check Bonding: Verify that water pipes, gas lines, and other metallic services are still securely bonded.
- After Severe Weather: Inspect grounding after major storms, earthquakes, or landscaping work that may have disturbed the soil or rods.
- Panel Inspection: Ensure ground wires are securely attached to the ground bus bar and that the panel is free of rust or moisture.
Common Maintenance Issues and Solutions
- Corroded Clamps/Wires: Replace with new, code-approved materials.
- Loose Connections: Re-tighten or re-clamp as needed.
- Rod Exposure: If the rod is exposed too far above grade or has shifted, re-drive or replace as necessary.
- Disconnected Bonds: Reconnect and secure any loose or missing bonding wires.
Safety Tips and Compliance Essentials
Staying Safe During Installation and Maintenance
- Turn off power at the main breaker before working inside the panel.
- Use insulated tools and wear appropriate PPE (gloves, safety glasses).
- Never work on the grounding system during wet weather or when the soil is saturated.
- If you’re unsure, call a licensed electrician—grounding errors can have serious consequences.
Understanding Code Compliance
- Follow the National Electrical Code (NEC) as well as local amendments.
- Use only UL-listed clamps, rods, and conductors.
- Keep installation records for permit inspections and insurance claims.
When to Call a Professional
- If your home lacks visible grounding or has a complicated electrical history.
- When resistance tests exceed safe thresholds.
- If you’re unsure about code requirements or safety best practices.
Frequently Asked Questions About Home Grounding
Can I Install a Ground Rod Myself?
Yes, if local codes permit and you’re comfortable with safe electrical work. Be meticulous in following code requirements and always get permits if required.
How Do I Know If My Home Is Properly Grounded?
Look for a grounding electrode conductor exiting the panel, bonded water/gas pipes, and a visible ground rod. For certainty, hire an electrician to perform a resistance test.
What If I Have an Older Home?
Older homes may lack modern grounding or have obsolete systems (such as cold water-only grounding). Retrofitting may be needed to meet current codes and safety standards.
Is One Ground Rod Enough?
Often, yes—but if resistance to ground is too high, the NEC requires a second rod at least 6 feet away. Soil conditions and code updates can affect this requirement.
Does Grounding Prevent All Electrical Problems?
No, but it’s a crucial defense against shock and fire hazards. Combine grounding with GFCIs, AFCIs, surge protection, and regular inspections for comprehensive safety.
Conclusion: Keeping Your Home Safe with Proper Grounding
Electrical grounding works behind the scenes, but its impact on safety and system performance is anything but invisible. As building codes evolve and new technologies enter our homes, the importance of a robust, well-maintained grounding system only grows. Whether you’re installing new grounding electrodes, bonding services, or simply performing annual inspections, every step you take reinforces the protective shield that keeps your family and property safe.
Don’t think of grounding as a set-it-and-forget-it task. Soil conditions change, materials degrade, and what was once code-compliant may need updating. Routine maintenance, informed by the checklist in this guide, will help you catch small issues before they become big hazards. And remember: when in doubt, consult a qualified electrician who understands the nuances of local codes and best practices.
By investing time and attention in your home’s grounding system, you’re not just complying with regulations—you’re ensuring peace of mind, protecting your investment, and building a safer environment for years to come. Stay proactive, stay safe, and let your home’s electrical system work for you, not against you.
When setting up a proper grounding system during a renovation, are there important differences between grounding for older homes versus newer constructions that a DIYer should be aware of?
Yes, there are some key differences. Older homes often have outdated wiring and may use metal pipes or rods for grounding, which might not meet current safety codes. Newer constructions usually require grounding with copper rods and have dedicated grounding conductors. As a DIYer, always check local codes, and consider having a qualified electrician inspect any existing system before making changes or upgrades.
You mentioned that local electrical codes can evolve over time and that grounding systems might degrade or loosen. How often should a homeowner schedule professional inspections to make sure everything is still up to code and safe?
For most homes, it’s wise to schedule a professional electrical inspection every three to five years. However, if you live in an older house, have recently renovated, or notice issues like tripped breakers or flickering lights, it’s best to get an inspection sooner. Regular checks help ensure your grounding system stays safe and compliant with updated codes.
You mention that local codes can change over time when it comes to grounding. How often should homeowners have their grounding systems inspected to make sure they’re still up to code and safe?
It’s generally recommended to have your home’s grounding system inspected by a qualified electrician every 3 to 5 years, or whenever you have major electrical work done. If your area updates its codes frequently, you might want to check with your local building department about recommended intervals. Regular inspections help ensure both safety and compliance with current standards.
You mentioned that grounding systems can degrade and connections may loosen over time. Are there any warning signs homeowners should look out for that might indicate a problem with their grounding before doing a full inspection?
Yes, there are some warning signs that may suggest your grounding system needs attention. Watch for frequent tripped breakers, flickering lights, shocks when touching appliances, or unexplained appliance malfunctions. Also, look out for visible corrosion, loose wires, or damaged ground rods near your electrical panel. If you notice any of these, it’s a good idea to schedule a more thorough inspection.
The article mentions that proper grounding can protect against voltage surges from lightning. Are there particular types of surge protectors or grounding enhancements recommended for areas that experience frequent thunderstorms, or do standard home grounding setups usually suffice?
In areas with frequent thunderstorms, it’s wise to consider whole-house surge protectors in addition to a standard grounding setup. These devices are installed at your main electrical panel and provide extra protection against large surges from lightning. Enhanced grounding methods, like installing ground rods with lower resistance or extra rods, can also help. Consulting a licensed electrician for a tailored solution is recommended in high-risk regions.
When you mention that local codes evolve, does that mean older homes might need grounding upgrades to stay safe and compliant? If so, what are some of the first things I should check in a house that’s a few decades old?
Yes, as electrical codes get updated, older homes might not meet current grounding standards. In a house that’s several decades old, start by checking if it has a grounding conductor (copper wire) running from the main panel to a ground rod or water pipe. Also, inspect outlets for three prongs, as two-prong outlets suggest older, possibly ungrounded wiring. An electrician can perform a full assessment to identify necessary upgrades.