
Introduction: Why Home EV Charger Installation Demands Expert Planning
The rise of electric vehicles (EVs) has transformed how we think about personal transportation, energy use, and even real estate value. As more homeowners embrace EVs, installing a dedicated home charging station is quickly becoming a must-have feature. However, EV charger installation isn’t as simple as plugging in a new appliance. It involves careful planning, adherence to strict electrical codes, obtaining proper permits, and understanding the necessary upgrades for safety and efficiency. The process also carries budgetary considerations and opportunities for long-term savings. Whether you’re a DIY enthusiast or planning to hire a professional, approaching EV charger installation with a clear roadmap is essential to avoid costly missteps, ensure compliance, and future-proof your home’s electrical infrastructure. This guide provides a comprehensive walkthrough—covering compliance, cost breakdowns, permits, equipment selection, and step-by-step setup—to help you make informed decisions and achieve a safe, reliable, and efficient home EV charging solution.
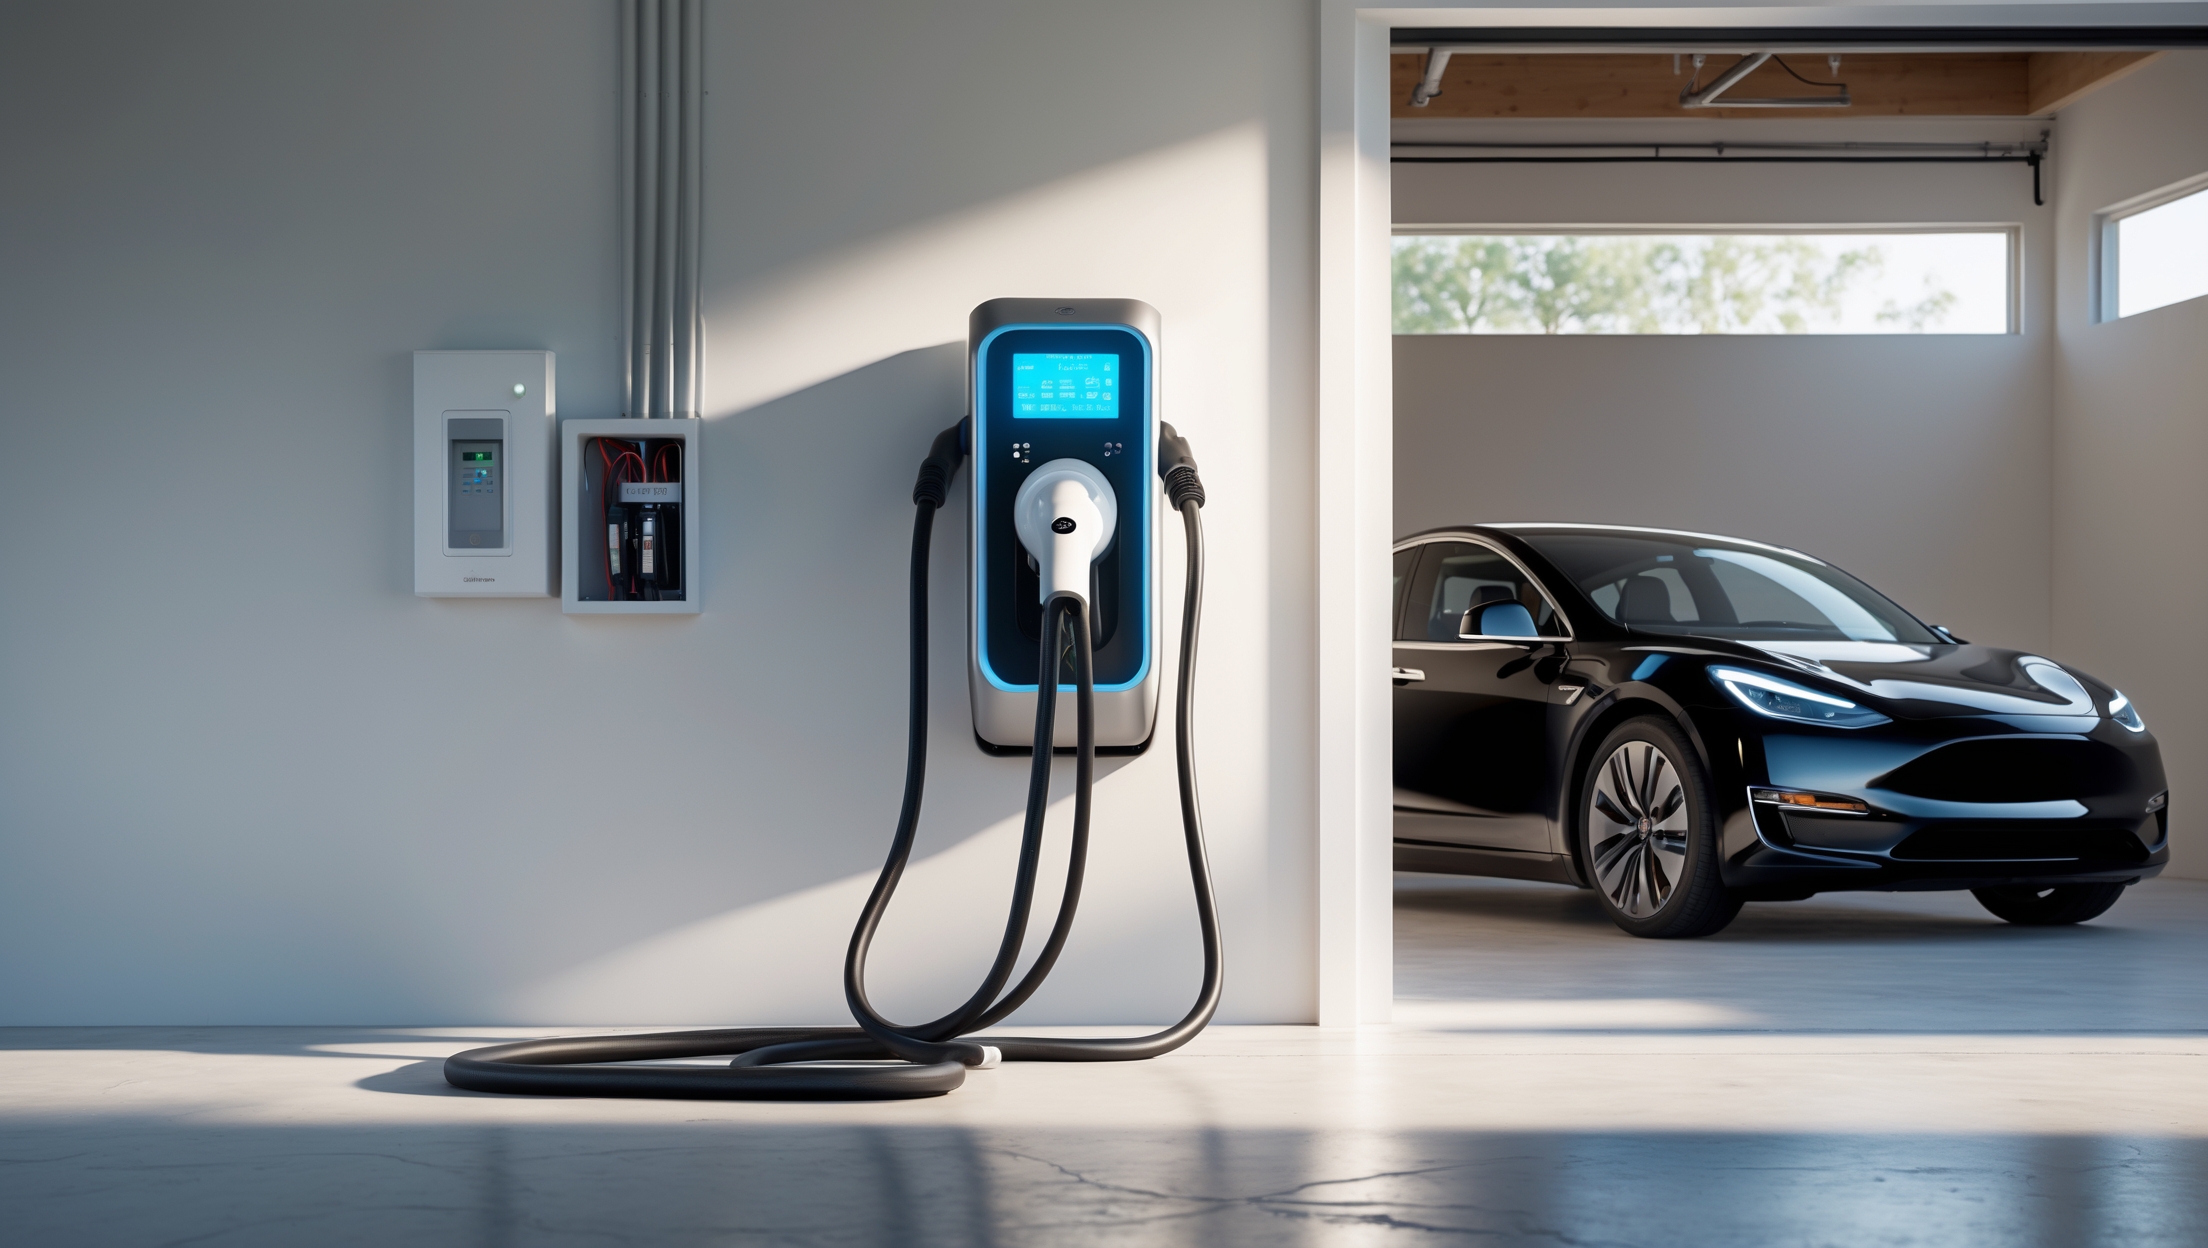
Understanding Home EV Charging: Types, Power Levels, and Suitability
Level 1 vs. Level 2 Charging
Before diving into installation specifics, it’s crucial to understand the two primary types of home EV charging:
- Level 1 Charging: Utilizes a standard 120V household outlet. Delivers slow charging (typically 3-5 miles of range per hour). Suitable for plug-in hybrids or low-mileage daily use.
- Level 2 Charging: Requires a 240V dedicated circuit. Delivers much faster charging (15-30+ miles of range per hour). Recommended for most EV owners, especially those with longer commutes or multiple vehicles.
Choosing the Right Charger for Your Needs
Assess your daily driving habits, vehicle battery size, and future EV plans. For most, a Level 2 charger strikes the best balance of speed and practicality. Consider whether you want a hardwired or plug-in model, Wi-Fi connectivity for energy monitoring, and whether your electrical panel can handle the extra load.
Compliance and Permit Essentials: Navigating Local Codes
Why Permits and Inspections Matter
EV chargers draw significant power, making them subject to local electrical codes and permitting requirements. Failing to obtain permits can result in fines, denied insurance claims, or unsafe installations that pose fire hazards. Inspections ensure the work meets safety standards and is up to code.
How to Obtain the Right Permits
- Contact your city or county building department before starting.
- Submit detailed plans for the charger location, electrical panel upgrades (if needed), and wiring routes.
- Pay permit fees (typically $50–$200, but can vary by region).
- Schedule inspections after installation to verify code compliance before use.
National Electric Code (NEC) Requirements
The NEC outlines minimum safety standards for EV charger installations, including:
- Dedicated circuit sizing based on charger amperage (usually 40–60A for Level 2).
- Proper wire gauge and insulation.
- Ground-fault circuit interrupter (GFCI) protection.
- Weatherproofing for outdoor installations.
- Correct placement to avoid trip hazards and ensure ventilation.
Cost Breakdown: Budgeting for Your Home EV Charger Project
Major Cost Components
- Charger Unit: $400–$800 for most quality Level 2 chargers.
- Electrical Work: $300–$1,200 for straightforward installs; $1,500+ if panel upgrades or long wire runs are needed.
- Permit Fees: $50–$200 (varies by municipality).
- Upgrades: $1,000–$3,000 if you need a new subpanel or service increase.
- Optional Features: Smart chargers, load management, or solar integration may add $200–$1,000.
Hidden and Long-Term Costs
- Drywall, patching, or painting if walls are opened for wiring.
- Routine maintenance and eventual replacement (chargers last 7–10 years on average).
- Potential increases in homeowner insurance premiums—notify your provider.
Rebates and Incentives
Many utilities and government agencies offer rebates or tax credits for home EV charger installation. Check the U.S. Department of Energy’s Alternative Fuels Data Center or your local utility for current programs. These can offset costs by $200–$1,000 or more.
Electrical System Assessment: Can Your Panel Handle an EV Charger?
Evaluating Your Existing Electrical Panel
Most Level 2 chargers require a dedicated 240V circuit at 40A or 50A, which means your panel must have:
- Enough available amperage after accounting for existing household loads.
- Physical space for a new double-pole circuit breaker.
- Modern, up-to-date wiring and grounding.
If your panel is 100A or older, an upgrade may be necessary. A licensed electrician can perform a load calculation to determine feasibility.
Subpanels and Service Upgrades
In older homes, you may need to install a subpanel in the garage or increase your main service from 100A to 200A. These upgrades add safety and allow for future expansion (e.g., a second EV, heat pump, or workshop tools).
Step-by-Step Home EV Charger Installation Plan
1. Site Selection and Preparation
- Choose a location near where you park your EV, minimizing cable length and tripping hazards.
- For outdoor installations, select a weatherproof model and ensure adequate lighting and drainage.
- Mark the mounting spot on a finished wall or a secure post.
2. Electrical Planning and Load Calculation
- Work with a licensed electrician to perform a load calculation, ensuring your panel can safely handle the new circuit.
- Determine circuit breaker size and wire gauge (typically 8 AWG or 6 AWG copper for 40–50A circuits).
- Plan the wire routing—surface-mounted conduit or inside-wall runs.
3. Permit Application and Utility Notification
- Submit plans and obtain required permits.
- Some utilities require notification or approval, especially if you qualify for time-of-use rates or smart charging incentives.
4. Electrical Rough-In
- Shut off power at the main breaker.
- Install the new double-pole breaker and run wire from the panel to the charger location.
- Use appropriate conduit, clamps, and weatherproof boxes as required by code.
5. Charger Mounting and Final Electrical Connections
- Mount the charger securely according to manufacturer instructions.
- Connect wires: hot, neutral (if required), and ground.
- Install GFCI protection if not built into the charger.
- Label the breaker clearly in your panel directory.
6. Inspection and First Test
- Schedule the required inspection with your local authority.
- Do not use the charger until it passes inspection.
- Once approved, test the charger with your EV and verify all functions (charging speed, Wi-Fi, timers).
Best Practices for Safe, Efficient EV Charging at Home
Routine Maintenance
- Inspect the charging cable weekly for wear, cracks, or damage.
- Keep the charger and plug clean and free of debris.
- Check for secure mounting and tight electrical connections annually.
Safety Tips
- Never use extension cords with an EV charger.
- Ensure outdoor installations use weatherproof equipment and GFCI outlets.
- Update your insurance policy to reflect the new installation.
- Test GFCI protection monthly.
Energy Efficiency Strategies
- Use the charger’s scheduling feature to charge during off-peak hours, saving money and reducing grid strain.
- If you have solar panels, coordinate charging times for maximum self-consumption.
- Monitor energy use via the charger’s app or a whole-home energy monitor.
Future-Proofing: Planning for Additional EVs and Smart Home Integration
Scalability Considerations
- Install conduit or extra wire capacity during the initial project to make future upgrades easier.
- Consider a higher-amperage circuit or smart load-sharing charger if you anticipate a second EV.
Integrating with Smart Home and Energy Management Systems
- Choose a charger compatible with your smart home ecosystem (Alexa, Google Home, Apple HomeKit).
- Enable remote monitoring and notifications for charging status, energy use, and fault alerts.
- Explore utility demand response programs and time-of-use rate integration for more savings.
Conclusion: Invest in Safe, Code-Compliant Home EV Charging for Long-Term Value
Installing a home EV charger is more than a convenience—it’s a forward-thinking upgrade that increases property value, reduces reliance on public charging, and supports a greener lifestyle. However, the process demands careful planning, from understanding your electrical system’s limitations to securing permits and ensuring code compliance. A well-executed installation protects your home, family, and investment, while also optimizing charging speed and convenience. By following the steps outlined in this guide—assessing your needs, budgeting accurately, navigating permits, and working with qualified electricians—you can enjoy the full benefits of home charging with peace of mind. Don’t overlook future-proofing; as EV adoption grows, your electrical infrastructure should be ready to support additional vehicles and emerging smart technologies. In the long run, investing in safe, compliant, and efficient home EV charging pays dividends in convenience, cost savings, and sustainability. Take the time to plan your installation carefully, leverage available incentives, and always prioritize safety and code compliance for a truly worry-free EV ownership experience.
How do I determine if my current electrical panel can handle adding a Level 2 charger, or will I likely need an upgrade? The article mentions electrical infrastructure, but I’m not sure what signs to look for in my own home.
To find out if your panel can support a Level 2 charger, check your main panel’s amperage rating (usually marked as 100A, 150A, or 200A inside the panel door). Level 2 chargers typically need a dedicated 40-50A circuit. If your panel is nearly full or close to its capacity, an upgrade might be necessary. It’s safest to have a licensed electrician evaluate your panel and determine available capacity before proceeding.
If I mostly drive under 30 miles a day, would sticking with Level 1 charging make sense, or are there long-term efficiency or cost savings that justify investing in a Level 2 setup right away?
If you typically drive under 30 miles a day, Level 1 charging can be sufficient since it usually adds about 4–5 miles of range per hour plugged in. However, Level 2 chargers are faster and can be more convenient if your driving needs change or you want quicker charging. They may also be more energy efficient and could add value to your property. For now, Level 1 should meet your needs, but consider Level 2 if you expect your usage to increase or want future flexibility.
You mention permit requirements for installing a home EV charger. How involved is this process for a typical homeowner, and are there common delays or complications when dealing with local permitting for a Level 2 setup?
For most homeowners, obtaining a permit for a Level 2 home EV charger is a straightforward process handled through your local building or electrical permitting office. The main steps involve submitting an application, sometimes including electrical plans, and possibly scheduling an inspection after installation. Delays can occur if paperwork is incomplete, local offices are busy, or your home’s electrical panel needs upgrades. Checking requirements with your city or county ahead of time helps avoid most complications.
I’m curious about the budget side—are there any hidden costs during a typical home EV charger installation, like unexpected wiring or trenching expenses, that homeowners should plan for beyond the basic charger and labor?
Yes, there can be hidden costs during a home EV charger installation. Homeowners sometimes face extra expenses if their electrical panel needs upgrading or if new wiring is required to reach the desired charger location. Trenching is another possible cost if the charger is installed far from the main panel, such as in a detached garage. It’s wise to have an electrician assess your setup in advance to get a realistic estimate.
The article talks about permits being necessary for installation. Can you explain what the permitting process actually looks like and if it adds significant time or cost to getting a charger installed at home?
The permitting process usually involves submitting an application to your local building or electrical authority, often with details about the charger and installation plans. An inspector may visit your home before or after installation to ensure everything is up to code. This process can add anywhere from a few days to a few weeks, depending on your local office. Permit fees vary, but they’re typically moderate—anywhere from $50 to $300. Overall, permits add some time and cost, but they’re important for safety and required by most municipalities.
The article mentions that Level 2 chargers require a 240V dedicated circuit. Are there certain homes or neighborhoods where installing this type of circuit is especially challenging or costly? It would be helpful to know any common obstacles to watch for during planning.
Yes, installing a 240V dedicated circuit for a Level 2 charger can be more challenging in older homes, homes with outdated electrical panels, or neighborhoods with limited electrical capacity. Common obstacles include lack of space in the main panel for a new breaker, insufficient overall service capacity, or outdated wiring that doesn’t meet current safety codes. In some cases, upgrading the panel or even the service connection from the utility may be required, which can increase both the complexity and cost of installation.